
Creative Drink Station Ideas for Any Party
Every host knows the phenomenon well: no matter how much effort you put into the living room arrangement, everyone eventually crowds into the kitchen. This usually creates a bottleneck right in front of the refrigerator or the sink. As a designer, I solve this problem by creating a dedicated destination for drinks away from the cooking zone.
A well-styled drink station does more than just serve beverages; it acts as a magnetic anchor that pulls guests through your space. It encourages flow, prevents congestion, and allows you to showcase a bit of personality without redesigning a whole room. For visual inspiration on how to set this up, check out the Picture Gallery at the end of the blog post.
Whether you are hosting a casual backyard barbecue or an elegant holiday soirée, the mechanics of a good bar area remain the same. It requires a balance of traffic management, functional measurements, and aesthetic layering. Here is how to build a station that works as good as it looks.
1. Location and Traffic Flow Strategy
The most common mistake I see in residential party planning is placing the drink station in a dead end. If you place the bar in a corner, guests will walk in, get a drink, turn around, and block the person behind them. This creates immediate congestion.
The Pass-Through Rule
Ideally, you want your drink station to be accessible from multiple angles, or at least situated along a natural path. In interior design, we look for “circulation paths” of at least 36 to 48 inches wide. If you are setting up a bar on a sideboard, ensure there are at least 4 feet of clearance behind where the guest stands so others can walk past.
De-Centralization
If you have more than 20 guests, I always recommend splitting the station. Place alcoholic beverages and intricate mixers in one area (like the dining room) and a “hydrating station” with water, sodas, and ice in another (like the living room or patio). This disperses the crowd and prevents the non-drinkers from waiting in line behind someone mixing a complex cocktail.
Landscape Considerations
For outdoor parties, look for level ground. Never place a drink station on a slope, even a mild one, as condensation makes glass bottles slide. If you are setting up on a lawn, use a solid table with wide legs; thin metal legs can sink into soft grass, destabilizing the whole surface.
2. Selecting the Right Surface and Height
You do not need a dedicated built-in wet bar to have a professional setup. However, the furniture piece you choose must meet specific ergonomic standards. The comfort of your guests depends heavily on the height of the surface.
Standard Heights
- Bar Height (40–42 inches): This is ideal for standing guests. It allows them to mix a drink without hunching over. If you are renting high-top tables, this is the category you want.
- Counter Height (36 inches): This is the standard height of a kitchen island. It works perfectly for self-serve stations.
- Table Height (28–30 inches): This is standard dining table height. While usable, it is technically too low for a standing bar. If you must use a dining table or low console, use risers, crates, or sturdy boxes under the tablecloth to elevate the back row of bottles.
Surface Protection
As a designer, I cannot stress this enough: alcohol and citrus destroy natural finishes. Lemon juice creates an “etch” (a dull spot) on marble instantly. Condensation leaves white rings on waxed wood and can lift the veneer on cheaper furniture.
Always use a barrier. Large trays are my go-to solution because they frame the zone and catch spills. If you are using a wood heirloom piece, cover the top with a custom-cut piece of glass or a high-quality, water-resistant table runner with a felt underlay.
3. The Mechanics of the Setup: The Assembly Line
Professional bartenders use a system called “mise en place” (everything in its place). Your home drink station should follow the logical order of building a drink. If you scramble the order, guests will cross over each other, knocking things over.
Left-to-Right Flow (or Right-to-Left)
Arrange the items in this specific sequence:
- Glassware: This is the starting point.
- Ice: The bucket goes next.
- Spirits and Base Mixers: The heavy pours.
- Carbonation/Toppers: Club soda, tonic, prosecco.
- Garnishes: Lemons, limes, herbs.
- Tools and Napkins: Stirrers and straws at the very end.
Grouping by Category
Keep the dark spirits (bourbon, whiskey) together and the clear spirits (vodka, gin, tequila) together. This visual grouping helps guests scan their options quickly. Speed is the key to a relaxed host; you want guests to help themselves efficiently so you are not stuck playing bartender all night.
4. Lighting and Vertical Styling
Lighting is the most under-utilized tool in drink station design. If guests cannot see the labels, they won’t drink the expensive wine you bought. Furthermore, a dark corner feels uninviting.
Task Lighting
You need specific light directed at the table surface. Since you often cannot rely on a hardwired ceiling fixture in a makeshift bar area, rechargeable portable lamps are a lifesaver. I use small, battery-operated LED table lamps (often called “mushroom lamps”) placed on the bar itself.
Ambiance Rules
Aim for a warm color temperature, ideally between 2400K and 2700K. Anything cooler (3000K+) will look like a hospital or a convenience store. If you are outdoors, string lights overhead provide general glow, but you still need a lantern or candle on the table for visibility.
Using the Vertical Plane
A flat table full of bottles looks cluttered. You need height variation to make it look styled. Place a large floral arrangement or a tall branch cutting on one side of the station to anchor the vignette. Just ensure the arrangement is not so wide that it creates a barrier to the bottles.
5. Creative Theme Ideas and Vessels
Once the logistics are handled, you can have fun with the aesthetics. The vessel you use for cooling drinks often sets the tone for the entire party. Move beyond the red plastic cooler.
The Garden Party Trough
For outdoor landscape integration, I love using clean, galvanized potting benches as bars. For coolers, use large terracotta planters (seal the drain hole with a rubber stopper or waterproof putty). The clay insulates the ice surprisingly well, and it looks beautiful nestled in the garden.
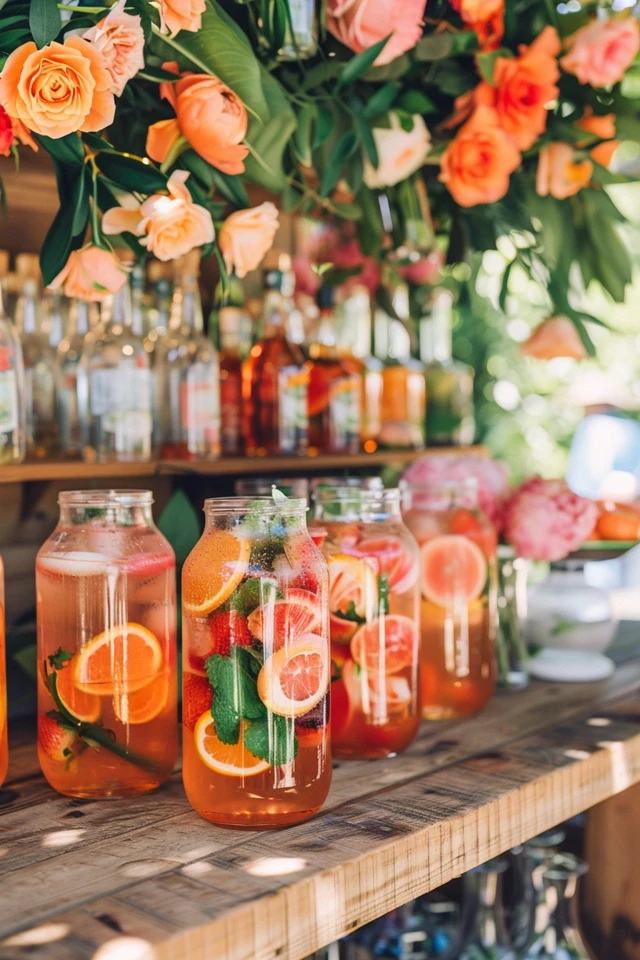
The Batched Cocktail Dispenser
For large groups, pre-batched cocktails are a survival tactic. Use clear glass dispensers with high-quality spigots. Elevate these dispensers on cake stands. This is not just for looks; you need clearance for the glass to fit under the spigot without tilting it.
The Canoe or Wheelbarrow
If you have a rustic setting, cleaning out a wheelbarrow or a vintage canoe and filling it with ice is a classic move. However, ensure it is water-tight first. If not, line it with heavy-duty landscaping plastic, trimmed neatly at the edges so it is invisible.
Designer’s Note: The Reality Check
Here is a lesson I learned the hard way early in my career. I once set up a beautiful champagne station on an antique sideboard for a client. I used a silver champagne bucket filled with ice.
What I forgot was “sweating.” As the ice melted, the silver bucket became freezing cold, pulling moisture from the humid air. The condensation dripped down the sides of the bucket, pooled at the bottom, and overflowed the small coaster I had used.
By the end of the night, there was a significant water ring on the French polished wood. Now, I always place ice buckets inside a secondary, lipped tray or on top of a thick, folded linen napkin that gets changed halfway through the night. Function must always protect the asset.
Common Mistakes and Fixes
Mistake: The Trash Oversight
Guests will finish their drink and stand there awkwardly holding a sticky napkin or an empty can. If they don’t see a trash can, they will leave waste on your furniture.
The Fix: Place a dedicated, visible trash bin and a recycling bin immediately next to the bar. It doesn’t have to be ugly; use a wicker basket or a ceramic cylinder.
Mistake: Running Out of Ice
Nothing kills a party faster than warm cocktails. Home freezers cannot keep up with a party of 10 or more.
The Fix: Buy bags of ice. The general rule of thumb is 1 to 1.5 pounds of ice per guest. If you have 20 people, buy 30 pounds of ice. Keep the backup bags in a cooler, not the freezer, for easier access.
Mistake: Wind Chaos
Outdoors, a slight breeze will blow paper napkins into your landscaping or pool.
The Fix: Use a weighted napkin holder, or place a heavy decorative stone on the stack of napkins. Avoid paper plates if it is windy; they become frisbees.
What I’d Do in a Real Project: The Mini Checklist
If I were styling a drink station for a client’s home today, this is the exact mental checklist I would run through to ensure success:
- Rug Check: Is the station on a rug? If so, I tape down the corners. People carrying drinks look at their cups, not their feet. Tripping hazards are a major liability.
- The “Sniff” Test: I ensure no scented candles are near the drink station. The smell of vanilla or lavender interferes with the taste of wine and whiskey. Unscented votives only.
- Glassware Count: I estimate 3 glasses per person for the night. Guests constantly set drinks down and lose them. I mix and match rentals with the homeowner’s collection for an eclectic look.
- Bottle Pre-Opening: I uncork all wine and break the seals on all liquor bottles before guests arrive. Trying to peel off stubborn plastic wrap while a guest waits is stressful.
- The “Drip Zone”: I place a small, dark-colored hand towel tucked discreetly behind the ice bucket for quick wipe-ups of spills before they become sticky messes.
Frequently Asked Questions
How much space do I need for a drink station?
A standard 4-foot to 6-foot table is sufficient for a full bar. If you are tight on space, use a round 36-inch high-top table. It has a smaller footprint but still accommodates an ice bucket, glasses, and a few bottles.
Can I put the drink station in the entryway?
Yes, this is actually a fantastic designer trick. Greeting guests with a drink immediately upon arrival (a “welcome drink”) sets a hospitable tone and prevents them from rushing straight to the kitchen. Just ensure the entry is wide enough so people don’t bottleneck at the front door.
How do I style a bar cart that looks cluttered?
Edit, edit, edit. A bar cart should not hold your entire liquor inventory. Display only the bottles being used for the party. Store the backstock in a cabinet. Use a tray on the bottom shelf to Corral small items and keep the top shelf for active mixing space.
Conclusion
Creating a creative drink station is about empathy for your guest’s experience. It is about anticipating their needs—a cold glass, an easy flow, a visible trash can—and meeting them with style.
By moving the drinks away from the kitchen and treating the station as a distinct design moment, you change the dynamic of your gathering. You encourage movement, protect your home’s surfaces, and create a focal point that sparks conversation. With the right height, lighting, and logistical planning, your drink station will serve you just as well as it serves your guests.
Picture Gallery


