
Creative Ideas for Painting Ceramics Revealed
There is nothing quite like the feeling of placing a custom decor piece on a shelf and knowing it fits the space perfectly because you made it that way. In my years designing interiors, I have frequently encountered clients who have the perfect architectural “bones” in their home but lack the budget for high-end artisan accessories. One of my favorite solutions is sourcing affordable ceramic shapes—whether from thrift stores or big-box retailers—and completely transforming them with paint.
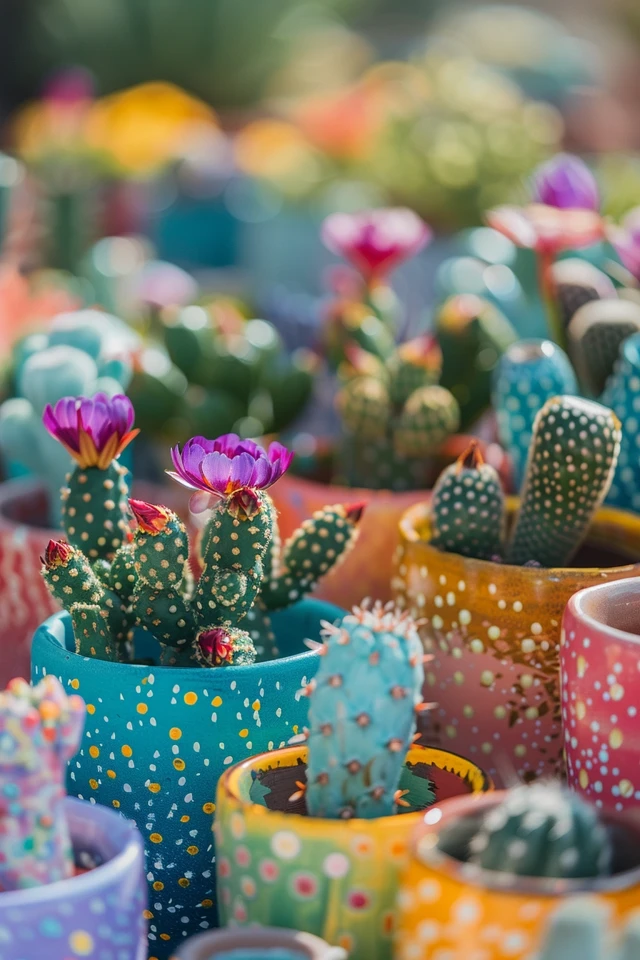
This approach allows you to control the color palette, texture, and finish without spending hundreds of dollars on a single designer vase. For those looking for visual inspiration, please note that a curated Picture Gallery is available at the end of this blog post to spark your creativity. However, simply slapping a coat of acrylic on a glazed vase is a recipe for disaster; it will peel, chip, and look cheap within weeks.
To achieve a look that rivals high-end showrooms, you must apply the same principles we use in renovation: proper surface preparation, layering textures, and sealing for longevity. This guide will walk you through professional techniques for painting ceramics that look intentional, expensive, and cohesive with your home’s design.
Preparation: The Foundation of Professional Results
The biggest mistake I see DIYers make is skipping the prep work. Ceramics, especially those that are already glazed, provide a slippery surface that paint hates adhering to. If you want your finish to last, you have to create “tooth” for the paint to grab onto.
Step 1: Deep Cleaning
Thrifted ceramics often have years of dust, oils, or wax residue. Wash the piece thoroughly with warm water and TSP (Trisodium Phosphate) or a strong degreaser. Standard dish soap often contains oils that can interfere with paint adhesion, so a heavy-duty cleaner is safer.
Step 2: Sanding the Glaze
You do not need to remove the glaze entirely, but you must scuff it. Use 100 to 150-grit sandpaper. You are looking to take the shine off the object until it has a dull, matte appearance. This mechanical bond is crucial for durability.
Step 3: The Right Primer
Do not use standard wall primer here. You need a bonding primer specifically designed for difficult surfaces. I recommend an oil-based bonding primer or a high-adhesion shellac-based spray. Apply thin coats; two light mists are always better than one heavy drip.
Designer’s Note: Patience Pays Off
I learned this the hard way during a rushed install for a show house. I painted a lamp base without letting the primer cure fully. As soon as I set the shade on top, the paint shifted and wrinkled. Read the can. If it says 24 hours to cure, give it 24 hours. The chemical bond needs time to harden before you add layers of color.
Achieving Texture: The “Faux Stone” and Terracotta Look
One of the most requested looks in my projects recently is the organic, earthy aesthetic of aged pottery. Real vintage terracotta or limestone vessels can cost a fortune. You can replicate this texture using a simple pantry staple: baking soda.
The Ratio
Mix your water-based acrylic paint with baking soda. Start with a ratio of 1 cup of paint to 1 tablespoon of baking soda. If you want a chunkier, more volcanic texture, increase the baking soda until the consistency resembles fluffy frosting.
Application Technique
Do not use a standard roller. Use a bristle brush or a chip brush. Apply the paint in cross-hatch motions (X-shapes) rather than long, smooth strokes. This builds dimension and mimics the irregularity of hand-thrown clay.
Layering for Depth
Real stone isn’t one flat color. To make it look authentic:
- Apply your base coat (e.g., a warm beige) and let it dry.
- Mix a second batch of paint that is two shades darker or lighter.
- “Dry brush” this second color over the high points of the texture. To dry brush, dip your brush, wipe almost all the paint off on a paper towel, and lightly drag it over the surface.
Common Mistakes + Fixes
Mistake: The baking soda mixture clumps up and falls off after drying.
Fix: You added too much baking soda, making the binder (the paint) too weak. Seal the piece with a spray matte fixative to lock the texture in place, or mix a small amount of drywall joint compound into the paint for a sturdier texture.
Modern Minimalism: Geometric and Matte Finishes
Not every home suits the rustic, textured look. For modern, mid-century, or Scandinavian interiors, a smooth, ultra-matte finish is often more appropriate. This style relies on clean lines and perfect color saturation.
Choosing the Paint
For a velvety, dead-flat finish, I prefer using chalk-style paints or mineral paints. These are self-leveling, meaning brush strokes disappear as they dry. Alternatively, high-quality spray paint in a “flat” or “matte” sheen can provide a factory-like finish.
Creating Crisp Lines
If you are doing a two-tone design or geometric shapes:
- Paint the base color and let it cure for at least 48 hours.
- Use automotive detail tape or high-quality painter’s tape (pressed down firmly with a credit card) to mask off your design.
- Pro Tip: Paint a thin layer of the base color over the tape edge first. This seals the tape and prevents the new color from bleeding underneath.
- Apply your accent color.
- Peel the tape while the paint is still slightly tacky to avoid pulling up dried chips.
Scale and Proportion
When blocking out color, follow the Rule of Thirds. Avoid splitting a vase exactly in half visually. Instead, paint the bottom third a heavy, grounding color (like charcoal or navy) and the top two-thirds a lighter tone. This anchors the object and feels more balanced to the human eye.
Styling Considerations: Integrating Ceramics into Your Design
A beautifully painted vase is useless if it doesn’t work within the context of the room. As a designer, I don’t just look at the object; I look at where it lives.
Color Coordination
When choosing paint colors, look at the fixed elements in your room. Pull a secondary color from your area rug or a tone from your curtains.
- Monochromatic: Paint three vases in varying shades of the same color (e.g., sage, olive, and forest green) for a calming, sophisticated look.
- Contrast: If your room is very neutral (whites and creams), paint a ceramic lamp base in a deep oxblood or black to act as visual punctuation.
Grouping Rules
Never display a single small ceramic item alone; it will look like clutter.
- The Rule of Three: Group items in odd numbers (3, 5, or 7).
- Height Variation: Ensure your painted ceramics vary in height. If you have three vases of the same size, place one on a stack of books to create a visual triangle.
- Texture Contrast: Pair your new “faux stone” textured vase next to a sleek glass object or a metallic frame. The opposition of textures makes both look better.
What I’d Do in a Real Project
If I were styling a coffee table for a family with young kids:
- I would source a heavy, wide-bottomed ceramic bowl (harder to knock over).
- I would paint it a dark, matte charcoal to hide fingerprints.
- I would seal it with a heavy-duty polycrylic spray to resist scratches.
- I would fill it with something lightweight, like moss spheres or wooden beads, rather than water and flowers, to avoid spills.
Durability and Sealing: Protecting Your Work
Ceramics painted with acrylics or latex are susceptible to scratching and moisture damage. If you plan to use the item, not just look at it, sealing is mandatory.
decorative vs. Functional
If you paint a vase, do not paint the inside. Paint contains chemicals that may leech into water and kill fresh flowers. Keep the paint on the exterior. If the vase was not originally waterproof, place a smaller glass vessel inside it to hold the water.
Selecting a Topcoat
- Polycrylic (Water-based): Best for light colors. It dries crystal clear and won’t yellow over time. Use a satin finish for a soft sheen or matte to keep it natural.
- Polyurethane (Oil-based): Extremely durable but has a slight amber tint. Only use this on dark colors where yellowing won’t show.
- Spray vs. Brush-on: For textured “stone” looks, use a spray sealer to avoid flattening your texture. For smooth geometric designs, a wipe-on poly can provide a flawless hand-rubbed look.
Designer’s Note: The dusting Reality
Textured paints (like the baking soda hack) are dust magnets. In a high-traffic home, I often recommend a satin finish over a rough texture. It allows you to wipe the piece down with a damp cloth without snagging the fibers of the cloth on the rough paint.
Final Checklist: The Path to Perfection
Before you start your project, run through this quick checklist to ensure you have covered all bases.
- Assessment: Is the ceramic piece cracked? Paint won’t fix structural structural damage.
- Cleaning: Have you degreased the item with TSP or strong soap?
- Sanding: Did you scuff the glaze until it looks dull?
- Priming: Do you have a bonding primer suitable for glass/tile/glossy surfaces?
- Paint Selection: Is your paint compatible with your primer? (Water-based over oil-based primer is usually fine; oil over water is risky).
- Tools: Do you have the right brush for the texture you want? (Bristle for texture, foam/soft synthetic for smooth).
- Environment: Is your workspace ventilated but free of blowing dust?
- Patience: Have you allotted 24-48 hours for drying times between major steps?
Frequently Asked Questions
Can I eat off plates I have painted?
No. Most DIY paints and sealers are not food-safe. Even “non-toxic” paints are not certified for direct food contact. Paint the undersides of clear glass plates or restrict painting to chargers and decorative bowls that will not hold food directly.
Can I put painted ceramics in the dishwasher?
Absolutely not. The heat and water pressure will strip the paint, and the paint chips can clog your dishwasher’s filter. Hand wipe only with a soft, damp cloth.
My paint is peeling off immediately. What happened?
This is almost always a cleaning or sanding issue. If any wax or oil remained on the piece, the primer sat on top of the dirt rather than the ceramic. You will need to strip the paint, clean it again, and restart.
Can I paint ceramic floor tiles using these methods?
No. The methods described here are for decor objects (vases, lamps, bowls). Floor tiles require specific epoxy paints and strict preparation protocols to withstand foot traffic. Do not use craft acrylics on floors.
How do I paint a lamp without ruining the electrical parts?
Tape is your best friend. Use painter’s tape to completely wrap the socket, the cord, and the harp saddle. Ideally, if you are handy, disassemble the lamp and paint the body separately. If not, tape carefully and use a plastic bag to cover the cord completely.
Conclusion
Painting ceramics is one of the most accessible ways to bring high-design concepts into your home without the designer price tag. It allows you to experiment with trends—like the current obsession with organic, earthy textures—without committing to expensive artisan pieces that might go out of style in a few years.
By focusing on the correct preparation and understanding the visual weight of the objects you are creating, you can curate shelves and tables that look professionally styled. Remember that in interior design, the success of a project often lies in the invisible steps: the sanding, the priming, and the sealing.
Take your time with the process. Treat your thrifted finds with the same care you would a high-end purchase, and the result will be a bespoke collection that adds genuine character and warmth to your living space.
Picture Gallery


