
Creative Inside Chicken Coop Ideas & Tips
Designing a chicken coop is much like designing a tiny house or a functional mudroom. You have to balance aesthetics with extreme durability and sanitation requirements. I treat my coop projects with the same level of detail as a kitchen renovation because, ultimately, this is a working space that needs to perform well.
Many people focus strictly on the exterior appeal of the coop to match their landscape design. However, the interior is where your flock spends their nights and lays your breakfast, so the layout needs to be impeccable. If you are looking for visual inspiration, keep reading because I have curated a stunning Picture Gallery at the end of the blog post.
In this guide, I will walk you through professional interior strategies for your flock. We will cover correct spatial planning, safe materials, and how to style a space that is both adorable and rugged.
1. Layout and Flow: The Floor Plan
The first step in any design project is the floor plan. In a coop, overcrowding is the enemy of a clean, healthy space. While agricultural minimums often suggest 2 to 3 square feet per bird, I always recommend designing for at least 4 square feet per bird for the interior coop space.
This extra square footage reduces pecking order bullying and keeps the ammonia levels manageable. You also need to consider human ergonomics. If you cannot stand up inside your coop, you need to position the clean-out doors and feeders so you can reach them without crawling through bedding.
Establish distinct “zones” within the coop just as you would in an open-concept living room. You need a sleeping zone (roosting bars), a working zone (nesting boxes), and a dining zone (food and water). Keep the dining zone away from the roosting zone to prevent droppings from contaminating the water.
Designer’s Note: The “Deep Litter” Threshold
A common design oversight is failing to account for the bedding depth. If you plan to use the “Deep Litter Method” (where bedding creates compost over time), you need a 6 to 12-inch threshold across the doorway. Without this retaining wall, your expensive hemp or pine shaving bedding will spill out into the run every time you open the door.
2. The Art of the Roost: Sleeping Quarters
Chickens instinctually want to sleep at the highest available point. If you do not design the roosts correctly, they will sleep in the nesting boxes, which leads to poop-covered eggs.
The hierarchy of height is a golden rule here. Your roosting bars must be higher than your nesting boxes. I usually position the lowest roost at least 18 inches off the ground, with subsequent bars stepped up ladder-style if space allows.
Avoid round dowels or plastic pipes for roosting bars. In the winter, chickens need to cover their feet with their breast feathers to prevent frostbite. I use standard 2×4 lumber, sanded smooth and installed with the wide (4-inch) side facing up. This provides a stable, flat surface for their feet.
Common Mistakes + Fixes
- Mistake: Placing roosts too close to the wall.
- Fix: Install the roosting bar at least 15 to 18 inches away from the back wall. If it is too close, their tails will rub against the wall, damaging their feathers and leaving manure streaks on your paint.
- Mistake: Metal roosting bars.
- Fix: Never use metal pipes. They get too cold in winter and too hot in summer, which causes foot injuries. Stick to wood or high-density composite.
3. Nesting Boxes: Privacy and Style
Nesting boxes are the focal point of the interior. You generally need one box for every four hens. While you can buy metal insert boxes, building them into the structure looks much more custom and high-end.
The standard dimension for a nesting box is a 12-inch cube. If you go much larger, two hens might try to squeeze in at once, leading to broken eggs. I like to raise the nesting boxes 12 to 18 inches off the floor to save floor space for scratching.
To add a touch of “farmhouse chic” that is actually functional, consider nesting box curtains. I use heavy canvas or burlap stapled to the top of the box opening. Hens prefer dark, secluded spots for laying, and curtains can actually encourage them to use the box rather than a hidden corner of the floor.
What I’d do in a real project:
- Slope the roof: I always build a steep slant on top of the nesting bank. This prevents hens from roosting and pooping on top of the boxes.
- External access: Cut an access door on the exterior wall directly behind the nesting boxes. This allows you to collect eggs without entering the coop, keeping your boots clean.
- Removable bottoms: I design the floor of the nesting box to slide out or lift up. This makes scrubbing out a broken egg mess incredibly fast.
4. Interior Materials: Walls and Flooring
The materials you choose for the interior must be non-toxic and scrubbable. Raw wood is difficult to sanitize because it is porous and harbors mites.
For the flooring, I swear by a single seamless sheet of high-quality vinyl or linoleum. You can often find remnants at flooring stores for a discount. Run the vinyl up the walls about 4 to 6 inches to create a “flash cove” base, which prevents moisture from rotting the bottom plates of your framing.
For the walls, painting is a must for longevity and brightness. I use a non-toxic exterior grade semi-gloss paint. White or very light gray is the best choice because it reflects light, helping the hens see better in winter, and makes it easy to spot red mites or mold issues immediately.
Traditional Whitewash Recipe
If you want a historic, safe finish, use traditional whitewash instead of latex paint. It has natural antimicrobial properties.
- Mix hydrated lime with water and a pinch of salt.
- Apply it to the wood interior.
- It dries to a brilliant, chalky white that kills bacteria on contact and is perfectly safe if the chickens peck at it.
5. Ventilation and Lighting Design
In interior design, lighting is about mood; in a coop, it is about production and health. Hens require about 14 hours of daylight to lay consistently. If you add artificial light, use a warm-spectrum LED bulb on a timer. Avoid leaving lights on 24/7, as birds need darkness to sleep and reset their immune systems.
Ventilation is more important than insulation, even in cold climates. Chickens generate a massive amount of moisture through respiration and droppings. If that moisture is trapped, it leads to frostbite.
Design your ventilation high up on the walls, well above the roosting hens. You want the humid air to escape without creating a draft directly on the sleeping birds. I frame out long, narrow windows near the roofline and cover them exclusively with 1/4-inch hardware cloth.
Safety Rule: Never use chicken wire for vents or windows. Raccoons and weasels can tear through chicken wire like tissue paper. Heavy-gauge hardware cloth secured with screws and washers is the industry standard for predator safety.
6. Enrichment and Decor
Once the functional bones are in place, you can have fun with the styling. Bored chickens can become aggressive, so interior enrichment serves a dual purpose: decor and distraction.
Hanging vegetable baskets are a great addition. I use tiered fruit baskets suspended from the ceiling to hold cabbage or lettuce heads. This keeps the treats off the soiled floor and provides a tetherball-like game for the flock.
Mirrors can also be a controversial but interesting addition. Some designers mount sturdy, shatterproof acrylic mirrors on the wall. It makes the coop feel larger and entertains the birds, though you must monitor them to ensure no roosters become aggressive toward their reflection.
Dust baths are essential for hygiene. Instead of a plastic tub, I like to build a designated dust bath box that integrates with the architecture. Frame a 2×2 foot box in the corner and fill it with a mix of sand, wood ash, and diatomaceous earth.
Final Checklist: The Designer’s Audit
Before you introduce your flock to their new home, run through this final audit to ensure the space works.
Structure & Safety
- Are all vents covered with hardware cloth (not chicken wire)?
- Is the door latch complex (two-step) so raccoons cannot open it?
- Are there any protruding nails or sharp wire edges inside?
Ergonomics
Maintenance
FAQs
What is the best color to paint the inside of a chicken coop?
White or a very pale neutral is the best choice. It makes the space look larger and cleaner. More importantly, it allows you to easily spot pests like mites or ticks, which appear as small dark or red specs against the white paint.
Can I use cedar shavings inside the coop?
No, you should avoid cedar shavings. While they smell nice to humans, cedar contains aromatic oils (phenols) that can irritate a chicken’s delicate respiratory system. Stick to kiln-dried pine shavings or industrial hemp bedding.
How do I keep the water from freezing inside the coop?
I recommend designing an electrical outlet into the coop layout near the door. This allows you to safely plug in a heated poultry waterer or a heated base during winter. Do not use heat lamps, as they are a major fire risk; focus on heating the water, not the air.
How much roosting space does each chicken need?
Plan for 10 to 12 inches of roost bar length per standard-size hen. In the winter, they will cuddle close together for warmth, but in the summer, they will spread out to cool down.
Conclusion
Designing the interior of a chicken coop is a rewarding challenge that blends landscape architecture with interior styling. By prioritizing the “flow” of the coop, choosing durable materials like vinyl and high-gloss paint, and adhering to the hierarchy of roosting heights, you create a space that is healthy for your birds and easy for you to maintain.
Remember that a coop is a dynamic environment. Your needs may shift as your flock grows or ages. Start with good “bones”—proper ventilation, solid flooring, and sturdy roosts—and the rest of the decor can evolve over time.
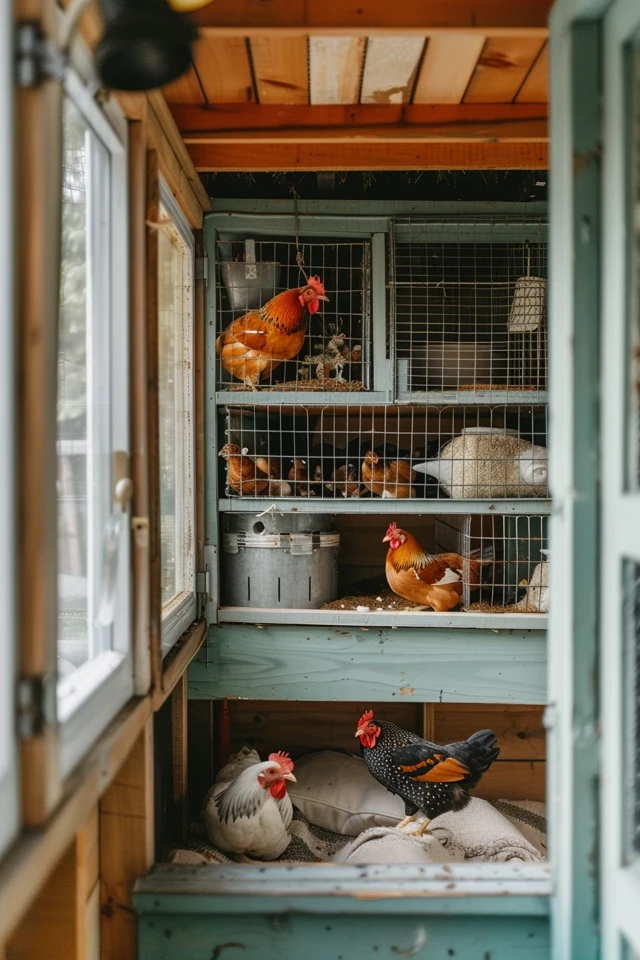
Picture Gallery


