
Creative Loft Railing Ideas for Your Home
Designing a loft space is one of the most rewarding challenges in interior architecture because it forces you to think in three dimensions. The railing isn’t just a safety barrier; it is the visual bridge between your two floors. I often tell my clients that the railing is like the eyeliner of the room—it defines the shape and dictates the mood.
In my early days of designing, I once treated a loft railing as an afterthought, opting for a standard builder-grade balustrade to save budget. It ended up closing off the room visually and making the lower level feel cramped and dark. Since then, I have learned that the transparency, material, and mounting style of your railing are critical to the flow of the home.
Whether you are renovating a historic barn, updating an urban condo, or building a new mezzanine, your choice of railing needs to balance code compliance with aesthetic impact. If you are looking for visual inspiration, you can jump right to the Picture Gallery at the end of this blog post.
1. Safety First: The Rules of the Road
Before we get to the pretty finishes, we have to talk about building codes. As a designer, my first step is always ensuring the railing will pass inspection and keep your family safe.
In the US, residential codes typically require railings (guards) to be at least 36 inches high. However, for loft spaces that look down into a living area, I usually specify a height of 42 inches. That extra six inches adds a psychological sense of security, especially if the drop is significant.
Another non-negotiable is the “4-inch sphere rule.” You should not be able to pass a 4-inch ball through any opening in the railing. This prevents small children from getting their heads stuck or slipping through.
Designer’s Note: The Ladder Effect
A common debate in the design world involves horizontal bars. They look sleek and modern, but they can effectively create a ladder for adventurous toddlers. If you have young kids, some inspectors may flag this, though it varies by jurisdiction. If you love the horizontal look but have climbers, consider installing a temporary clear acrylic sheet on the inside until they are older.
2. Glass Railings: Maximizing Light and Space
If your loft is small or has limited windows, glass is often the best solution. It allows light to travel uninterrupted from the upper level to the lower floor, making both spaces feel larger.
There are two main ways to install glass: base shoe and standoff pins. A base shoe is a heavy metal channel set into or on top of the floor that holds the glass panel. It offers a very clean, “floating” look. Standoff pins are stainless steel bolts that hold the glass to the side of the loft fascia (the edge of the floor structure).
When specifying glass, I always recommend tempered, laminated glass. If it breaks, it stays in one sheet rather than shattering into dangerous shards. For a truly high-end look, ask for “low-iron” or Starphire glass. Standard glass has a slight green tint at the edges, but low-iron glass is crystal clear.
Common Mistakes + Fixes
- Mistake: Ignoring the cleaning factor. Glass shows every fingerprint and dog nose smudge.
- Fix: If you have a busy household, choose a railing with a top cap (handrail). People naturally grab the metal or wood rail instead of the glass, drastically reducing smudges.
- Mistake: Underestimating the weight. Glass is incredibly heavy.
- Fix: You must ensure your floor joists are reinforced where the railing mounts. I’ve seen subfloors sag because the contractor didn’t add blocking between the joists to support the heavy steel shoe and glass.
3. Cable Railing: The Modern Industrial Standard
Cable railings have become the go-to for modern farmhouses and industrial lofts. They offer great visibility, similar to glass, but with more texture and less cleaning.
The system consists of tensioned steel cables running horizontally through posts. You can choose between wood posts for a warmer look or stainless steel posts for a cooler, sleeker vibe.
The key to a professional look with cable is the spacing and tension. Cables should generally be spaced no more than 3 inches apart. Even though code allows for 4 inches, cables have some give. If a child steps on one, it can flex open wider than 4 inches, which is a safety hazard.
Real-World Lesson: Tensioning
Over time, steel cables will stretch slightly. This creates a “saggy” look that ruins the sharp lines of the design. When I spec these, I ensure the hardware includes easy-to-access turnbuckles. I tell my clients to do a “tension check” once a year—usually just a quick turn with a wrench to tighten everything back up.
4. Vertical Wood Slats: Mid-Century Warmth
Vertical wood slats are currently having a massive moment in interior design. This style functions as both a safety railing and a feature wall. It involves floor-to-ceiling (or floor-to-rail) wood pieces spaced closely together.
This is an excellent option if you want to zone the space. Unlike glass, which disappears, wood slats add architectural weight. They are perfect for lofts that are used as bedrooms because they offer visual privacy from the floor below while still allowing airflow and sound to travel.
Material choice matters here. Softwoods like pine can dent easily if you bump them with furniture. I prefer White Oak or Walnut. They are harder, more durable, and take stain beautifully.
Pro-Level Rule of Thumb: Spacing
For vertical slats, the spacing creates the vibe.
- 1.5-inch gap: Creates a screen-like effect. Very private.
- 3.5-inch gap: Feels more like a traditional railing. Open and airy.
- Angled Slats: For a dynamic look, install rectangular slats at a 45-degree angle. From one direction, the loft looks open; from the other, it looks like a solid wall.
5. Wrought Iron and Steel: The Classic Statement
For homes with a more traditional or rustic aesthetic, custom metalwork is unbeatable. This doesn’t just mean ornate, curly Victorian styles. Simple, vertical steel balusters are timeless and work with almost any décor.
If you are on a budget, pre-fabricated iron panels are available. However, for a high-end finish, custom welding is the way to go. This allows you to mount the railing directly into the side of the loft floor (fascia mounting), which saves precious square footage in the loft itself.
When choosing a finish, be wary of raw steel. While it looks cool and industrial, it will rust over time, even indoors, due to humidity. I always recommend a matte black powder coat. It mimics the look of raw iron but is smooth to the touch and requires zero maintenance.
What I’d Do in a Real Project
If I were designing a loft for a family with pets, I would avoid horizontal bars or cable rails (easy for paws to slip through) and glass (nose smudges). I would specify a simple vertical steel railing with a flat wood top rail.
- The Metal: Matte black vertical spindles, 0.5-inch thick.
- The Top Rail: A flat wood cap that matches the hardwood flooring of the loft.
- The Result: The wood top makes it comfortable to lean on, while the vertical bars are safe and durable.
6. The Pony Wall: The Budget-Friendly Hybrid
A pony wall (or knee wall) is simply a short wall framed out of studs and drywall. It is often the cheapest option because your general contractor can build it during the framing stage without needing a specialized metal or glass fabricator.
The downside is that a plain drywall half-wall can look cheap and boxy. It also blocks all the light. To elevate this, I like to use a “hybrid” approach. Build a pony wall up to 24 inches, and then top it with 12 to 18 inches of glass or decorative metal.
This hybrid approach is brilliant for loft home offices. The solid wall portion hides the messy wires and back of your desk from the view below, while the glass top keeps the open feeling.
Styling a Pony Wall
Never leave the top of a drywall pony wall as painted drywall. It will get dirty and dented within weeks. Always cap it.
- Trim: Use a piece of wood trim that is slightly wider than the wall (usually 5.5 to 6 inches for a standard 2×4 wall).
- Molding: Add picture frame molding to the drywall face to break up the large white surface and add traditional character.
Final Checklist: Choosing Your Loft Railing
Use this mini-checklist to narrow down your selection before calling a contractor.
- 1. Who lives here? If you have toddlers or energetic dogs, avoid horizontal bars (climbing hazard) and clear glass (cleaning nightmare). Stick to vertical pickets or mesh.
- 2. What is the light situation? If the loft has the only good window, use glass or cable rail to share that light with the lower level. If the loft is bright but the downstairs is dark, the same applies.
- 3. How much privacy do you need? If the loft is a master suite, an open cable rail might make you feel too exposed. Consider vertical wood slats or a pony wall for visual separation.
- 4. What is the mounting surface? Check your floor structure. Heavy glass requires solid blocking. Side-mounted (fascia) railings require a sturdy rim joist. Knowing this helps you get an accurate quote.
- 5. Budget reality. From most expensive to least: Custom Glass > Custom Steel > Cable Rail > Wood Slats > Drywall Pony Wall.
FAQs
How much does a custom loft railing cost?
Costs vary wildly by region and material. Generally, a drywall pony wall is the cheapest. Wood railings are mid-range. Cable systems often cost $150 to $250 per linear foot installed. Frameless glass is usually the most expensive, often exceeding $300 to $400 per linear foot due to the heavy hardware and engineering required.
Can I install a railing myself?
Wood and cable railing kits are available for DIYers and are reasonably manageable if you are handy. However, I strongly advise against DIYing frameless glass or custom welded steel. The margins for error are tiny, and the safety risks are high.
What is the most durable railing finish?
Powder-coated steel is arguably the most durable. It doesn’t scratch easily, doesn’t rust, and doesn’t show dirt. Wood requires occasional polishing or re-staining. Glass requires weekly cleaning to look good.
How do I stop things from falling through the railing?
This is a common fear with lofts. If you choose a railing with an open bottom (where the spindle doesn’t go all the way to the floor), specify a “kick plate” or ensure the gap at the bottom is less than 2 inches. This stops phones, toys, and dust bunnies from rolling off the edge onto the people below.
Conclusion
Your loft railing is a significant architectural feature that deserves thoughtful consideration. It is one of the few elements in your home that must perform perfectly on a structural level while also acting as a primary focal point.
Don’t be afraid to mix materials. Some of the most beautiful spaces I have worked on combined the industrial coldness of steel with the organic warmth of a wood handrail. Take your time, measure twice, and choose a style that fits not just the look of your home, but the way you actually live in it.
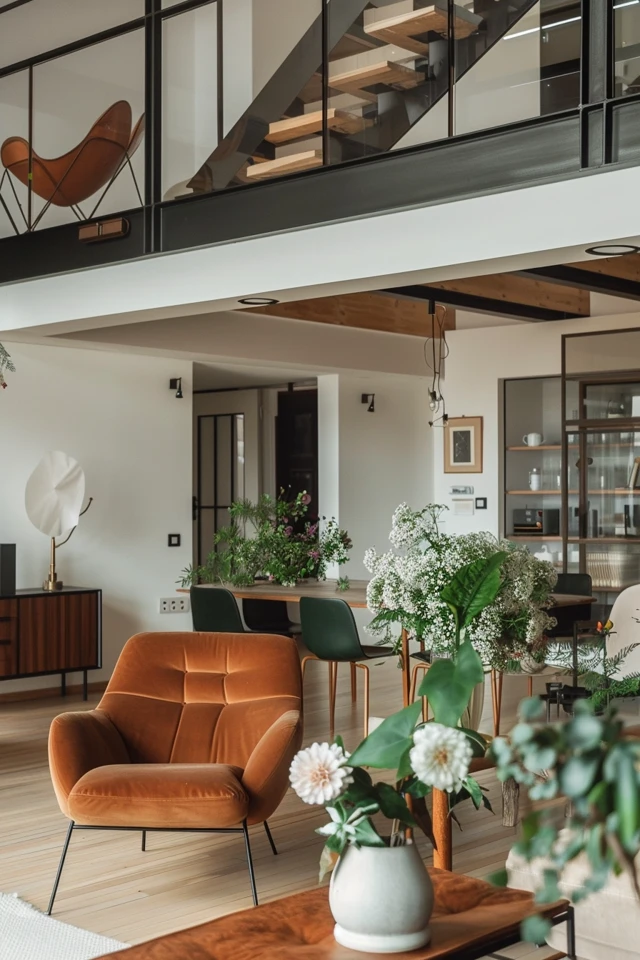
Picture Gallery


