
Title: Creative Mudroom Hook Ideas to Organize in Style
There is nothing quite as chaotic as an entryway during the after-school rush or a rainy weekend. Coats end up on the floor, backpacks are flung into corners, and dog leashes tangle into an unrecognizable knot. As an interior designer, I have found that the difference between a serene home and a cluttered one often boils down to vertical storage.
The humble wall hook is the unsung hero of the mudroom. It is the most accessible form of organization because it requires zero effort; there are no hangers to fiddle with and no doors to open. However, simply screwing a few hooks into the wall rarely achieves the polished, custom look most homeowners desire.
To truly transform your space, you need to combine ergonomic placement with deliberate aesthetic choices. For a visual dose of inspiration, don’t miss the curated Picture Gallery located at the end of this blog post.
The Ergonomics of Hook Placement: Measurements That Work
Before buying hardware, you must understand the math behind a functional mudroom. The biggest failure I see in DIY entryway projects is improper height and spacing. If hooks are too low, long coats drag on the floor; if they are too high, they become useless for half the family.
For general use, I recommend installing the main row of hooks at 60 to 66 inches from the finished floor. This height accommodates most adult trench coats and parkas without them touching a bench or the ground. It is also high enough to keep visual clutter above eye level when you are seated.
If you are designing specifically for children, you need a secondary tier. I typically place kid-friendly hooks at 36 to 48 inches off the floor. This empowers independence, allowing even toddlers to hang up their own jackets.
Spacing is just as critical as height. To prevent an overcrowded look where bulky winter coats fight for space, space your hooks 8 to 12 inches apart (center-to-center). If you are only hanging light items like scarves or tote bags, you can tighten this to 6 inches, but 8 inches is the safe standard for versatility.
Selecting the Right Hardware Style and Finish
The style of the hook dictates the vibe of the entire room. In a mudroom, hardware acts like jewelry on an outfit; it adds the finishing touch that pulls the design together. Do not feel pressured to match your hooks exactly to your door knobs or cabinet pulls, but they should speak the same language.
For a modern farmhouse or industrial look, matte black cast iron hooks are a staple. They hide dirt well and offer a strong, graphic contrast against white shiplap or light-colored paint. If your home leans traditional or coastal, consider unlacquered brass. This finish develops a beautiful patina over time, showing the life and history of the home.
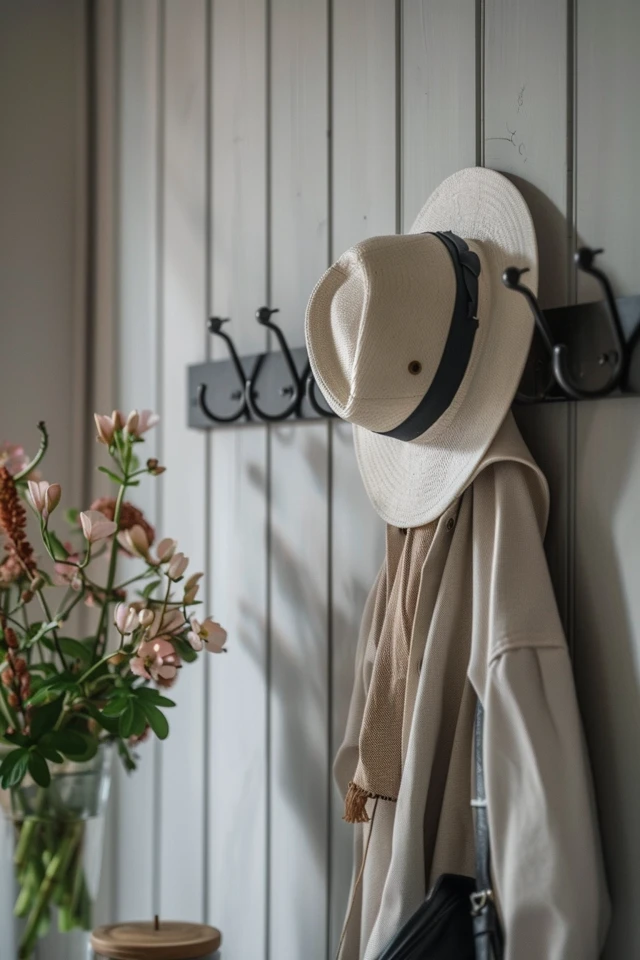
The shape of the hook matters for functionality. “Double hooks” (often called hat-and-coat hooks) are my go-to for maximizing storage in small footprints. The top prong holds the hat or scarf, while the bottom curve holds the heavy coat.
For narrow spaces or corners, look for swivel hooks. These can fold flat against the wall when not in use, preventing snagged sweaters as you walk by. If you want a minimalist aesthetic, single wood pegs or simple J-hooks offer a cleaner visual that doesn’t overwhelm the wall.
Creative Layouts Beyond the Straight Line
While a single horizontal row of hooks is classic, it is not the only option. In fact, breaking the linear mold is often the secret to a “designed” look. One effective technique is the staggered formation.
Install one hook high (at 65 inches), and the next hook low (at 45 inches), alternating across the wall. This effectively doubles your storage capacity without requiring a wider wall. It also creates a dynamic visual rhythm that looks more interesting than a straight line.
Another creative approach is vertical stacking. If you have a narrow slice of wall between two doors, install a vertical column of three or four hooks. Use the top one for rarely used items like guest hats, and the bottom ones for daily bags or dog leashes.
For renters who cannot drill dozens of holes, I suggest using a hook rail or a peg rail. You only need to drill two anchor points to secure a board that might hold six or seven pegs. This creates a built-in look with minimal wall damage to repair later.
Material Selection and Weight Capacities
A mudroom hook must be a workhorse. It needs to withstand the weight of a wet wool coat or a backpack loaded with textbooks. I frequently see decorative hooks bending or snapping because they were made of zinc or thin aluminum rather than solid metal.
Always check the weight rating on the packaging. A good mudroom hook should be rated for at least 35 pounds. Solid brass, cast iron, and solid wood are your best material choices for longevity.
If you are choosing wood pegs, ensure they are turned from hardwoods like oak, maple, or walnut. Softwoods like pine can snap under the torque of a heavy bag. Additionally, the finish on the hook matters. Powder-coated metals are highly resistant to chipping, which is essential if you hang metal zippers or keys on them daily.
Avoid ceramic or glass knobs for heavy mudroom duty. While they look charming, they are prone to snapping at the neck where the screw meets the decorative head. Save those for the bedroom or bathroom where they will only hold robes or towels.
Integrating Hooks into Millwork
The most high-end mudrooms usually involve some form of millwork or wainscoting. Incorporating hooks into these architectural elements instantly elevates the space. The most common application is Board and Batten.
In a Board and Batten application, the hooks should be installed directly onto the vertical battens or the top horizontal rail. This provides a sturdy wood substrate for the screw, offering far more strength than drywall anchors.
For a Shiplap wall, you have more flexibility with placement, but you must be careful about weight. Since shiplap is often thin (sometimes only 1/4 inch thick), it does not hold screws well on its own. You must use screws long enough to go through the shiplap and bite into the drywall studs behind it.
Another seamless look is the “Locker” cubby system. If you have built-in benches, install a hook on the back wall of each cubby section. I also like to add a smaller side hook on the interior walls of the cubby for smaller items like umbrellas or keys, keeping them tucked away from sight.
Designer’s Note: The Reality of Installation
Here is a lesson I learned the hard way early in my career: never trust the mounting hardware that comes in the package. Most hooks come with cheap, short screws and flimsy plastic drywall anchors.
If a client’s child tries to pull a backpack off a hook, those plastic anchors will rip right out of the drywall, leaving a gaping hole. I always throw those packets away immediately.
Instead, I use my own supply of heavy-duty toggle bolts or self-drilling metal anchors for any hook that isn’t going directly into a wooden stud. It costs a few dollars more, but it ensures the hook stays on the wall for decades.
Also, be wary of “ghost studs.” Just because a stud finder beeps doesn’t mean you are in the dead center of the wood. always use a small finish nail to probe the area first to confirm you hit solid wood before driving in a large screw.
Common Mistakes + Fixes
Mistake: Overcrowding the wall.
Many homeowners try to squeeze too many hooks onto a short rail. This results in a “pile” of coats where you can’t find anything, and the wall looks messy.
Fix: Adhere to the 8-inch minimum spacing rule. If you need more storage, add a second row of hooks lower down rather than cramping the top row.
Mistake: Hooks behind a fully opening door.
Installing bulky hooks behind a door often punches holes in the door surface or prevents the door from opening fully.
Fix: Use a hinge-pin door stop to restrict the door’s opening angle, or switch to flush-mount or fold-flat hooks in tight areas.
Mistake: Placing hooks too high for functionality.
Installing hooks at 72 inches or higher makes them unreachable for many adults and teenagers.
Fix: Stick to the 60-66 inch range. If you have very tall ceilings and want to fill the space, use the upper area for art or a shelf, not for daily storage hooks.
What I’d Do in a Real Project: Mini Checklist
If I were walking into your home tomorrow to design your mudroom hook layout, this is the exact process I would follow:
1. Inventory the Items: I count exactly how many heavy winter coats, backpacks, and leashes the family owns. This determines the minimum number of hooks needed.
2. Check the Structure: I use a magnetic stud finder to mark every stud on the wall with blue painter’s tape.
3. Define the “Drop Zone”: I identify the path of traffic. Hooks should be close to the door but not blocking the walkway.
4. Mockup with Tape: Before drilling a single hole, I cut pieces of blue painter’s tape and stick them to the wall where the hooks will go. I test the height by having the shortest family member reach for a pretend coat.
5. Select the Anchors: If my tape marks don’t align with the studs, I switch to toggle bolts for those specific locations.
Final Checklist for Installation
Ready to install? Follow these steps to ensure a professional finish.
Gather Tools: Drill, level, measuring tape, pencil, stud finder, hammer, screwdriver, and appropriate anchors.
Mark the Height: Draw a light pencil line (or use a laser level) at your desired height (e.g., 60 inches) across the wall.
Mark the Centers: specific spacing (e.g., every 10 inches) along that level line.
Pre-drill Holes: Use a drill bit slightly smaller than your screw shank for studs, or the size specified on your anchor package for drywall.
Install Anchors: Tap in your drywall anchors if not hitting studs.
Secure Hooks: Hand-tighten the screws at the end to avoid stripping the screw head or cracking the finish.
* Test Weight: Give the hook a firm tug to ensure there is no wiggle.
Frequently Asked Questions
How much weight can a drywall anchor hold?
Standard plastic conical anchors usually hold 10-15 pounds, which is risky for heavy bags. Toggle bolts or strap toggles can hold 50+ pounds, making them much safer for mudrooms.
Can I use adhesive strips instead of screws?
For a functional mudroom, I say no. Adhesive strips (like Command strips) are great for keys or lightweight hats, but they will eventually fail under the weight of coats and backpacks, potentially damaging your paint when they fall.
Should I use a hook rail or individual hooks?
Individual hooks offer more design flexibility and allow you to customize spacing. However, pre-made hook rails are easier to install since you usually only need to mount the board at two points.
What is the best hook finish for a family with kids?
Matte black or Oil-Rubbed Bronze are the most forgiving. Polished chrome or nickel tends to show fingerprints and water spots from wet raincoats more easily.
How far should hooks be from a corner?
Leave at least 4 to 6 inches of clearance from an interior corner. If the hook is too close, a bulky coat will bunch up against the adjacent wall, making the space feel cramped.
Conclusion
Creating an organized mudroom does not require a full renovation or custom cabinetry. By thoughtfully selecting the right hooks and placing them at ergonomic heights, you can drastically improve the flow of your home.
Remember that function comes first. A beautiful hook is useless if it pulls out of the wall or is mounted too high to reach. Take the time to measure, find your studs, and choose hardware that can handle the heavy lifting of daily life.
Once you have the mechanics dialed in, have fun with the style. Mix metals, stagger heights, and treat your wall hardware as a design element in its own right. A well-organized entry sets the tone for the rest of your house, welcoming you home with order rather than chaos.
Picture Gallery


