
Creative Painted Pottery Ideas for Your Home
Pottery is often the unsung hero of interior design, bridging the gap between architecture and nature. It serves a functional purpose by housing your greenery, but it also acts as a sculptural element that can define the aesthetic of a room. Whether you are sourcing vintage artisan vessels or engaging in a DIY project to refresh generic terra cotta, painted pottery offers a high-impact, low-renovation way to inject color into your home.
I have seen countless spaces transformed simply by swapping out plastic nursery pots for substantial, hand-painted ceramic vessels. A dull hallway can suddenly become a focal point with the addition of a floor vase featuring bold geometric patterns. If you want to skip straight to the visuals, you can find our curated Picture Gallery at the end of this blog post.
However, integrating painted pottery isn’t just about picking a pretty color; it requires an understanding of scale, finish, and plant health. In this guide, I will walk you through professional strategies for styling, painting, and placing pottery to elevate both your interior and exterior spaces.
1. Mastering Scale and Placement in Living Areas
One of the most common issues I see in residential projects is “underscaling.” This happens when a homeowner places a small, 8-inch pot on the floor in a large corner, making the room feel cluttered rather than designed.
When placing painted pottery on the floor, you must go big. A floor pot should generally be at least 18 to 24 inches in height before you even add the plant. This ensures the vessel holds its own against sofas and armchairs.
If you are working with a smaller painted pot, elevate it. Use a plant stand, a stack of coffee table books, or a dedicated pedestal to raise the visual height.
Designer’s Note: The “Dead Corner” Fix
Every living room has a “dead corner”—that awkward space between the end of the sofa and the wall, or next to a media console.
- The Mistake: Filling it with a small basket or a wobbly floor lamp.
- The Fix: Use a large, hand-painted ceramic pot with a vertical plant (like a Ficus or Snake Plant).
- The Measurement: Ensure the top of the plant reaches at least 5 feet high to draw the eye upward. The pot itself should have a diameter of at least 16 inches.
When selecting a pattern for these large vessels, consider your rug and upholstery. If your rug has a busy Persian print, opt for pottery with broad stripes or solid color blocking. If your furniture is neutral, this is your chance to use a pot with intricate, hand-painted floral or abstract designs.
2. Curb Appeal: Outdoor Planter Strategies
Outdoor pottery faces different challenges than indoor décor. The sun bleaches colors, and freezing temperatures can crack improper materials. Furthermore, the scale of the outdoors is massive compared to a living room.
A pot that looks huge in your trunk will look surprisingly small when placed next to your front door. For entryways, I always recommend the “Rule of Three” or a symmetrical pair of substantial urns.
If you are painting these pots yourself, you must use exterior-grade masonry paint or specific ceramic paints sealed with a UV-resistant clear coat. Without this, your creative design will flake off within one season.
What I’d Do in a Real Project: The Entryway Formula
If I am styling a front porch, I follow a strict checklist to ensure longevity and visual impact:
- Material Selection: I choose glazed frost-proof ceramic or high-quality fiberstone. Unsealed terra cotta will crack in freezing zones.
- Sizing: The pot height should be roughly 1/3 to 1/2 the height of the door entrance when the plant is included.
- Design Continuity: I paint or select pots that pull a color from the home’s fixed elements—the roof shingles, the brick undertones, or the shutter color.
Common Mistakes + Fixes
Mistake: Using indoor acrylic craft paint on outdoor pots.
Correction: If you have already painted a pot with acrylics, you must seal it with a marine-grade polyurethane. However, for future projects, start with an oil-based primer and exterior latex paint.
Mistake: Placing pots directly on wood decking.
Correction: Always use pot feet or risers. This allows air circulation and prevents the moisture in the clay from rotting your deck boards.
3. DIY Techniques for Customizing Generic Pots
Sometimes the budget doesn’t allow for imported Italian ceramics. Fortunately, customizing hardware store terra cotta is a staple in the design world. The porous nature of terra cotta makes it an excellent canvas, but it absorbs paint quickly.
To achieve a professional finish, you need to prepare the surface. Soak the pot to remove stickers and dust, then let it dry completely for 48 hours. If the pot is damp, the paint will bubble.
For a modern, high-end look, avoid intricate doodles. Instead, focus on texture and simple geometry. A “dip-dye” effect, where only the bottom third is painted, looks chic and intentional.
Step-by-Step: The “Faux Aged” Finish
If you want the look of antique limestone without the price tag, try this method I use for rustic projects:
- Base Coat: Paint the pot a solid dark grey or brown. Let it dry.
- Texture Layer: Mix white paint with baking soda (1:1 ratio) to create a thick, gritty paste.
- Application: Brush this mixture over the dark base, but leave some spots exposed.
- Wipe Back: Before it dries fully, use a damp rag to wipe away some of the white paint, revealing the dark color underneath.
This creates depth and history. It works exceptionally well in farmhouse or Mediterranean-style homes.
Designer’s Note: Sealing is Mandatory
Terra cotta “breathes,” meaning water passes through the clay walls. If you paint the outside but don’t seal the inside, the water pressure from the soil will push outward and blister your paint.
Always apply a waterproof sealer (like a spray-on asphalt or liquid rubber) to the interior of the pot before planting. This preserves your artwork on the exterior.
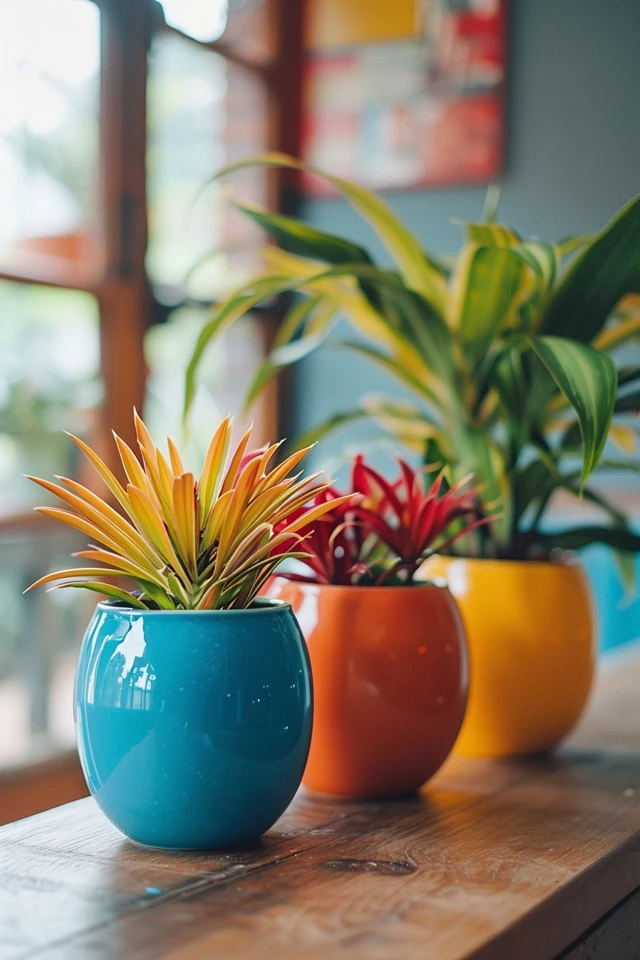
4. Styling Bookshelves and Tables
Small painted pottery is perfect for bookshelves, coffee tables, and mantels. In these spaces, the pottery often acts as a standalone object of art, sometimes not even holding a plant.
When styling shelves, balance is key. If you have a cluster of books on the left, place a sculptural painted bowl on the right. Avoid lining up small pots in a row, which looks like a retail display.
Group items in odd numbers. A trio consisting of a tall vase, a medium rounded pot, and a small low bowl creates a pleasing visual triangle.
Measurements and Clearances
When placing pottery on a coffee table or dining table, visibility is paramount.
- Coffee Tables: Keep arrangements under 12 inches high so they don’t block the view of the TV or guests.
- Dining Tables: Use low, long troughs or a series of small bud vases. If you use a large centerpiece, ensure it is narrow enough to leave room for serving dishes—at least 15 inches of clearance on all sides.
- Shelf Depth: Ensure the pot diameter is at least 1 inch smaller than the shelf depth. A pot hanging over the edge creates subconscious visual tension (and a safety hazard).
Mixing Patterns
On a bookshelf, you can take more risks with patterns. You might mix a striped pot with a polka-dot vase, provided they share a color palette. If your room is monochromatic, using pottery with high-contrast black and white patterns adds necessary sharpness to the design.
5. Functional Considerations: Drainage and Floor Protection
The most beautiful painted pot is useless if it ruins your hardwood floors. I have seen thousands of dollars in damage caused by a slow leak from a planter.
Every pot housing a live plant must have drainage. If you fall in love with a decorative painted vessel that has no hole, use it as a “cachepot” (a cover pot). Keep the plant in its plastic nursery grower pot and drop it inside the decorative vessel.
This method also makes watering easier. You can lift the plant out, water it in the sink, let it drain, and place it back. This eliminates the risk of stagnant water sitting at the bottom of your ceramic pot.
Floor Protection Protocol
Never place a ceramic or clay pot directly on hardwood, laminate, or carpet.
- Condensation: Even glazed pots can “sweat” with temperature changes.
- Scratches: The bottom of clay pots is abrasive and will scratch sealers.
- The Solution: adhere felt furniture pads to the bottom of indoor pots. For heavy floor plants, use cork mats with a plastic backing.
Designer’s Note: The Weight Factor
Painted ceramic pots, especially large ones filled with wet soil, are incredibly heavy.
Before you fill a 20-inch pot with soil, move it to its final location. To reduce weight, I often fill the bottom third of very large pots with empty, crushed plastic water bottles or upside-down nursery pots. This saves on soil costs and makes the pot movable if you need to rearrange furniture later.
Final Checklist: Before You Buy or Paint
Before you finalize your pottery setup, run through this quick checklist to ensure professional results.
- Check the Scale: Is the floor pot at least 18 inches tall? Is the shelf pot small enough to fit without hanging over?
- Check the Palette: Does the paint color clash with the rug or the wall color? (Tip: Bring a paint swatch of your wall when shopping).
- Check the Drainage: Does it have a hole? If not, do you have a plastic liner pot that fits inside?
- Check the Seal: If using terra cotta, have you sealed the inside to protect the outside paint?
- Check the Floor: Have you applied felt pads or cork protection to the bottom?
Frequently Asked Questions
Q: Can I paint glazed pottery?
A: Yes, but it requires prep. You must sand the glossy surface thoroughly with fine-grit sandpaper to create “tooth” for the paint to stick. Use a bonding primer specifically designed for glossy surfaces before applying your topcoat.
Q: How do I clean hand-painted pottery?
A: Avoid harsh chemicals or soaking the outside. Wipe the exterior gently with a damp microfiber cloth. If the pot has a textured finish, use a soft bristle brush to remove dust from the crevices.
Q: My outdoor painted pots are peeling. Why?
A: This usually happens because moisture got behind the paint. This could be from the soil inside (lack of interior sealing) or from the pot absorbing ground moisture (lack of pot feet). To fix it, you’ll need to scrape, sand, and repaint, ensuring you seal the interior this time.
Q: What is the best paint for terra cotta?
A: For indoor pots, standard acrylic craft paint works well if sealed. For outdoor pots, use exterior latex house paint or patio paint. Always avoid oil-based paints on unprimed terra cotta, as the clay’s moisture regulation can cause oil paints to fail quickly.
Conclusion
Painted pottery is one of the most versatile tools in a designer’s kit. It allows you to introduce trend colors without painting walls, add organic texture to boxy rooms, and bridge the gap between your interior and the outdoors.
By paying attention to scale, ensuring proper drainage, and choosing finishes that align with your home’s architecture, you can curate a collection that looks gathered and high-end rather than clutter. Whether you are painting a $5 pot from the hardware store or styling a vintage find, the principles of placement and proportion remain the same.
Picture Gallery


