
Creative Play Corner Ideas for Living Rooms
For years, I fought a losing battle against the plastic invasion in my own living room. I wanted a sophisticated space where I could host friends for wine, but I also wanted my children to feel welcome and creative in the heart of the home. The turning point came when I stopped trying to hide the fact that kids lived there and started designing for it.
A play corner doesn’t have to look like a preschool exploded in your lounge. By applying standard interior design principles—like scale, balance, and color theory—you can create a designated zone that satisfies a child’s need for play and an adult’s need for order. It is entirely possible to have a chic coffee table and a basket of wooden blocks existing in harmony.
This guide dives deep into the logistics of carving out space, selecting the right durable materials, and blending toy storage into your existing decor. If you are looking for visual inspiration, jump straight to the curated Picture Gallery at the end of this blog post.
1. Zoning and Layout Strategy
The first step in creating a functional play corner is defining the zone without erecting physical walls. In open-concept living rooms, furniture placement acts as the architecture. You need to create a visual boundary that signals to your child, “This is where the toys live,” while maintaining a cohesive flow for the rest of the room.
I often use the “floating furniture” technique. Instead of pushing your sofa against the wall, float it in the center of the room. The space behind the sofa is often dead space, but it is perfect for a low console filled with toys or a small play table. This keeps the visual clutter out of your direct line of sight when you are sitting on the couch watching TV.
Rug layering is another powerful zoning tool. If your main living area has a large 9×12 area rug, place a smaller, distinct rug (perhaps a 4×6 or a round 5-foot rug) in the corner dedicated to play. This visual cue helps children understand where the Lego construction site should theoretically stay.
Designer’s Note: The Sightline Rule
In my client projects, I always check the “kitchen sightline.” Stand at your kitchen sink or wherever you spend the most time prepping food. Can you see the play corner? If not, adjust the layout. Safety is paramount, but so is your peace of mind. You want to be able to supervise independent play without having to stop what you are doing every two minutes.
Common Mistakes + Fixes
- Mistake: Blocking the flow of traffic with a play kitchen or easel.
- Fix: Ensure you maintain a minimum of 30 to 36 inches of walking clearance between any piece of furniture. If the play corner pinches a doorway or walkway, it will feel cluttered regardless of how tidy it is.
2. The Art of Concealed Storage
Storage is the make-or-break element of a living room play area. The goal is “accessible for them, invisible for you.” Open bins are great for toddlers, but they create visual noise. I prefer a mix of open and closed storage solutions that grow with the child.
Look for sideboards or credenzas rather than dedicated “toy boxes.” A standard media console with doors is often the best toy storage unit. It fits the aesthetic of a living room but hides the chaos behind solid wood or cane fronts. Aim for a unit that is roughly 15 to 18 inches deep; this is deep enough to hold standard square storage cubes but shallow enough not to encroach on the room’s footprint.
If you are short on floor space, use the vertical plane. Wall-mounted shelving units with opaque baskets on the bottom shelves allow you to store toys down low where kids can reach them, while keeping breakables or books on the higher shelves out of reach.
The “Two-Basket” System
I teach all my clients the two-basket system for quick cleanups. Keep two large, beautiful woven baskets (think seagrass, jute, or cotton rope) in the living room. One is for “hard toys” (blocks, cars, plastic figures) and one is for “soft toys” (stuffed animals, dress-up clothes).
When guests are five minutes away, you don’t have time to sort Legos by color. You just need to clear the floor. This system makes the speed-clean realistic and manageable for even young children to help with.
3. Selecting “Adult-Grade” Kid Furniture
One of the biggest design disconnects occurs when parents buy bright primary-colored plastic tables for a room filled with neutral linens and natural woods. To maintain a sophisticated look, select child-sized furniture that mimics the style of your full-sized pieces.
If your dining table is a walnut mid-century modern style, look for a mini play table with similar tapered legs and a wood finish. If your aesthetic is farmhouse, look for a painted white wooden table. Brands are finally catching on to this, offering “mini-me” versions of trendy furniture.
Acrylic furniture is a secret weapon for small living rooms. A clear acrylic play table takes up zero “visual weight.” It serves its purpose without making the corner look heavy or crowded. Plus, marker and crayon wipe off acrylic incredibly easily.
Dimensions Matter
When selecting a play table and chairs, scale is critical for comfort.
- Toddler Table Height: 18 to 20 inches.
- Seat Height: 10 to 12 inches.
- Clearance: Ensure there are at least 7 inches between the chair seat and the table apron so little legs fit comfortably.
4. Durability and Material Selection
A living room play corner will see high traffic, spills, and rough handling. The materials you choose must be performance-grade. This doesn’t mean wrapping everything in plastic, but it does mean being strategic about fabrics and finishes.
For upholstery on ottomans or reading nook chairs, I exclusively recommend performance velvet or crypton fabrics. Performance velvet is incredibly durable; most stains sit on the surface and can be wiped away with a damp cloth. Avoid linen or loose-weave cottons in a play zone, as they absorb liquids instantly and snag easily on toys.
For the walls in the play corner, paint finish is your best defense. Do not use flat or matte paint in this specific area. Use an eggshell or satin finish. These sheens have a tighter molecular structure that creates a shell, allowing you to scrub off scuff marks or crayon without burnishing the paint.
Rug Rules for Play Zones
The rug in your play corner needs to be soft enough for kneeling but flat enough for building blocks.
- Pile Height: Aim for a pile height of 0.25 to 0.5 inches. Anything higher (like a shag rug) will swallow Lego pieces and make towers unstable.
- Material: Wool is naturally stain-resistant and durable. If budget is a constraint, look for high-quality polypropylene blends that are solution-dyed, meaning the color goes all the way through the fiber, making it bleach-cleanable in dire situations.
5. Integrating Lighting and Decor
Lighting defines the mood. A play corner shouldn’t feel like an interrogation room with harsh overhead lights, nor should it be a dark cave. Layered lighting is essential here just as it is in the rest of the house.
Install a wall sconce with a swing arm above the play table or reading nook. This provides directed task lighting for drawing or reading without taking up valuable floor space with a floor lamp base (which is also a tipping hazard). If you are renting or don’t want to hire an electrician, look for “plug-in” sconces that simply mount to the wall and plug into an outlet.
Integrate the children’s artwork into the room’s design, but frame it intentionally. Instead of taping papers to the wall, install a gallery rail or a set of matching frames with mats. When a child’s drawing is placed in a clean white mat and a wood frame, it elevates the art from “fridge clutter” to “abstract expressionism.”
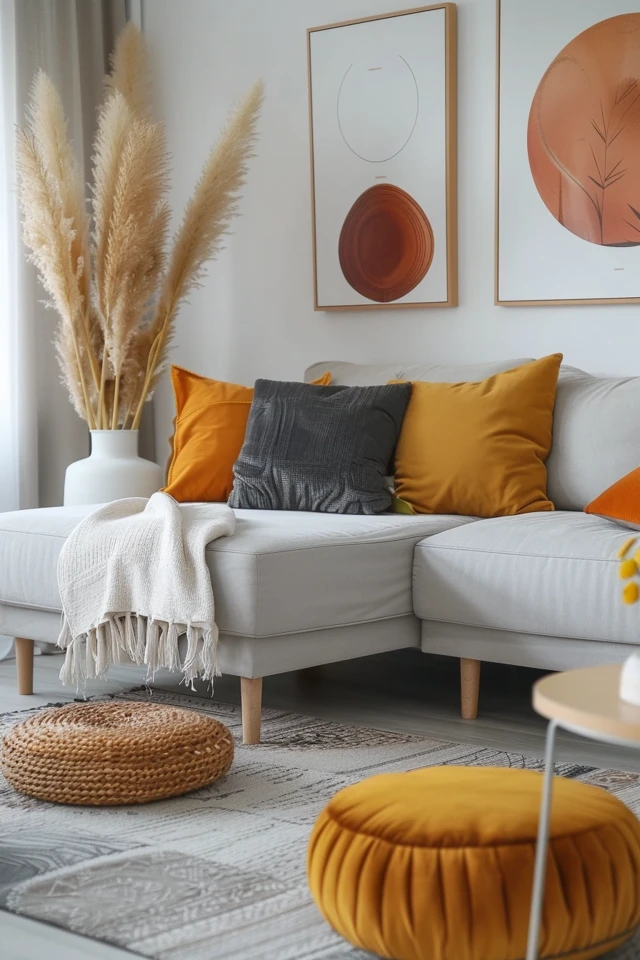
Designer’s Note: The Color Echo
To make the play corner feel like it belongs, use the “color echo” technique. Pick one dominant color from your main living room decor—say, the rust orange from your throw pillows—and repeat that color in the play corner. It could be the color of the kids’ chairs, a bin, or a detail in their rug. This repetition tricks the eye into seeing the two distinct zones as one cohesive space.
Final Checklist: What I’d Do in a Real Project
If I were hired to install a play corner in your living room tomorrow, this is the exact workflow I would follow. Use this to guide your own setup.
1. Audit and Edit
I would ask you to bring out every toy intended for the living room. We would cut that pile in half. We would select only the “open-ended” toys (blocks, magnets, art supplies) for the living room and banish large, loud, battery-operated plastic toys to the bedroom or basement.
2. Tape it Out
I would use painter’s tape to mark the floor where the furniture will go. I would check the walkways. If I can’t walk past the play table while carrying a laundry basket, the table is too big or in the wrong spot.
3. Anchor with a Rug
I would select a rug that contrasts slightly with the main floor but coordinates with the main area rug. I would secure it with a heavy-duty rug pad to prevent slipping during active play.
4. Install “Hiding” Spots
I would place a low storage unit with doors. Inside, I would use clear bins labeled with pictures (for non-readers) so the child knows exactly where the cars go. The doors would close at the end of the night, restoring the adult atmosphere.
5. Style the Surface
On top of the toy storage unit, I would place a lamp, a plant (faux if necessary), and a stack of coffee table books. This reclaims the surface for the adults and prevents the “toy creep” from taking over the vertical planes.
FAQs
How do I create a play corner in a very small apartment?
In small spaces, you must use multifunctional furniture. Swap your coffee table for a large storage ottoman. Inside, you can store games and toys. When it’s play time, the top flips over or the ottoman pushes aside. Also, utilize the back of doors; an over-the-door organizer can hold art supplies or small figures without taking up any floor space.
What if I have children of different ages sharing the nook?
Use height as your divider. Store the toddler-safe toys in bottom drawers or baskets on the floor. Install floating shelves higher up (at least 48 inches off the ground) for the older child’s Lego sets or intricate art projects. This protects the big kid’s work from the little kid’s destruction.
How do I protect my walls from art mishaps?
If you are renting or just cautious, install a sheet of clear acrylic on the wall behind the art table. It looks modern and invisible but acts as a splash guard. Alternatively, use scrubbable wallpaper on just that one wall to create an accent feature that doubles as protection.
My kid pulls everything out at once. How do I stop this?
This is usually a symptom of deep bins where toys get lost at the bottom. Kids dump the bin to see what is inside. Switch to shallow trays or clear containers. Also, implement a “toy rotation.” Keep only 20% of the toys out in the living room and store the rest in a closet. Swap them every two weeks. It reduces mess and keeps the toys feeling fresh and exciting.
Conclusion
Designing a creative play corner in your living room is about respecting the needs of everyone who lives in the house. It is a rejection of the idea that you must wait until your children leave for college to have a beautiful home. By prioritizing closed storage, durable materials, and smart layouts, you can create a space that feels curated and calm, even when the blocks are out.
Remember that this space will evolve. The low table you buy for a toddler today might become a plant stand or a side table in five years. Invest in quality pieces, stick to your color palette, and don’t be afraid to let the design facilitate the fun.
Picture Gallery


