
Creative Record Painting Ideas to Inspire You
There is something inherently sculptural about a vinyl record. The glossy black finish, the circular symmetry, and the distinct texture of the grooves make it a fascinating canvas for art. As an interior designer, I often look for ways to bring texture and history into a space without spending a fortune, and upcycled vinyl art is a perfect solution for that specific design craving.
However, painting on vinyl isn’t quite the same as painting on canvas or paper. The surface is slick, the material is prone to warping if mishandled, and the circular shape demands a different compositional approach. Whether you are looking to create a retro-inspired gallery wall or a single statement piece for a shelving unit, the technique matters just as much as the artistic vision.
In this guide, I will walk you through the professional approach to record painting, from surface preparation to the final installation rules I use in client homes. If you are looking for visual examples to spark your creativity, make sure to check out the extensive Picture Gallery at the end of this blog post.
1. Sourcing and Preparing Your Canvas
Before we touch a paintbrush, we have to talk about the vinyl itself. In the design world, the success of a finish depends entirely on the preparation of the substrate. Vinyl is plastic, and plastic is notoriously difficult for paint to adhere to without the right groundwork.
First, please ensure you are not painting over a valuable collector’s item. I recommend sourcing records from the “dollar bin” at local record stores, thrift shops, or garage sales. Look for records that are already scratched or unplayable; this gives the object a second life rather than destroying a piece of musical history.
Once you have your records, cleaning is non-negotiable. Vinyl carries oils from fingerprints and dust deep in the grooves that will cause your paint to bubble or peel later.
Designer’s Note: The Cleaning Protocol
In my studio, we never skip the alcohol wipe-down. Use a lint-free microfiber cloth and 90% Isopropyl alcohol. Wipe in a circular motion following the grooves to lift every bit of grease. Allow it to air dry completely for at least 15 minutes before priming.
The Priming Process
You cannot use standard acrylic paint directly on slick vinyl and expect it to last. You need a mechanical bond. I suggest lightly scuffing the surface (avoiding the center label) with high-grit sandpaper, around 220-grit. You aren’t trying to remove the grooves, just taking off the shine.
After sanding and wiping away the dust, apply a spray primer designed for plastic. A flat white primer works best if you plan on painting bright colors, as the black vinyl will naturally dull your pigments. If you want the grooves to show through as part of the design, clear gesso is an excellent alternative that provides “tooth” for the paint without hiding the black base.
2. Design Concepts and Composition Strategies
Designing for a circle is challenging because your eye is naturally drawn to the center point. Unlike a rectangular canvas where we use the rule of thirds, a circular canvas requires radial balance or intentional asymmetry. When I incorporate record art into a room, I usually stick to one of three design aesthetics to ensure it looks high-end rather than like a craft project.
The Geometric Minimalist
This style suits Mid-Century Modern or Scandinavian interiors. Use masking tape to block off sharp, angular sections of the record. Leave some of the raw black vinyl exposed to create negative space.
Contrast is key here. If your room features warm wood tones (like walnut or oak), opt for cool tones on the record like slate blue, sage green, or muted terracotta. The juxtaposition of the matte paint against the glossy exposed vinyl grooves adds a sophisticated texture that looks expensive.
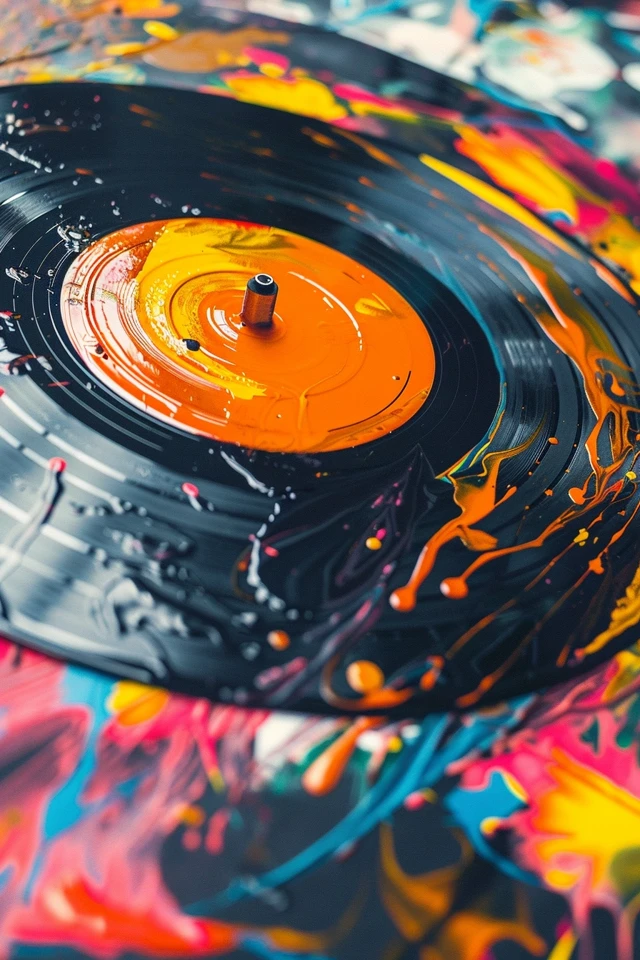
The Organic Pour
Acrylic pouring remains popular because the organic, fluid movement mimics natural stone or marble. This works beautifully in Bohemian or Eclectic spaces. The spinning motion of a record player (if you have an old, broken one) can actually be used to spin-art the paint, creating perfect centrifugal designs.
However, be careful with paint thickness. If the paint is too thick, it will crack as it dries because vinyl is somewhat flexible. Use a pouring medium mixed with your acrylics to keep the paint flexible and self-leveling.
The Landscape Portal
Using the circle as a “porthole” view into a landscape is a classic technique. Paint a mountain range, a desert sunset, or a seascape across the bottom two-thirds of the record.
Keep the horizon line low (about 30% up from the bottom) to make the image feel vast. If you paint the horizon right through the center hole, the image will feel cut in half and static.
Common Mistakes + Fixes
- Mistake: Ignoring the center label.
- Fix: Either tape it off perfectly with a circle cutter and painter’s tape to preserve the vintage typography, or paint over it entirely. A half-painted label looks messy.
- Mistake: Using heavy brushstrokes.
- Fix: Use soft, synthetic brushes. Vinyl has grooves, and stiff bristles will flick paint unpredictably. Thin layers are better than one thick coat.
3. Color Theory and Palette Selection
As a designer, I define the color palette before the brush hits the vinyl. Because records are small (usually 12 inches in diameter), they work best as accents. They should pull from the secondary or tertiary colors of your room’s existing palette.
The 60-30-10 Rule Application
In a room, 60% is your wall color, 30% is furniture, and 10% is accents. Your painted records fall into that 10% category. If your living room is neutral (cream/beige) with a navy sofa, your records should incorporate that navy but also introduce a “punch” color, like mustard yellow or burnt orange.
Metallic Accents
I love using gold or copper leaf on vinyl records. The metallic sheen catches the light differently than the plastic grooves. You can apply gold leaf to just the outer rim or use a gold paint pen to trace specific groove lines for a hypnotic spiral effect.
If you are painting a set of three or four records to hang together, do not paint them all identical. Instead, use a “cousin” approach. Use the same three colors on all records, but change the dominance of the colors. Record A is mostly blue with gold accents; Record B is mostly gold with blue accents. This creates cohesion without repetition.
4. Professional Mounting and Display
You have painted a beautiful set of records. Now, how do you get them on the wall without them looking cheap? This is where many DIY projects fail. Taping a record to the wall with poster putty is not an option if you want a polished look.
Framing for Elevation
The most high-end way to display painted vinyl is in a purpose-built record frame. These are typically 12.5 x 12.5 inches. Framing the work turns it into legitimate art. The glass protects the paint from dust, and the frame adds visual weight, making the artwork feel substantial.
If you prefer the frameless look to see the texture, use a “record prop” or a floating vinyl mount. These are small plastic or wooden hubs that screw into the wall; the record creates a friction fit over the spindle. It creates a shadow line behind the record, making it float about an inch off the wall.
The Gallery Wall Grid
For a modern, organized aesthetic, hang painted records in a tight grid. A 3×3 grid (9 records total) creates a massive visual impact that can replace a large canvas or mirror.
What I’d do in a real project (The Measurements):
- Spacing: For a grid, keep the space between records tight. I recommend 2 to 3 inches maximum between the edges of the records. Too much space makes them look like floating polka dots.
- Height: The center of your grouping should be at eye level, which is roughly 57 to 60 inches from the floor.
- Furniture Relation: If hanging above a sofa, ensure the bottom of the lowest record is 6 to 8 inches above the top of the sofa back.
The Organic Cloud
If a grid feels too rigid, arrange the records in an organic “cloud” formation. This works well in stairwells or hallways. Start with a central cluster and have them spread out as they move toward the ceiling. Mix 12-inch LPs with 7-inch singles to vary the scale. This variation in size is crucial for organic layouts; it keeps the eye moving.
5. Sealing and Longevity
Interior design is not just about aesthetics; it is about durability. A painted record is a dust magnet. If you try to dust unsealed acrylic paint with a cloth, the texture of the paint will grab the lint, or you might scratch the surface.
The Varnish Step
Once your painting is fully cured (give it 24 to 48 hours), you must seal it. I recommend a spray-on polyacrylic varnish rather than a brush-on type. Brushing varnish over the grooves can cause it to pool, creating unsightly white hazy spots.
Matte vs. Gloss
The finish you choose changes the vibe entirely.
- High Gloss: Mimics the original look of vinyl. It makes colors pop and look “wet.” Best for modern, pop-art styles.
- Matte/Flat: Removes all reflection. This makes the art look velvety and rich. I prefer matte finishes for intricate designs because glare won’t obscure the details.
- Satin: The middle ground. It has a slight sheen but isn’t mirror-like.
Environmental Considerations
Vinyl is sensitive to heat. Never hang painted records in direct sunlight or above a working radiator or fireplace. The heat will cause the vinyl to warp and wave, ruining both the record and your painting. If you are decorating a sunroom, keep the records on the shaded wall.
Final Checklist: The Designer’s Approach
Before you hammer that nail or apply that brushstroke, run through this mental checklist to ensure professional results.
1. The Prep Check
- Did you clean with alcohol?
- Did you lightly sand the surface?
- Is the center label protected or planned for?
2. The Design Check
- Does the color palette relate to the room’s existing decor?
- Have you decided on a matte or gloss finish?
- If doing a set, do they look cohesive together?
3. The Install Check
- Are you avoiding direct sunlight/heat sources?
- Do you have the right hardware (floating mounts or frames)?
- Is the center of the display at 57-60 inches from the floor?
FAQs
Can I still play the record after painting it?
No. Painting a record fills the grooves with acrylic, rendering it completely unplayable. The needle of a turntable would be destroyed instantly if it tried to track over dried paint. Only paint records that are already scratched or that you do not intend to listen to again.
What is the best paint for vinyl records?
High-quality fluid acrylics are the industry standard. Heavy body acrylics can be used for texture, but fluid acrylics settle better into the grooves. Do not use oil paints; they take weeks to dry and may react poorly with the plastic over time. Posca paint pens are also excellent for detailed line work.
How do I hang a record without putting holes in the wall?
If you are renting and cannot use screws, use heavy-duty command strips. However, do not apply the strip directly to the record, as it might not adhere well to the grooves. Apply a piece of painter’s tape to the back of the record first, superglue a flat mounting block or a soda tab to that, and then use the adhesive strip on the block.
How do I clean a painted record?
If you sealed it properly with varnish, you can dust it with a dry microfiber cloth or a feather duster. Do not use water or chemical cleaners, as they can cloud the varnish over time.
Conclusion
Painting vinyl records is a fantastic intersection of music appreciation and visual art. It allows you to introduce circular forms, bold colors, and unique textures into your home decor for a very low cost. However, the difference between a craft project and a design element lies in the execution.
By taking the time to prep the surface, choosing a palette that compliments your interior, and mounting the finished pieces with proper spacing and hardware, you elevate humble plastic discs into sophisticated wall sculpture. Whether you choose a rigid geometric grid or a flowing organic pour, the result is a personalized stamp on your living space that tells a story.
Picture Gallery


