
Self Serve Bar – Creative Ideas for Your Next Party
Hosting a party often feels like a balancing act between socializing and servicing. As an interior designer, I see clients struggle with this constantly. They build beautiful entertaining spaces but end up stuck behind the counter mixing drinks while their guests mingle without them.
The solution is not just hiring a bartender, but designing a functional, stylish self-serve bar station. This approach allows you to join the conversation and empowers guests to customize their drinks exactly how they like them. It turns the act of getting a beverage into an interactive experience rather than a transaction.
We are going to cover the logistics of flow, the aesthetics of styling, and the practical measurements you need to make this work. For those who want to jump straight to the visuals, please note that the Picture Gallery is at the end of the blog post.
1. Designing the Layout and Traffic Flow
The most common failure point in any home event is the “bottleneck.” If you place your bar station in a dead-end corner, you create a traffic jam that isolates guests from the main party.
In my design practice, I apply the “loop rule” to drink stations. You want to position the bar so that guests can approach it, make their drink, and exit in a different direction than they arrived. This keeps the room moving.
Ideally, you should place a self-serve bar on a kitchen island, a floating console table, or a round table in the center of a foyer. If you must use a wall-facing sideboard, ensure there is at least 48 inches of clearance behind the person standing at the bar to allow others to walk past comfortably.
Designer’s Note: The 30-Inch Buffer
When planning your layout, avoid placing the bar immediately next to the food. I typically recommend a minimum of 30 inches between a food station and a drink station, though 5 to 6 feet is better.
Why separates them? Food lines move slowly as people browse. Drink lines move quickly once the glass is in hand. Combining them creates frustration. By separating them, you encourage movement across the room, which makes the party feel fuller and more dynamic.
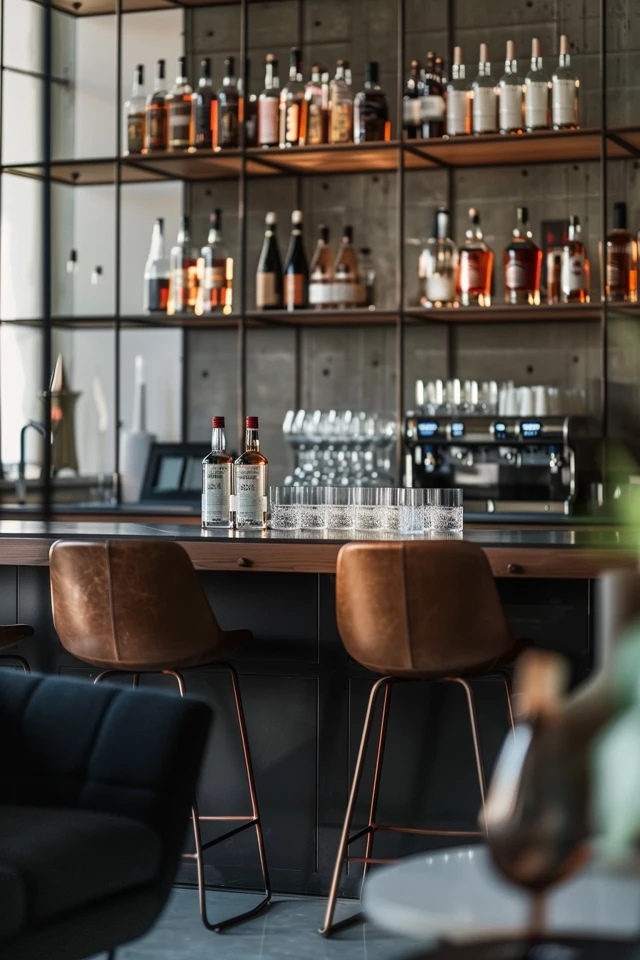
2. Selecting the Right Surface and Height
Not all furniture is created equal when it comes to mixing drinks. The standard height for a kitchen counter is 36 inches, while a standard bar height is 42 inches. Dining tables sit lower at 30 inches.
For a self-serve bar, 36 to 40 inches is the ergonomic sweet spot. It allows guests to pour and mix without hunching over. If you are using a dining table (30 inches), I strongly suggest using sturdy risers or thick butcher block slabs to elevate the actual workspace.
Surface Protection Strategies
Alcohol, citrus, and ice are the enemies of natural wood and porous stone. If you are using an antique sideboard or a marble console, protection is mandatory.
- Use a thick runner: Choose a heavy linen or vinyl runner that absorbs condensation. Avoid sheer fabrics that let moisture seep through immediately.
- Trays are your best friend: Grouping bottles and mixers on large trays creates a “spill zone.” If a guest over-pours, the mess is contained within the tray rather than ruining your finish.
- Glass tops: For clients who entertain frequently, I often have a piece of tempered glass cut to fit the top of their buffet. It is invisible protection that wipes clean instantly.
3. Zoning Your Station for Functionality
A self-serve bar works best when it follows a logical assembly line. If you scatter ingredients randomly, guests will cross over each other, knocking over bottles and slowing down the process.
Think of the station reading from left to right (or right to left, depending on traffic flow). The sequence should mimic the order of operations for building a drink.
The “Assembly Line” Logic
- Glassware: This must be the first stopping point.
- Ice: Place the ice bucket or cooler immediately after the glasses.
- Spirits: The base alcohol comes next.
- Mixers: Sodas, juices, and tonics follow the spirits.
- Garnish and Tools: Citrus slices, olives, stirrers, and napkins go at the very end.
Common Mistakes + Fixes
Mistake: Placing the ice bucket in the center of the table.
Fix: Move the ice to the start or end of the line. When ice is in the center, guests reach over open bottles to get to it, increasing the risk of knocking things over with their sleeves.
Mistake: Putting the trash can in the kitchen.
Fix: Place a small, discreet bin directly under or next to the bar. Guests will not walk to the kitchen to toss a lime wedge; they will leave it on your nice table if a bin isn’t visible.
4. Lighting and Ambiance
Lighting is the element that transitions a drink station from “utility” to “design feature.” Overhead recessed lighting is often too harsh for a party atmosphere, casting unflattering shadows on guests.
I always recommend layering light at the bar level. This draws the eye to the station and makes the liquids and glassware sparkle, which looks incredibly inviting.
Cordless Table Lamps
The biggest revolution in event styling recently is the high-quality rechargeable LED table lamp. You no longer need to worry about taping extension cords to the floor—a major tripping hazard.
Place one or two small cordless lamps on the bar surface. Choose a warm color temperature (2700K to 3000K). This creates an intimate glow that highlights the workspace without ruining the mood lighting of the room.
Using Height and Visual Weight
A flat table looks boring. To make your bar look professionally styled, you need vertical variation.
- Tall florals: Place a tall, narrow vase with greenery at the back corner of the station. Keep the footprint small so it doesn’t eat up prep space.
- Elevated garnishes: Use cake stands or tiered serving platters to hold garnishes. This saves table space and adds visual interest.
- Bottle tiers: If you have a deep console, use acrylic or wood risers (like spice steps) for the back row of bottles. This makes labels readable and accessible.
5. Outdoor and Landscape Considerations
When moving the self-serve bar outside, the rules change slightly. The landscape introduces variables like uneven ground, wind, and pests.
If you are setting up on a lawn, do not use a bar cart with small wheels; it will sink into the grass and become unstable. Instead, look for a heavy teak table or a station placed on a paved patio or deck.
Wind and Safety
Paper napkins and lightweight plastic cups are a disaster outdoors. Even a light breeze will scatter them across your yard.
What I do in real projects:
- Weighted napkin holders: Use a holder with a heavy arm, or place a clean, decorative stone on top of the napkin stack.
- Heavy glassware: Use heavy-bottomed acrylic glasses or weighted glass tumblers. Stemware is risky outdoors as it tips over easily on patio pavers or decking gaps.
- Covered pitchers: Use carafes with lids or stopper tops to keep insects out of the sugary mixers.
The Cooler Dilemma
Standard plastic coolers ruin the aesthetic of a styled event. For landscape parties, I prefer galvanized steel tubs or stone troughs.
If you use a non-insulated metal tub, keep in mind that it will sweat (condensate) heavily in the heat. Never place a metal ice tub directly on a wooden deck or teak table without a waterproof tray underneath, as the water ring can cause permanent staining.
6. Curating the Menu for Self-Service
The paradox of choice is real. If you put out twenty different bottles of liquor, guests will be overwhelmed, and you will spend a fortune. A curated self-serve bar is chicer and easier to manage.
I recommend the “3-2-1 Rule” for a balanced but manageable setup:
- 3 Spirits: One clear (vodka or gin), one dark (bourbon or dark rum), and one specialty (tequila or scotch).
- 2 Mixers: One carbonated (club soda or tonic) and one fresh juice (lemonade or grapefruit).
- 1 Signature Batched Drink: A pre-mixed punch or cocktail in a dispenser for those who don’t want to mix their own.
This limitation helps you style the bar better. You can decant mixers into matching glass carafes for a cohesive look, rather than having a clutter of plastic store-bought bottles.
Decanting and Labeling
As a designer, I love the look of uniform bottles. However, you must prioritize safety and clarity. If you decant spirits or mixers into clear glass bottles, you must label them clearly.
Use simple hang tags or handwritten labels. Not only does this look charming, but it prevents a guest with a citrus allergy from accidentally pouring grapefruit juice instead of cranberry.
Final Checklist: What I’d Do in a Real Project
Before your first guest arrives, run through this designer-approved checklist to ensure your station is foolproof.
- The Shake Test: Bump the table lightly. Does anything rattle or wobble? If so, shim the legs or rearrange unstable bottles.
- The Reach Test: Stand in the “guest” position. Can you reach the ice and the garnish without your sleeve dragging through the drink prep area?
- Lighting Check: Dim the main room lights to party levels. Is the bar station bright enough to read labels? If not, add a lamp.
- Stock Backup: Do you have extra ice and bottles hidden nearby (e.g., in a cabinet or cooler under the table) so you can restock without running to the kitchen?
- Tools Count: Do you have at least two bottle openers and two sets of tongs? These items have a habit of wandering off.
- Hydration Station: Have you included a dispenser of plain water? This is crucial for pacing and hospitality.
FAQs
How much ice do I actually need?
The rule of thumb is 1 pound of ice per person for the night. This covers chilling bottles and filling glasses. If you are serving primarily cocktails, bump it up to 1.5 pounds per person. Always buy more than you think you need; running out of ice ends the party.
Can I do a self-serve bar in a small apartment?
Absolutely. In small spaces, verticality is key. Use a bookshelf. Clear off two shelves at waist/chest height. Use the lower shelf for heavy bottles and ice, and the upper shelf for glassware and lighter items. Just ensure the bookshelf is anchored to the wall.
How do I keep the bar looking clean during the party?
This is the host’s main job. Every 45 minutes, do a “sweep.” Wipe down the surface, remove empty glasses, and replenish garnishes. A messy bar discourages guests from using it. Keeping a small microfiber cloth hidden in a drawer nearby is very helpful.
What about non-drinkers?
An inclusive host always provides options. Include non-alcoholic spirits or interesting sodas (like ginger beer or elderflower pressé) on the main bar. Do not relegate non-drinkers to the kitchen tap. Treat the zero-proof options with the same styling and glassware as the alcohol.
Conclusion
Creating a self-serve bar is about more than just convenience; it is a design opportunity. It creates a focal point in the room, encourages movement, and facilitates conversation. By paying attention to the flow, protecting your surfaces, and curating your selection, you elevate the entire guest experience.
Remember that the goal is to make your guests feel taken care of, even when you aren’t physically pouring the drink. A well-stocked, well-lit, and logically organized station says, “Welcome, help yourself, and stay a while.”
Picture Gallery


