
Creative Shoe Display Ideas for Retail Spaces
Walking into a retail store should feel like entering a curated experience, not just a storage room for inventory. When it comes to footwear, the display is the bridge between a customer seeing a product and envisioning themselves wearing it out the door.
In the world of interior design, we treat shoes as sculptural objects. Because they are three-dimensional and vary wildly in texture—from buttery suede to high-gloss patent leather—how you light, height, and group them dictates the perceived value of your entire brand.
At-a-Glance: Key Takeaways for High-Impact Displays
- The Power of Eye Level: Most sales happen between 3 feet and 6 feet from the floor. Use this “strike zone” for your high-margin items or newest arrivals.
- Lighting is Non-Negotiable: Use a mix of ambient and task lighting. Integrated LED strips on shelves prevent the “shadow cave” effect on lower levels.
- Negative Space: Don’t crowd the shelves. Leaving 4 to 6 inches of breathing room between pairs signals luxury and quality.
- Variable Heights: Use risers to create a skyline effect. This keeps the eye moving and prevents the display from looking like a flat, boring line.
- Function First: Always provide seating within 5 feet of any major display. If they can’t try it on easily, they won’t buy it.
What This Style Means (and Who It’s For)
Creative shoe displays are for any retailer who wants to differentiate themselves in a crowded market. Whether you run a high-end boutique or a rugged outdoor boot shop, your display strategy tells the story of your brand’s lifestyle.
For luxury retailers, this means minimalist shelving, premium materials like marble or brass, and a “less is more” philosophy. Here, each shoe is treated like a museum artifact. The customer is meant to linger and admire the craftsmanship.
For streetwear and sneaker shops, the energy is different. The style involves industrial materials, vibrant colors, and dynamic layouts. It’s about the “drop culture” and creating a sense of urgency and community. The display should feel accessible and high-energy.
If you are a multi-brand department store, your display strategy is about navigation and clarity. You need a modular system that can be reorganized quickly as seasons change. This style is for the retailer who values agility without sacrificing the aesthetic appeal of the space.
The Signature Look: Ingredients That Make It Work
Every successful shoe display relies on a few core ingredients that work together to create a cohesive look. When I’m designing a retail space, I look at these four elements: materiality, lighting, geometry, and accessibility.
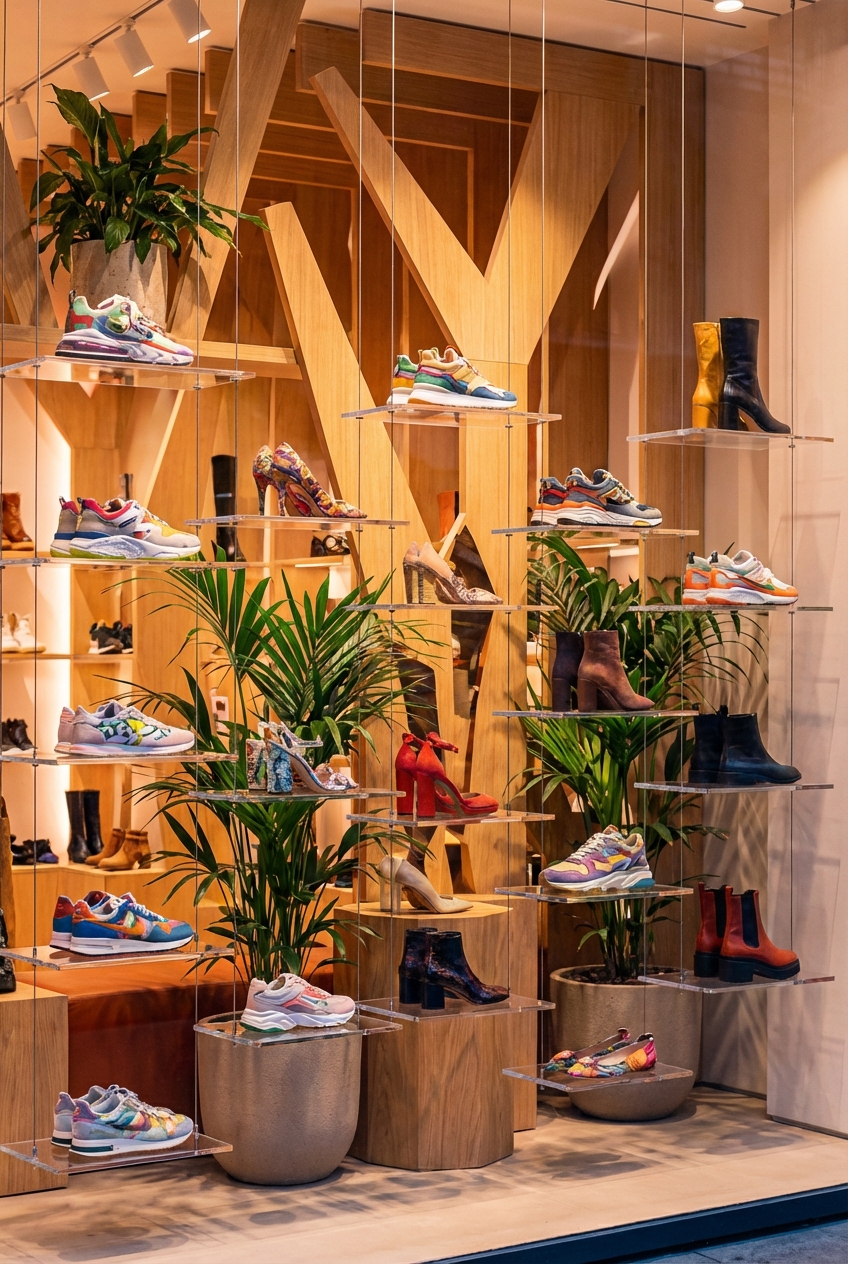
Materiality sets the tone. Using raw concrete floors paired with warm oak shelving creates a “warm industrial” vibe that is very popular right now. Metal accents, such as brushed gold or matte black iron, provide a frame for the products, making them pop against the background.
Lighting is the most overlooked ingredient. You want a Color Rendering Index (CRI) of 90 or higher. This ensures that the deep navy blue of a loafer doesn’t look like black under the store lights. I prefer 3000K to 3500K for a warm, inviting glow that mimics natural daylight.
Geometry refers to the shapes used in your shelving. Using repeated arches or circular niches can break up the hard lines of a square room. These curves naturally draw the eye toward the center of the display, which is exactly where you want the customer to look.
Accessibility ensures that the display isn’t just a pretty picture. The shoes should be easy to reach without a salesperson’s help, yet displayed in a way that feels intentional. Using “angled” shelves—where the shoe is tilted toward the customer—is a classic retail trick that shows off the top and side profiles simultaneously.
Layout & Proportions (Designer Rules of Thumb)
In retail design, measurements aren’t just suggestions; they are the difference between a functional space and a frustrated customer. Here are the specific rules of thumb I use for shoe displays.
The “Eye-Level is Buy-Level” Rule: Place your most important products between 48 inches and 66 inches from the floor. This is the natural resting point for the human gaze. Anything below 18 inches is often overlooked unless it is specifically highlighted with floor-level spot lighting.
Shelf Spacing: For standard shoes (flats, sneakers, loafers), allow for 10 to 12 inches of vertical space between shelves. For boots, you’ll need 18 to 24 inches. If you use adjustable shelving tracks, you can pivot between these measurements as the seasons change from summer sandals to winter boots.
Aisle Widths: To maintain a premium feel and meet ADA (Americans with Disabilities Act) requirements, your main aisles should be at least 48 inches wide. This allows two people to pass each other comfortably and provides enough space for someone in a wheelchair to navigate the displays.
Seating Proportions: Benches or ottomans should be 17 to 19 inches high. This is the standard “chair height” that makes it easy for adults to sit down and stand up. Ensure there is at least 36 inches of clear floor space in front of the seating so people can stretch their legs while trying on shoes.
Mirror Placement: Floor mirrors should be tilted slightly back (about 5 degrees). This creates a more flattering angle for the customer. I recommend mirrors that are at least 30 inches tall to ensure the customer can see the shoes in the context of their full outfit from the waist down.
Designer’s Note: A Real-World Lesson
In one of my early retail projects, we installed beautiful, floating glass shelves along a 20-foot wall. They looked stunning when empty. However, once we loaded them with heavy leather boots, the shelves began to bow slightly in the center. Even a 1/8-inch sag is visible to the human eye and makes the whole store look “cheap.”
The Lesson: Never underestimate the weight of footwear, especially when grouped. Always ensure your shelf brackets are rated for at least double the weight you expect. For spans longer than 3 feet, use a center support or a thicker shelf material (at least 3/4-inch for wood or 1/2-inch for tempered glass).
Step-by-Step: How to Recreate This Look
- Audit Your Inventory: Categorize your shoes by height and style. You need to know how many “high-rise” slots (for boots) and “low-rise” slots (for sneakers) you actually need before buying shelving.
- Define Your Focal Point: Choose one wall or a central “island” to be your hero display. This is where you will use your most expensive materials and best lighting.
- Install Vertical Supports: Whether you’re using wall-mounted tracks or custom-built cabinetry, ensure your supports are anchored into studs. In a retail environment, customers often lean on shelves, so they must be rock-solid.
- Add Integrated Lighting: Run LED tape lights along the front underside of each shelf. Use a diffuser cover so you don’t see the individual “dots” of the LEDs. This creates a high-end, seamless glow.
- Layer in Your Textures: If your shelves are hard (metal or glass), add soft elements nearby. A plush rug or a velvet-topped ottoman balances the “hard” edges of the shoe displays.
- Place the Product: Start with your “anchor” pairs at eye level. Work outward and downward. Use the “rule of three”—group items in threes with varying heights to create visual interest.
- The Mirror Test: Place mirrors at the end of every display aisle. Check the angles from the seated position to ensure the lighting doesn’t cause a glare that blinds the customer when they look down.
Budget Breakdown: Low / Mid / Splurge
Low Budget (The DIY/Boutique Start-up): Use industrial plumbing pipes and reclaimed wood for shelving. This creates a rugged, “found” aesthetic that works well for boots or casual wear. Use “puck lights” that are battery-operated if hard-wiring isn’t an option. Cost: $500–$1,500.
Mid-Range (The Modular Approach): Use high-quality modular systems like those found in professional showrooms. These offer adjustable metal brackets and finished wood shelves. You can include a few custom-built pedestals for the center of the floor. This provides a clean, professional look that is easy to update. Cost: $3,000–$7,000.
Splurge (The Luxury Custom Build): Think floor-to-ceiling custom millwork with integrated, recessed LED lighting and “smart” mirrors. Use premium materials like honed marble, brass inlays, and suede-lined shelving. Every shelf is custom-sized for the specific collection, and the seating is custom-upholstered furniture. Cost: $15,000+.
Common Mistakes (and How to Fix Them)
Mistake: Overcrowding the Shelves. When shoes are packed tight, they look like a clearance rack at a discount store.
The Fix: Apply the “one-hand” rule. You should be able to fit a flat hand comfortably between each shoe. If you have too much inventory, move the extras to the back room and rotate them weekly.
Mistake: Poor Bottom-Level Visibility. Shoes on the lowest shelf often sit in total darkness.
The Fix: Use an angled “kick” shelf at the bottom. By angling the bottom shelf upward at a 30-degree angle, you catch more ambient light and make the shoes more visible to a standing customer.
Mistake: Ignoring the “Walk Flow.” Putting a large display island right in front of the door creates a “bottleneck.”
The Fix: Leave at least 5 to 6 feet of “decompression space” at the entrance. Let the customer enter the store and orient themselves before they hit the first display.
Mistake: Distracting Backgrounds. Using busy wallpaper or bright colors behind the shoes can make the product disappear.
The Fix: Keep the back panel of your shelving neutral. Use textures (like grasscloth or micro-cement) rather than patterns. The goal is to make the shoe the star, not the wall.
Room-by-Room (or Zone-by-Zone) Variations
In a larger retail space, you should vary the display style based on the type of shoe being sold. This helps with wayfinding and creates different “moods” throughout the store.
The Athletic Zone: Focus on movement. Use perforated metal backdrops that mimic gym lockers or sports mesh. Floating “gravity” displays, where shoes appear to hover via thin acrylic stands, work exceptionally well for high-tech sneakers.
The Formal/Luxury Zone: This should feel like a private walk-in closet. Use warm wood tones, soft carpeting, and individual “niches” for each pair of shoes. Low-slung, comfortable armchairs are essential here, as the sales process is usually slower and more consultative.
The Boot/Rugged Zone: Use heavy, “honest” materials. Think thick oak slabs, blackened steel, and brick. You can even use creative props like vintage suitcases or wooden crates to reinforce the “adventure” theme of the footwear.
The Kids’ Corner: Durability and height are key. Displays should be lower to the ground (2 feet to 4 feet) so kids can interact with them. Use bright, primary colors and rounded edges on all furniture to ensure safety. Include “fun” seating, like animal-shaped stools, to keep children occupied while they try on shoes.
What I’d Do in a Real Project: A Checklist
- Check the “Floor Mirror Coverage”: Is there a mirror within 3 steps of every display?
- Verify the “Sit Test”: Does the seating feel sturdy, or does it wobble? (Wobble = lack of trust).
- Test the “Reach”: Can a person of average height (5’4″) reach the top shelf without straining?
- Evaluate the “Shadows”: Turn on all store lights. Are there any dark spots on the merchandise?
- Scent and Sound: Ensure the display area smells like “clean leather” (not chemicals) and that the music is at a volume that allows for conversation.
- The “Touch Factor”: Are the shoes positioned so that the customer’s first instinct is to pick them up? (This is why we display one shoe of a pair, not both).
Finish & Styling Checklist
Once the shelves are up and the shoes are out, use this final checklist to polish the look:
- Stuffing: Ensure all shoes are properly stuffed with paper or have shoe trees. Floppy shoes look sad and cheap.
- Price Tags: Hide the price tags inside the shoe or on the bottom. Never have them dangling off the side where they distract from the design.
- Direction: Most shoes should face the same direction (usually toward the entrance). However, for a “hero” pair, turn one shoe to show the side and the other to show the heel or toe.
- Cleanliness: Use a microfiber cloth to wipe down glass shelves and acrylic risers every single morning. Fingerprints are the enemy of luxury.
- Greenery: Add a small, high-quality plant (like a Sansevieria) near the seating area to soften the space and improve air quality.
FAQs
How many shoes should I put on one shelf?
For a standard 3-foot shelf, 3 to 4 pairs is the limit for a premium look. If you are a high-volume “value” store, you can go up to 6 pairs, but the aesthetic will feel more cluttered.
Should I display both shoes or just one?
In most boutique settings, we display only the right shoe. This encourages the customer to ask a salesperson for the other shoe, which starts a conversation. It also keeps the displays cleaner and reduces the risk of theft.
What is the best material for shoe shelving?
Glass is great for modern looks and helps light travel downward. Wood is best for warmth and “luxury” vibes. Metal is the most durable for high-traffic areas. I often mix all three to create a layered, custom feel.
How do I handle “clearance” shoes without ruining the store’s vibe?
Never use a “dump bin.” Instead, dedicate a specific wall in the back of the store to “Last Pairs.” Keep the shelving consistent with the rest of the store, but perhaps increase the density of the shoes to signal that these are the remaining items.
Is carpet or hard flooring better for a shoe store?
I recommend a mix. Use hard flooring (luxury vinyl tile or polished concrete) for the main walkways because it’s easier to clean. Use inset “rug zones” or carpet under the seating and display areas to provide a soft surface for trying on shoes and to dampen the acoustics of the room.
Conclusion
Designing a shoe display is about more than just finding a place for products to sit. It is an exercise in psychology, lighting, and spatial awareness. By following these designer rules—focusing on eye-level placement, prioritizing high-quality lighting, and respecting the “breathing room” between items—you turn your retail space into a destination.
Remember that the goal of a great display is to make the customer feel something. Whether it’s the excitement of a new pair of sneakers or the sophistication of a handmade leather boot, your display is the stage upon which those feelings are built. Start with a solid layout, choose your materials wisely, and always, always keep your mirrors clean.
With a thoughtful approach to proportions and a keen eye for detail, your shoe displays can become one of your most powerful sales tools. Take the time to audit your space today and see where a few small adjustments in lighting or shelf height can make a massive difference in your store’s overall appeal.


