
Creative Toilet Divider Wall Ideas for Privacy
Designing a bathroom requires a delicate balance between openness and privacy. We often want that spa-like, airy atmosphere, but we also need practical separation for the toilet area.
I have walked into countless master bathrooms where the toilet is the first thing you see. This is a layout failure that kills the vibe of an otherwise beautiful space.
Fortunately, you do not need to build a fully enclosed water closet to solve this. If you are looking for visual inspiration, jump to our Picture Gallery at the end of this blog post.
1. The Pony Wall: A Classic Architectural Solution
The “pony wall,” or half-wall, is the most traditional solution for toilet privacy. It effectively blocks the toilet from view while sitting at the vanity or soaking in the tub.
However, it allows light to travel over the top, keeping the room feeling expansive. This is crucial in bathrooms that only have one window.
Determining the Right Height
In my projects, I usually specify a pony wall height between 42 and 48 inches. This height is sufficient to hide the tank and the seated user, but low enough to serve as a visual ledge.
If you go lower than 36 inches, you lose the privacy benefit. If you go higher than 60 inches, it starts to look like a mistake or an unfinished wall.
Material and Finish Details
Do not just leave the top of the pony wall as painted drywall. Moisture will eventually ruin it, and it is a dust magnet.
I always recommend capping the wall with the same material used on your vanity countertop, such as quartz or marble. This creates a cohesive look and provides a durable, wipeable surface.
You can also tile the entire wall to match your shower surround. This is a great way to integrate the toilet area into the wet zone visually.
2. Glass Partitions: Modern and Light-Enhancing
For a more contemporary look, glass partitions are my go-to recommendation. They provide a physical barrier without the visual weight of a solid wall.
This is particularly effective in small urban apartments or narrow bathroom layouts. The goal here is to blur the view, not block the light.
Fluted and Reeded Glass
Textured glass, specifically fluted or reeded varieties, is having a major moment in interior design. The vertical ridges distort the image behind the glass, offering excellent privacy while letting 100% of the light through.
From a maintenance perspective, the texture is usually on the outside face, while the inside face (near the toilet) is smooth for easy cleaning.
Frosted and Acid-Etched Glass
If you prefer a softer, more diffused look, acid-etched glass is a timeless choice. It has a velvet-like finish that is less prone to fingerprints than standard sandblasted glass.
For safety, ensure your contractor uses tempered glass. I generally specify a thickness of at least 3/8 inch or 1/2 inch to prevent wobbling.
The Steel Frame Look
Framing the glass in black steel or brass creates a strong architectural statement. This “Crittall” style works beautifully in industrial or modern farmhouse aesthetics.
Ensure the metal is powder-coated or treated for high-humidity environments to prevent rust over time.
3. Wood Slats and Vertical Screens
Bringing wood into the bathroom adds immediate warmth and spa-like character. A vertical slat wall acts as a semi-transparent veil.
It directs the eye upward, making low ceilings feel higher. It also provides a rhythmic texture that breaks up the monotony of tile and stone.
Spacing and Scale
The gap between the slats dictates the level of privacy. A standard rule of thumb is to use 1.5-inch wide slats with a 1-inch gap between them.
If the gaps are too wide, you lose the screening effect. If they are too narrow, cleaning between them becomes a nightmare.
Wood Species and Sealing
Wood in a bathroom is risky if not treated correctly. I recommend using Teak, Cedar, or White Oak sealed with a marine-grade matte varnish.
Avoid softwoods like pine, which can warp in humid conditions. If you want the look without the maintenance, look for aluminum slats wrapped in a wood-effect film.
4. Functional Storage Dividers
In smaller homes, every square inch counts. I love using the privacy divider as a storage opportunity.
Instead of a dead wall, we can build a floor-to-ceiling cabinet or an open shelving unit. This creates separation while housing extra toilet paper, towels, and toiletries.
The Open Shelving Approach
A bookcase-style divider allows you to style the shelves with rolled towels, plants, and baskets. This creates a curated vignette that distracts from the toilet behind it.
Ensure the unit is anchored securely to the floor and ceiling. A depth of 12 to 15 inches is usually sufficient for stability and storage utility.
The Pull-Out Cabinet
For maximum utility, consider a custom millwork piece that acts as a wall on one side and a pull-out pantry on the other. This completely hides the toilet and creates a dedicated linen closet.
This is a more expensive route, as it requires custom joinery, but the return on investment in functionality is huge.
5. Renter-Friendly and Budget Solutions
Not every privacy solution requires a contractor or a permit. There are several ways to create visual separation without permanent construction.
These are ideal for renters or homeowners who want to test a layout before committing to a renovation.
Folding Screens
A vintage or rattan folding screen is the easiest instant fix. It can be moved around as needed and adds a sculptural element to the room.
Look for screens with a height of at least 60 inches. Position it at an angle to ensure stability so it doesn’t tip over.
Plant Walls
A “living wall” is a beautiful way to obscure a toilet. You can achieve this with a row of tall, dense planters.
Sansevieria (Snake Plant) or a tall Ficus are great choices because they grow vertically and tolerate bathroom humidity well. Place them in a rectangular planter box that acts as the room divider.
Curtain Partitions
A ceiling-mounted curtain track is a soft, romantic way to divide a space. It allows you to close off the area completely when in use and open it up to maximize space later.
Use a heavy, mildew-resistant fabric. Outdoor fabrics (like Sunbrella) are excellent here because they resist moisture and are easy to clean.
Designer’s Note: The Lighting Trap
Here is a lesson I learned the hard way early in my career. When you build a divider wall, you often inadvertently block the light source for the toilet area.
I once designed a beautiful floor-to-ceiling slat wall, only to realize the toilet nook was pitch black because the main vanity light didn’t reach it.
The Fix: Treat the toilet nook as a micro-room. It needs its own recessed can light or a small wall sconce. Do not rely on “borrowed light” from the rest of the bathroom, especially if you are using solid or semi-solid dividers.
Common Mistakes + Fixes
Mistake: Ignoring Airflow
Building a divider that goes floor-to-ceiling without proper ventilation can trap odors and humidity.
Fix: Leave a gap at the top or bottom of the divider, or ensure there is an exhaust fan vent located specifically within the toilet zone.
Mistake: Violation of Clearance Codes
Placing the divider too close to the toilet makes the space feel claustrophobic and violates building codes.
Fix: The US standard requirement is a minimum of 15 inches from the center of the toilet to any side obstruction (wall or divider). This means you need a minimum 30-inch wide space, but I prefer 36 inches for comfort.
Mistake: Using Drywall in Splash Zones
If the divider is next to a tub or shower, standard drywall will rot.
Fix: Always use cement board (Durock) or green board for any partition wall in a bathroom, even if it isn’t inside the shower.
What I’d Do in a Real Project: A Checklist
When I am helping a client choose a divider, I run through this mental checklist to determine the best material and style.
1. Check the Clearance: Do I have 36 inches of width available? If no, I cannot build a thick wall. I must use a thin glass or metal screen.
2. Assess the Light: Is there a window in the toilet zone? If no, I must use translucent materials like fluted glass or open shelving.
3. Determine Storage Needs: Does the client lack linen storage? If yes, I will push for a millwork cabinet divider.
4. Check the Vibe: Is the room cold and tiled? If yes, I use wood slats to add warmth. Is the room busy? I use simple glass to keep it calm.
5. Verify Blocking: If we are hanging a heavy glass door or screen, is there solid wood blocking behind the drywall to screw into? (Always ask your contractor this).
Final Checklist for Your Project
Before you start building or buying, ensure you have ticked these boxes:
- Measured 15″ minimum from toilet center to the proposed divider location.
- Selected a material that can withstand high humidity.
- Planned for additional lighting inside the toilet nook.
- Determined if the divider needs to be anchored to the floor, wall, or ceiling.
- Considered how you will clean the floor around the base of the divider.
Frequently Asked Questions
How much does a custom glass divider cost?
A custom tempered glass partition with installation typically ranges from $800 to $2,500, depending on the glass type (fluted is more expensive) and the hardware finish.
Can I build a pony wall on top of existing tile?
Technically yes, but it is risky. Drilling into tile can crack it, and you cannot frame a sturdy wall without anchoring it to the subfloor. The professional method is to cut the tile, anchor the framing to the subfloor, and re-tile around it.
What is the best height for a privacy screen?
For seated privacy that still allows conversation or sightlines while standing, 48 inches is ideal. For full visual privacy, 66 inches or higher is recommended.
Does a toilet divider make a small bathroom look smaller?
It can if you use a solid, opaque wall. To avoid this, use materials that allow light to pass through, such as glass, open shelving, or widely spaced slats. Keeping the divider partial-height also helps preserve the sense of volume in the room.
Conclusion
Creating privacy for the toilet does not mean you have to sacrifice the beauty or flow of your bathroom. Whether you opt for a structural pony wall, a sleek glass partition, or a warm wood feature, the key is to respect the scale of the room.
Remember that the best design solutions solve functional problems while adding aesthetic value. A well-designed divider is not just a barrier; it is an architectural feature that elevates the entire space.
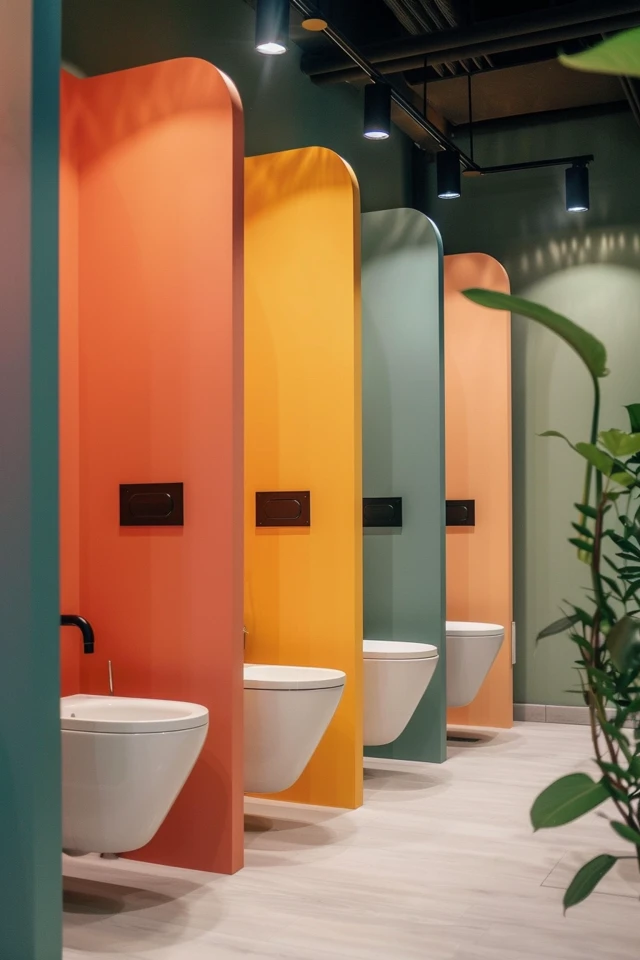
Picture Gallery


