
Creative Tray Ceiling Bedroom Paint Ideas
There is nothing quite like walking into a bedroom that feels completely finished, from the floorboards all the way up to the highest architectural detail. In my years of designing primary suites, I have found that the ceiling is the most underutilized surface in the home. This is especially true when a client is lucky enough to have a tray ceiling, yet they leave it painted the same standard flat white as the rest of the house.
A tray ceiling offers a built-in opportunity to add depth, character, and perceived height to a room without any major construction. It acts as an architectural frame that can define the sleeping area and set the mood for the entire space. If you are looking for visual inspiration, you can jump right to the Picture Gallery at the end of this blog post.
However, painting a tray ceiling requires more strategy than painting a flat wall. You have to consider the light sources, the ceiling height, and how the colors interact with your crown molding. In this guide, I will walk you through professional strategies to transform your bedroom using paint, lighting, and a bit of design theory.
1. Deconstructing the Tray: Anatomy and Preparation
Before we open a single can of paint, we need to understand the geography of your ceiling. A standard tray ceiling generally consists of three distinct parts: the center tray (the highest flat part), the riser (the vertical or angled slope connecting the levels), and the soffit (the lower border around the room’s perimeter).
In many builder-grade homes, these three elements are often painted one single color. This flattens the architecture and hides the detail you paid for. As a designer, my first goal is usually to separate these elements visually to highlight the depth.
The first decision you must make is where the “wall” ends and the “ceiling” begins. If you have crown molding, that usually acts as the natural divider. If you do not have molding, you will need to rely on precise painter’s tape lines to create crisp transitions between the soffit and the walls.
Designer’s Note: The Importance of the Riser
The riser is the trickiest part of the tray ceiling. In my projects, I often see homeowners paint the riser the same color as the walls to make the ceiling feel taller. While this is a valid strategy, it can sometimes make the tray look like a disconnected floating lid.
Common mistake + fix:
- Mistake: Painting the riser a dark color in a room with 8-foot ceilings. This creates a heavy, closing-in effect that feels claustrophobic.
- Fix: If your ceilings are under 9 feet, keep the riser light or the same color as the perimeter soffit. This blurs the line of the height change and makes the lift feel airier.
2. Color Placement Strategies for Drama and Height
Once you understand the anatomy, the fun begins with color placement. Paint can physically alter how large or intimate a bedroom feels. In a bedroom, we are usually balancing the desire for a spacious feel with the need for cozy intimacy.
The “Inverted Tray” Technique
One of my favorite methods for large primary bedrooms is painting the center tray a darker color than the rest of the room. This might sound counterintuitive because we are taught that dark colors shrink spaces. However, in a tray ceiling, a dark center (like charcoal, navy, or forest green) creates an infinite “night sky” effect.
When you look up, the dark color recedes visually, often making the ceiling feel higher rather than lower. This works best when you have a chandelier in the center. The dark background makes the crystals or metallic finishes of the light fixture pop, turning it into a piece of jewelry.
The Monochromatic Wrap
If you prefer a serene, spa-like atmosphere, avoid high-contrast transitions. Instead, paint the walls, the soffit, the riser, and the tray the exact same color. The distinction comes from the shadows created by the angles of the architecture.
To make this look intentional rather than unfinished, I recommend playing with saturation. You can ask your paint store to mix your wall color at 50% strength for the ceiling. This gives you a lighter version of your wall tone that coordinates perfectly without feeling heavy.
Real-World Project Tip
I recently worked on a bedroom that felt too large and cold. We painted the perimeter soffit and the walls a warm “Greige” (gray-beige). We then painted the riser and the center tray a deep, moody aubergine.
The result was an immediate sense of coziness. By bringing the “lid” down visually with a warm, dark color, the room felt like a hug. This is ideal for bedrooms where you want to prioritize sleep and relaxation over brightness.
3. Sheen and Finish: The Secret Design Weapon
Color is only half the battle; the sheen (or finish) of the paint is where the real professional magic happens. Most ceilings are painted in a “dead flat” finish. Flat paint is non-reflective, which is excellent for hiding bumps, uneven drywall seams, and imperfections.
However, a tray ceiling is a feature, not a utility surface. Using a different sheen can accentuate the architecture even if you stay within the same color family. A subtle shift in luster catches the light and draws the eye upward.
Satin or Eggshell for Soft Reflection
If your drywall is in good condition, consider using a satin or eggshell finish on the center tray. This slight sheen reflects the light from bedside lamps and overhead fixtures, creating a soft, ambient glow. It makes the room feel more dynamic than a flat, chalky finish.
High Gloss for the “Jewel Box” Effect
For the brave and bold, a high-gloss or lacquer finish on the center tray is a showstopper. It looks like glass or water and adds immense luxury to a bedroom. This is a look I often use in smaller city apartments to bounce light around and create the illusion of more space.
Crucial Warning: High gloss paint highlights every single flaw. A tiny bump in the drywall will look like a mountain under gloss paint.
What I’d do in a real project:
- Assess the surface: I shine a high-lumen flashlight across the ceiling (raking light). If I see waves or bumps, I veto high gloss immediately.
- The Level 5 Rule: To do gloss properly, you need a “Level 5” drywall finish. This involves skim-coating the entire surface to be perfectly smooth. If you are renting or on a budget, stick to flat or matte finishes.
4. Utilizing Trim and Molding
Paint does not exist in a vacuum; it interacts with your molding. Crown molding is the eyeliner of the room. It defines the shape and makes the paint colors pop. In a tray ceiling, you might have crown molding at the top of the wall (the soffit edge) and another layer of molding inside the tray itself.
Contrast vs. Blend
The traditional approach is to paint all trim a crisp semi-gloss white. This creates a hard stop between the wall color and the ceiling color. This is excellent for traditional, farmhouse, or transitional styles where you want to highlight the millwork.
However, for a more modern or moody look, I love painting the trim the same color as the walls or the ceiling. This is called “color drenching.” When the crown molding matches the paint, the room feels taller because the eye doesn’t get stopped by a white stripe. It creates a seamless vertical flow.
Metallic Accents
If you want to get creative without changing the main colors, consider painting just the thin strip of molding inside the tray with a metallic finish. A soft champagne gold or antique bronze stripe acts like a picture frame.
This is a subtle detail that people might not notice immediately, but it elevates the finish level of the room. It pairs beautifully with matching hardware on your nightstands or dresser.
5. Lighting Integration and Color Shifts
You cannot choose a paint color for a tray ceiling without considering your lighting plan. Because the tray creates angles, light hits the surfaces differently than it hits a flat wall. The riser will almost always appear darker than the center tray because it is vertical and often shadowed.
Cove Lighting Effects
Many tray ceilings have a ledge designed for rope lighting or LED strips (cove lighting). If you have this feature, the paint color inside the tray becomes a reflector. If you paint the tray a vibrant red, your cove lighting will turn the entire room pink.
I recommend sticking to neutral or cool tones inside a tray with cove lighting. Light grays, blues, and crisp whites allow the LED light to illuminate the room cleanly without casting weird tints on your skin or furniture.
Kelvin Temperature Matters
The “temperature” of your light bulbs will drastically change how your ceiling paint looks. This is measured in Kelvins (K).
- 2700K (Warm White): This is the standard for bedrooms. It casts a yellow/orange glow. It will make blue paint look slightly green and white paint look creamy.
- 3000K (Soft White): This is my preferred temperature for residential interiors. It is cleaner and whiter but not harsh. It renders paint colors more accurately.
- 4000K+ (Daylight): Avoid this in the bedroom. It is too blue and clinical, making the space feel like a hospital.
6. Common Mistakes to Avoid
Over the years, I have seen many DIY attempts at tray ceilings go wrong. Here are the pitfalls that usually lead to a repaint within a year.
Ignoring the “Fifth Wall” Scale
A common mistake is choosing a color that is too subtle. A shade that looks distinct on a small swatch often looks like white when painted on a massive ceiling that receives direct light. If you want contrast, go two shades darker than you think you need.
Choppy Transitions
Painting the soffit, riser, and tray three completely different colors creates a “bullseye” effect. It looks busy and distracts from the rest of the decor. Stick to a maximum of two colors for the ceiling assembly: one for the perimeter and one for the center.
Forgetting the Floor
Your ceiling color must talk to your rug or flooring. If you have warm honey-oak floors, a cool grey ceiling will clash. You need to carry the undertones from the ground up to the ceiling to sandwich the room design together.
Final Checklist: Executing Your Vision
Ready to paint? Here is the checklist I use for my project managers to ensure the job is done right.
Planning Phase
- Measure height: Confirm ceiling height to decide on riser color (Light for low ceilings, Dark for high ceilings).
- Inspect drywall: Check for imperfections. If the drywall is wavy, buy Flat paint. If it is glass-smooth, you can consider Satin or Semigloss.
- Swatch test: Paint large 12×12 inch squares on the ceiling, not just the walls. Look at them at night with the lamps on.
Prep Phase
- Protect the room: Drop cloths are non-negotiable. Ceiling paint splatters more than wall paint because of gravity.
- Tape lines: Use high-quality painter’s tape for the transitions between the soffit and riser. Press the tape edges down firmly with a putty knife to prevent bleeding.
- Cut in first: Paint the corners and angles (cutting in) before rolling the flat sections. This prevents “picture framing” marks.
The “What I’d Do” Summary
If I were designing a bedroom for a client today who wanted a cozy, elegant retreat, here is my go-to formula:
1. Paint the walls and the perimeter soffit a warm, mid-tone greige (like Benjamin Moore Revere Pewter).
2. Keep the crown molding a crisp, clean white to frame the space.
3. Paint the riser and the center tray a deep, desaturated navy or charcoal (like Hale Navy).
4. Use a “dead flat” finish on the dark ceiling to hide roller marks and create a velvety texture.
5. Install a brass chandelier to contrast against the dark paint.
FAQs
Can I paint a tray ceiling in a small bedroom?
Absolutely. In a small room, I recommend keeping the contrast low. A monochromatic look (where the ceiling is just a shade lighter or darker than the walls) adds interest without chopping up the visual space.
Should the ceiling fan match the paint?
If you have a standard ceiling fan that isn’t particularly stylish, try to match it to the ceiling color so it disappears. If you have a designer light fixture or a high-end wood fan, let it contrast so it stands out as a feature.
Does a dark ceiling make the room harder to light?
Yes, dark colors absorb light. If you paint the tray black or navy, you will lose some ambient light bounce. You may need to add table lamps or increase the wattage (lumens) of your bulbs to compensate.
How do I calculate paint for a tray ceiling?
Calculate the square footage of the flat center tray (Length x Width). Then, calculate the perimeter of the riser (Total length around x Height of the step). It is safer to buy 20% more paint than you think you need, as angular ceilings often require more touch-up work.
Conclusion
Treating your tray ceiling as a blank canvas is the quickest way to elevate the perceived value and comfort of your bedroom. Whether you choose a dramatic, moody contrast or a soft, light-reflecting satin finish, the key is intentionality. Don’t let the builder decide that your “fifth wall” should be boring white.
Remember to respect the architecture. Use color to highlight the layers, but use finish and sheen to hide the imperfections. By following the rules of scale, lighting, and preparation outlined here, you can turn an architectural detail into the room’s stunning focal point.
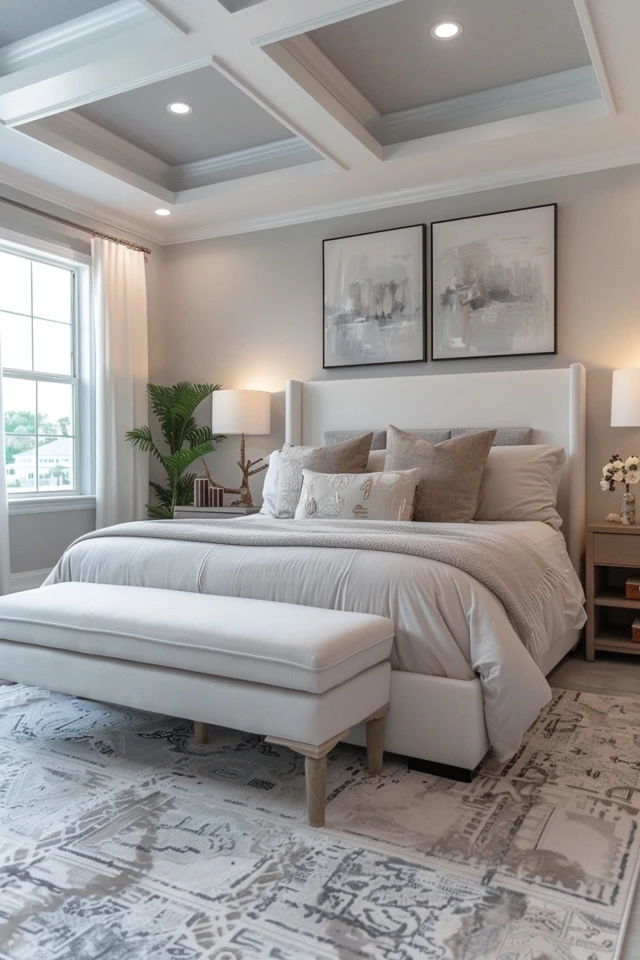
Picture Gallery


