
Creative Tree Branch Fence Ideas For Your Yard
There is something inherently grounding about using raw, organic materials in your landscape design. In a world dominated by vinyl panels and pressure-treated pine, a tree branch fence stands out as a sculptural element that feels like it grew right out of the earth.
I recently worked on a property where the homeowners felt their backyard was too “sterile” and disconnected from the surrounding woods. We decided to bypass the lumber yard and source local cedar branches to create a boundary that blurred the line between the manicured lawn and the wild forest. The result was not just a fence, but a conversation piece that completely transformed the energy of the space.
If you are looking for specific visual inspiration, make sure to check out the curated Picture Gallery at the end of the blog post.
Understanding Wood Selection and Preparation
Before you start digging post holes or collecting fallen limbs, you need to understand the material. Not all wood is created equal when it comes to outdoor longevity.
If you grab the wrong branches, your beautiful fence will rot or become a termite feast within two seasons. In professional landscape design, we prioritize rot-resistant hardwoods.
Black Locust, Cedar, Cypress, and Redwood are the gold standards for branch fencing. These woods contain natural oils and tannins that repel water and insects. If you must use softer woods like Pine or Fir, they will require significant sealing and maintenance.
Designer’s Note: The Bark Debate
One of the hardest lessons I learned early in my career involved a rustic pergola made of unpeeled logs. It looked incredible for six months, but then the bark began to peel, trapping moisture and bugs against the wood.
If you want the fence to last more than three years, you should strip the bark. Using a drawknife to peel the branches not only extends the lifespan of the timber but also reveals the beautiful, smooth grain underneath. If you are committed to the “bark-on” look for maximum rustic appeal, understand that it is a temporary aesthetic choice.
Sourcing Your Material
You do not always have to buy expensive timber. Many arborists and tree removal companies are happy to drop off loads of trimmed branches for free or a nominal fee, as it saves them disposal costs.
Ensure the branches are relatively straight if you are building a vertical fence, or flexible and “green” if you plan on weaving them.
The Woven Wattle Fence: A Textural Masterpiece
Wattle fencing is one of the oldest construction techniques in human history, dating back to Neolithic times. It involves weaving flexible branches (withs) around upright stakes.
From a design perspective, this adds incredible texture to a yard. The woven pattern catches light and shadow differently throughout the day, creating a dynamic backdrop for your planting beds.
The Best Wood for Weaving
For a wattle fence, you need “green” wood—branches that have been cut recently and still hold their internal moisture. Once wood dries, it becomes brittle and will snap when you try to bend it around the posts.
Willow and Hazel are the traditional choices because they grow in long, slender, flexible rods. If you have access to these, grab them.
Construction Logic and Measurements
1. Post Spacing: Place your upright stakes closer together than you would for a standard fence. I recommend spacing them 18 to 24 inches apart. This tighter spacing creates better tension for the weave.
2. Post Depth: Drive your upright stakes at least 18 inches into the ground. Since the weaving creates tension, shallow stakes will eventually lean or pull out of the soil.
3. Weaving Technique: Start at the bottom. Weave a branch in front of the first stake, behind the second, and in front of the third. Alternating the start side for each subsequent branch ensures the fence remains vertical and doesn’t lean to one side.
4. Compressing: Every few layers, push the weave down firmly. As the branches dry, they will shrink slightly. Compressing them now prevents large gaps from forming later.
Rustic Post and Rail: The Structural Approach
If you prefer a more open, airy look or need to define a large perimeter without blocking the view, the branch post and rail style is ideal.
This mimics the traditional ranch fence but uses natural, irregular logs instead of milled lumber. It works exceptionally well in cottage gardens or properties with a farmhouse aesthetic.
Scale and Proportion
When using raw branches, scale is the most common place where DIYers go wrong. A thick, heavy log rail looks ridiculous supported by a spindly, thin post.
Rule of Thumb: Your vertical posts should always be at least 30% thicker than your horizontal rails. Visually, this creates a sense of stability.
Main Posts: Aim for 6–8 inches in diameter.
Rails: Aim for 3–5 inches in diameter.
Height: For a perimeter fence, 36 to 42 inches is a standard height that defines the space without feeling like a barricade.
Joinery Methods
You have two main options for connecting the rails to the posts, depending on your skill level and tools.
The Notch Method (Professional Finish):
Use a chisel or chainsaw to cut a shallow notch into the vertical post where the rail will sit. This transfers the weight of the rail onto the wood of the post, rather than relying solely on screws. It creates a cleaner, integrated look.
The Lag Screw Method (Beginner Friendly):
Pre-drill holes through your rails and drive long, galvanized timber screws or lag bolts directly into the posts. While easier, this is less structural. Over time, the heavy rails can sag as gravity works on the screws.
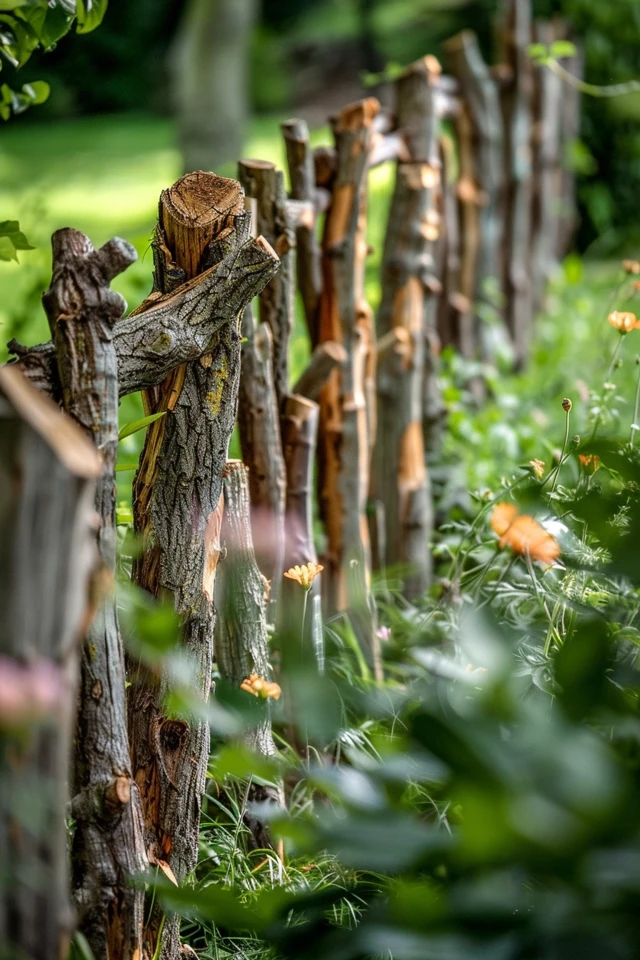
Vertical Branch Pickets: Modern meets Organic
For a more contemporary or privacy-focused design, consider installing branches vertically, side-by-side. This is often called a “stick fence” or “coyote fence.”
This style creates a strong visual rhythm. I love using this to screen off utility areas, like AC units or trash cans, because the density hides the eyesore while the natural material looks intentional.
Creating the Framework
Unlike the wattle fence, this style requires a rigid framework. You will need to install standard pressure-treated top and bottom rails (which can be hidden on the back side) to screw the vertical branches into.
Spacing and Privacy
Full Privacy: Butt the branches tightly against each other. You may need to trim knots and protrusions to get a tight fit.
Semi-Privacy: Leave a 1 to 2-inch gap between branches. This allows air to flow through, which is crucial in high-wind areas to prevent the fence from acting like a sail and blowing over.
Leveling vs. Natural Top
You have a design choice to make at the top of the fence. You can cut all the branches to a laser-level line for a crisp, modern appearance. Alternatively, you can leave the tops irregular for a jagged, organic silhouette.
In smaller yards, I prefer the level cut. It makes the space feel tidier and larger. In expansive properties, the irregular top blends better with the tree line.
Common Mistakes + Fixes
In my years of fixing DIY landscape projects, I see the same issues with branch fences repeatedly. Here is how to avoid them.
Mistake 1: Ignoring Ground Contact
The Issue: Placing raw wood directly in the dirt guarantees rot within two years, even with cedar.
The Fix: Embed your structural posts in concrete or gravel for drainage. For the decorative branches or pickets, keep them elevated 2 to 3 inches off the ground. The shadow line actually looks professional, and it prevents moisture wicking.
Mistake 2: Underestimating Shrinkage
The Issue: You build a privacy fence with green wood, but a month later, there are half-inch gaps everywhere.
The Fix: If you are building for privacy, overlap your branches slightly (board-on-board style) or wait for the wood to dry completely before installation.
Mistake 3: Weak Fasteners
The Issue: Using standard drywall screws or bright finish nails. They will rust and streak the wood black within weeks.
The Fix: Always use hot-dipped galvanized or stainless steel screws. They resist corrosion and interact better with the tannins in natural wood.
Lighting and Planting: The Finishing Touches
A fence is just a structure until you integrate it into the landscape. Lighting and plants are what turn a barrier into a feature.
Lighting Strategy
The texture of a branch fence is its best feature. You want to highlight that rough, organic surface.
Do not put bright floodlights pointing at the fence. Instead, use low-voltage uplighting positioned at the base of every third post. Grazing the light up the surface emphasizes the gnarly texture of the wood and creates dramatic shadows.
For a whimsical look, string bistro lights along the top rail. The contrast between the industrial glass bulbs and the rustic wood is timeless.
Softening with Plants
Wood and foliage are natural companions. However, you don’t want aggressive vines like English Ivy eating your new fence.
I recommend planting clumping ornamental grasses like Fountain Grass or Maiden Grass at the base. The soft, swaying movement of the grass contrasts beautifully with the rigid, heavy timber.
If you want a climber, opt for Clematis or annual vines like Morning Glory. They are lighter and won’t destroy the structural integrity of the branches.
Final Checklist: What I’d Do in a Real Project
If I were hired to build a branch fence for your yard tomorrow, here is exactly how I would execute it to ensure it passes professional standards.
Check Zoning: I would verify property lines and fence height restrictions with the local municipality before buying a single screw.
Select Material: I would source locally harvested Cedar or Black Locust.
Prep Wood: I would strip the bark immediately and let the wood cure (dry) for at least 3 weeks if using screws, or use immediately if weaving.
Post Digging: I would dig post holes to the frost line (usually 30-36 inches deep in the north) to prevent frost heave.
Drainage: I would add 3 inches of gravel to the bottom of the post hole so the wood doesn’t sit in standing water.
Fasteners: I would use 3-inch stainless steel screws, pre-drilling every hole to prevent the dry branches from splitting.
Protection: I would apply a coat of clear penetrating oil (like tung oil or linseed oil) to protect the wood from UV graying, re-applying it once a year.
FAQs
How long will a tree branch fence last?
It depends heavily on the wood species and ground contact. A willow wattle fence might last 4–6 years. A cedar log fence with proper concrete footings can last 15–20 years. Stripping the bark generally doubles the lifespan of any wood species.
Do I need to treat the wood?
You don’t have to, but it helps. If you like the silver-gray look of aged wood, you can leave it untreated. If you want to maintain the warm, brown tones, use a penetrating oil finish. Avoid film-forming varnishes, as they will peel and are impossible to sand off of irregular branches.
Is a branch fence cheaper than a standard fence?
Material-wise, yes, especially if you source wood for free. However, the labor cost (or your time) is significantly higher. Fitting irregular logs together takes much longer than screwing flat 2x4s together. It is a trade-off between cash and sweat equity.
Can this type of fence keep dogs in?
Yes, but you have to be strategic. A post and rail fence will need wire mesh (hog wire or chicken wire) attached to the inside to prevent dogs from slipping through the irregular gaps. A tightly woven wattle fence is generally secure enough for small to medium dogs without extra mesh.
Conclusion
Building a fence from tree branches is an exercise in patience and creativity. It requires you to work with the material rather than forcing it into perfect geometric shapes.
Whether you choose the delicate weave of a wattle fence or the sturdy presence of stacked logs, you are adding a unique architectural element to your home. These fences age gracefully, changing color and texture with the seasons, and eventually returning to the earth.
Don’t be afraid to experiment with different patterns or wood types. The beauty of this style lies in its imperfections. Gather your materials, plan your layout, and enjoy the process of building something truly one-of-a-kind.
Picture Gallery


