
DIY Broken Mirror Art Ideas to Transform Your Space
They say breaking a mirror brings seven years of bad luck, but in the design world, I prefer to see it as a fortunate accident. A shattered mirror offers a unique opportunity to introduce texture, light play, and organic shapes into a room without spending a dime on new materials. Instead of sweeping the shards into the trash, you can repurpose them into high-end decor that mimics the look of expensive mosaic tiling.
I remember dropping a massive, frameless vanity mirror during a renovation project in a tight hallway. After the initial panic subsided, we collected the pieces and used them to resurface a dated coffee table for the client’s sunroom. The result was stunning; the light refraction brightened the entire space, and the client loved it more than the original plan.
Whether you have accidentally broken a mirror or are intentionally smashing one for a project, safety and strategy are key. If you are looking for visual inspiration, jump to the Picture Gallery at the end of this blog post.
1. Preparation, Safety, and Material Selection
Before we get to the creative part, we have to talk about safety and materials. Working with broken glass is not a standard DIY project; it carries real risks if you aren’t prepared.
As a designer, my number one rule on any site involving glass is proper protective gear. You cannot rely on standard latex gloves for this. You need heavy-duty, cut-resistant gloves and protective eyewear to guard against flying shards during the breaking process.
Controlled Breaking Techniques
If you are breaking a mirror intentionally, do not just hit it with a hammer in the middle of your garage. The cleanup will be impossible, and you will find glass splinters for months.
Designer’s Note: The Canvas Bag Trick
To break a mirror safely, wrap the entire mirror in a thick drop cloth or place it inside a heavy-duty canvas bag. Strike the glass through the cloth with a hammer. This contains 100% of the shards and dust. If you want specific shapes, use a glass cutter to score lines before tapping them to break.
The Adhesive Dilemma
The biggest mistake DIYers make is using the wrong glue. Standard construction adhesives or super glues can eat away the silver backing of the mirror over time. This creates ugly black spots that ruin the reflection.
You must use a product specifically labeled as “mirror mastic” or a solvent-free mirror adhesive. For smaller craft projects, a clear silicone adhesive often works well, but always test a small piece first.
Essential Tool Checklist
- Cut-resistant gloves and safety goggles
- Glass cutter (for precise shapes)
- Wheeled glass nippers (for trimming edges)
- Mirror mastic or mirror-safe adhesive
- Sanded grout (for gaps larger than 1/8 inch)
- Unsanded grout (for gaps smaller than 1/8 inch)
- Plywood or MDF board (as a base)
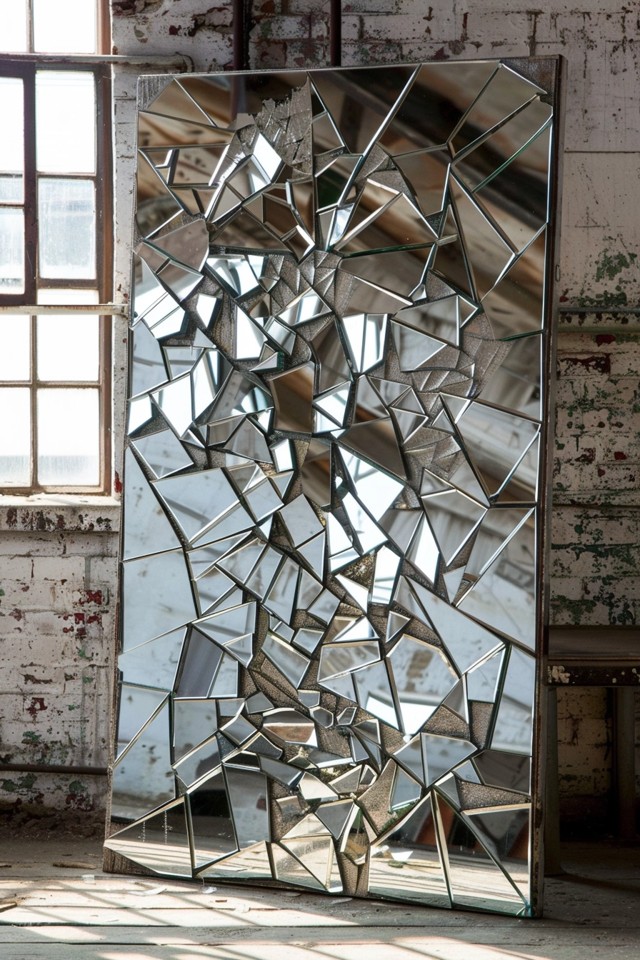
2. Creating Large-Scale Mosaic Wall Art
One of the most impactful ways to use broken mirror pieces is by creating a “shattered” wall installation. This works exceptionally well in dining rooms or entryways where you want to bounce light around.
In a recent project with a dark, windowless foyer, we used a broken mirror mosaic to simulate a window. The reflection creates depth, making the wall feel like it recedes rather than closing in on you.
The Backing Board Strategy
Never glue mirror shards directly to your drywall. It is permanent, will damage the wall upon removal, and is difficult to install vertically.
Instead, cut a piece of 1/2-inch plywood or MDF to your desired dimensions. Paint the edges and the front surface of the wood. I usually recommend painting the background a dark charcoal or matte black. This creates a high-contrast look between the gaps in the mirror shards.
Spacing and Layout Rules
When laying out your pieces, treat it like a puzzle that doesn’t quite fit. You want “negative space” between the shards to highlight the texture.
What I’d Do in a Real Project:
- Dry Fit First: Lay all pieces out on the board before gluing anything.
- Center the Focal Point: If you have a large, intact piece, place it slightly off-center to create movement.
- Manage the Gaps: Keep gaps consistent. I aim for about 1/8 inch to 1/4 inch spacing. If gaps are too wide, the piece looks messy; too narrow, and you lose the mosaic effect.
Grouting for a Polished Look
Once the glue has cured (usually 24 to 48 hours), you can choose to grout the lines. Grouting softens the edges and makes the piece safer to touch.
Use a non-sanded grout if your mirror pieces are delicate, as sand can scratch the glass surface during application. White grout creates a fresh, airy look, while dark grey grout adds drama and depth.
3. Upcycling Furniture Surfaces
Mirror-topped furniture is a staple of Hollywood Regency and Glam design styles. However, buying a mirrored dresser or coffee table can cost thousands. You can achieve this look for a fraction of the price using broken pieces.
This application is particularly great for surfaces that are already damaged. If you have a nightstand with water rings or a scratched top, broken mirror art effectively resurfaces and hides these flaws.
The Resin Pour Method
For horizontal surfaces like tables, sharp edges are a major concern. You cannot have jagged glass where people rest their arms or set down drinks.
The solution is a two-part epoxy resin pour.
1. Glue your mirror shards to the tabletop.
2. Build a temporary dam around the edges of the table using painter’s tape or a plastic barrier.
3. Pour clear epoxy resin over the entire surface, encapsulating the glass.
This creates a perfectly smooth, self-leveling surface. You get the visual sparkle of the broken mirror, but the touch is as smooth as glass.
Common Mistakes + Fixes
Mistake: The mirror pieces slide around while the glue dries.
Fix: Use painter’s tape to hold pieces in place, or use a quick-grab adhesive specifically made for vertical or slippery surfaces.
Mistake: Bubbles in the resin.
Fix: Use a heat gun or a kitchen torch lightly over the wet resin to pop air bubbles immediately after pouring.
Scale and Proportion
When covering furniture, consider the scale of the shards.
For a small side table, use smaller, mosaic-like chips (1-2 inches).
For a large buffet or dresser, use larger, jagged slabs (4-6 inches).
Matching the scale of the material to the furniture piece ensures the design feels intentional, not chaotic.
4. Light-Reflecting Garden and Outdoor Features
Bringing mirrors into the landscape is a designer’s secret weapon for making small gardens feel larger. A broken mirror mosaic can transform a dull concrete wall or a plain terracotta pot into a shimmering feature.
However, outdoor durability is the main challenge here. You must ensure your materials can withstand moisture and temperature fluctuations.
Weatherproofing Your Art
You cannot use MDF or standard plywood outdoors; it will swell and rot.
Base materials: Use cement board (like HardieBacker), sealed marine plywood, or apply directly to concrete or terracotta.
Adhesive: Use a thin-set mortar modified with latex for flexibility, or an exterior-grade silicone adhesive.
The “Disco Ball” Planter
One of the trendiest DIYs right now is the disco-ball-style planter.
Take a large, inexpensive plastic or ceramic pot.
Spray paint the rim silver or gold.
Glue small, roughly square pieces of broken mirror all around the exterior.
When the sunlight hits the pot, it scatters light across your patio or balcony, creating a magical atmosphere in the late afternoon.
Designer’s Note: Fire Safety & Wildlife
This is a critical safety warning. Concave mirror pieces can act like a magnifying glass. If direct sunlight hits a concave curve, it can focus a beam hot enough to singe leaves or, in rare cases, start a fire.
The Fix: Always use flat mirror pieces, not curved ones from fun-house mirrors or magnifying makeup mirrors. Also, be mindful of birds. If the reflection is too realistic, birds may fly into it. Breaking the mirror into smaller, mosaic pieces usually prevents this confusion.
5. Decorative Accessories and Small Accents
If you are renting or have a small budget, you don’t need to commit to a full wall or a piece of furniture. Small accessories can add that necessary “sparkle” to a room layout without overwhelming the space.
The Statement Tray
I often style coffee tables with a large tray to corral remotes and coasters.
Take a simple wooden tray from a thrift store.
Fill the bottom with broken mirror shards.
Grout the gaps with black grout for a moody, sophisticated look.
This acts as a base for candles. The mirror reflects the candlelight, doubling the glow and creating a warm ambiance in the evening.
Upcycled Photo Frames
Wide, flat picture frames are perfect candidates for this treatment.
This works best on flat-faced frames rather than ornate, curved ones.
Apply small shards along the frame border.
This is an excellent way to use up the “dust” and tiny chips left over from larger projects.
Styling Rules for Mirror Decor
When placing these items in your room, think about what they are reflecting.
Do not place a mirror art piece where it will just reflect a messy pile of laundry or a blank ceiling.
Position it opposite a window to bounce greenery and sky into the room.
Position it behind a table lamp to amplify the light source.
6. Maintenance and Cleaning
Broken mirror art requires different maintenance than a standard flat mirror. You have grout lines, uneven edges, and potential texture changes to contend with.
Cleaning Technique
Do not spray glass cleaner directly onto the art. The liquid can seep behind the glass pieces or into unsealed grout, causing moisture damage.
Instead, spray the cleaner onto a microfiber cloth until it is damp, then gently wipe the surface.
Grout Sealing
If you used grout, you must seal it. Grout is porous and will absorb dust and oils over time. Apply a penetrating grout sealer 72 hours after your project is dry. This will keep white grout from turning yellow and prevent dark grout from chalking.
Final Checklist: Before You Start
Before you shatter that glass, run through this quick checklist to ensure your project is a success.
- Safety First: Do I have heavy canvas drop cloths, eye protection, and leather gloves?
- Base Check: Is my substrate (plywood, concrete, wood) rigid? Flexible bases will cause the mirror pieces to pop off.
- Adhesive check: Am I using mirror-safe mastic? (Read the label: it must say “mirror safe”).
- Environment: If this is for a bathroom or outdoors, are my materials water-resistant?
- Design Plan: Have I dry-fitted the pieces to ensure I like the pattern before gluing?
- Grout Gap: Did I leave enough space between pieces for the grout to adhere?
FAQs
Q: Can I cut mirror pieces into specific shapes?
A: Yes, but it requires practice. Use a glass cutter with oil. Score the line firmly once (do not go back and forth), then use running pliers to snap the glass along the line. For curves, score the curve and make relief cuts to snap off small sections at a time.
Q: How do I smooth the sharp edges of the glass?
A: If you aren’t using resin or grout to cover the edges, you must sand them. Use a diamond hand sanding pad or wet/dry sandpaper (start with 60 grit, move to 100). Always wet-sand glass to prevent inhaling glass dust.
Q: Can I use a broken tempered glass mirror?
A: No. Tempered glass (safety glass) is designed to shatter into thousands of tiny, dull pebbles, not shards. You cannot cut it, and it is very difficult to mosaic with because the pieces are too small and uniform.
Q: How do I remove the mirror glue if I make a mistake?
A: Mirror mastic is incredibly strong. If the glue is still wet, use acetone. If it has cured, you will likely have to pry the piece off, which usually breaks the glass further and damages the drywall or wood backing. Dry fitting is essential to avoid this.
Conclusion
Transforming broken mirrors into art is one of the most satisfying upcycling projects because it turns something “ruined” into something resilient and beautiful. It allows you to play with light, texture, and dimension in a way that flat mirrors simply cannot.
Whether you are covering a small planter for your patio or creating a massive focal point for your dining room, the key lies in patience and preparation. Respect the materials, take safety seriously, and don’t be afraid to embrace the irregular, organic nature of the shards. The beauty is in the imperfections.
Picture Gallery


