
DIY Planters: Upcycling Items Around Your Home
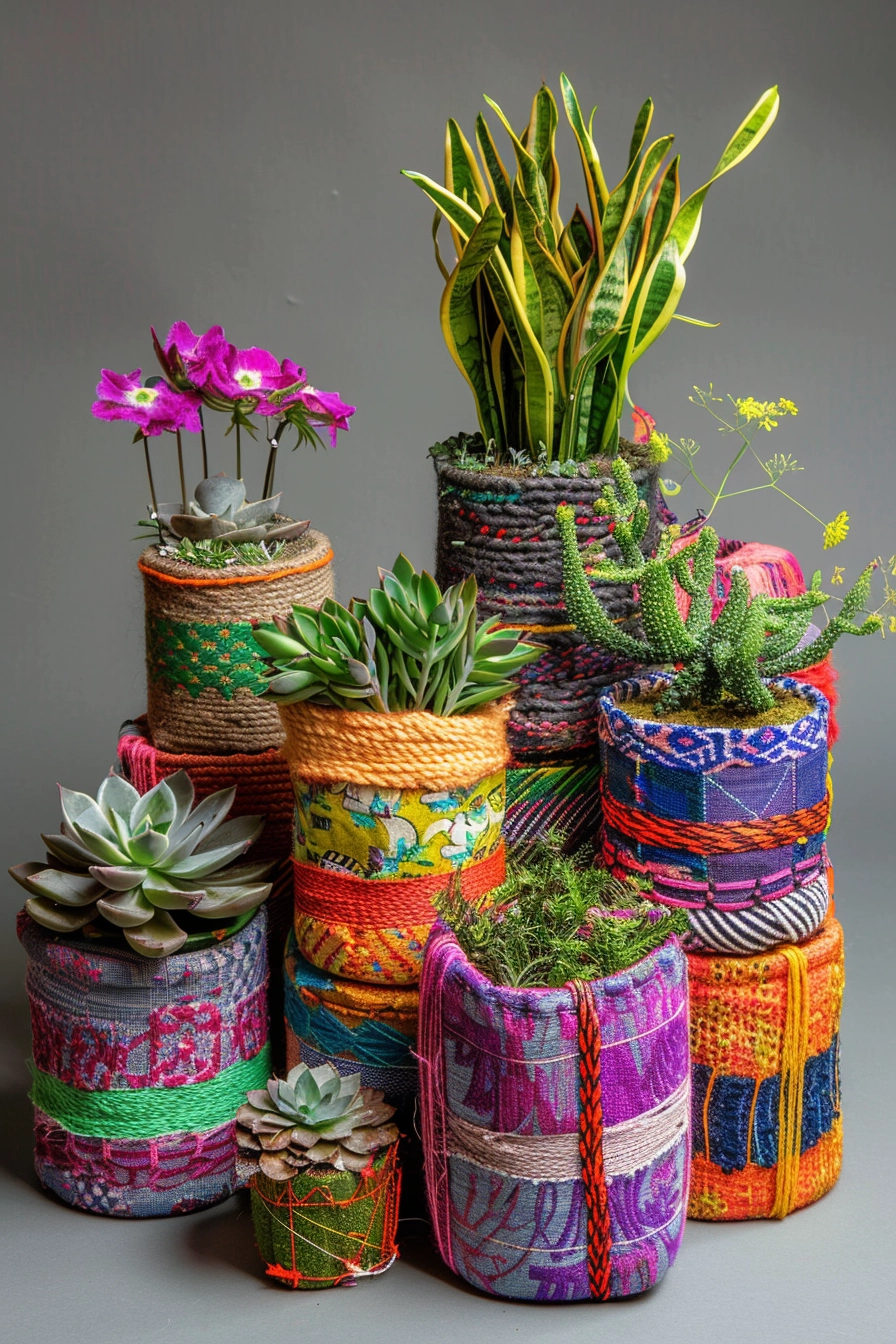
Finding the perfect vessel for your greenery often comes with a steep price tag, especially when you are looking for large-scale outdoor urns or textured indoor ceramics. I have found that some of the most charming and character-rich planters aren’t bought from a garden center, but rather created from items destined for the donation pile or the recycling bin. To give you plenty of visual inspiration for your own projects, I have curated a comprehensive Picture Gallery at the end of this blog post.
I recall a specific project for a client’s sunroom where the budget was nearly exhausted on structural repairs, leaving very little for decor. We raided their garage and found old galvanized wash tubs and vintage wooden crates, which we transformed into a stunning, layered indoor garden that added more soul to the space than brand-new pots ever could.
This guide will walk you through the practical steps of turning household items into functional planters, ensuring they are not just beautiful, but also safe for your plant’s root systems. We will cover necessary prep work, drainage logic, and design principles to make your upcycled creations look intentional rather than accidental.
Assessing Candidates: What Makes a Good Upcycled Planter?
Before you start filling random objects with soil, you need to evaluate the material and structural integrity of the item. Not every hollow object makes a good home for a plant, particularly if you want that plant to thrive long-term.
The primary rule of thumb in container gardening is drainage. If water cannot escape, the roots will sit in stagnant moisture, leading to root rot and fungal issues within weeks. When selecting an item to upcycle, ask yourself if you can drill a hole in it or if it is wide enough to hold a nursery pot inside (the cachepot method).
Material Durability Checklist
- Metal: Durable but prone to rusting and conducting heat. If used outdoors in direct sun, metal can cook the roots. Use a liner or keep these in shaded areas.
- Wood: porous and susceptible to rot. It requires a plastic liner or a thorough application of a non-toxic sealant to prevent the wet soil from decomposing the container.
- Ceramics/Glass: Great for moisture retention but tricky to drill. These require specific diamond-tip drill bits and patience to prevent cracking.
- Wicker/Rattan: These will degrade rapidly if in direct contact with wet soil. These should only be used as cover pots (hiding a plastic pot inside).
Designer’s Note: The “Water Test”
I always perform a water test before planting. Fill your potential vessel with water and let it sit for an hour outside or in a bathtub. If the material absorbs the water and becomes soggy (like untreated wood or unglazed low-fire clay), it will pull moisture away from your soil. If it holds water perfectly, you must drill drainage holes.
Kitchen Conversions: Tins, Colanders, and Teapots
The kitchen is often a goldmine for small to medium-sized vessels that add a vintage or industrial aesthetic to a home. Old tea tins, enamel colanders, and chipped teapots are perfect candidates for herbs and succulents.
Colanders are naturally the easiest option because the drainage is already built-in. These are exceptional for plants that require high oxygen flow to the roots, such as orchids or epiphytes. I recommend lining a colander with a layer of sphagnum moss or burlap before adding soil to keep the dirt contained while allowing water to drain freely.
Drilling Metal Tins
If you are using vintage tea tins or olive oil cans, you need to create drainage.
- Turn the tin upside down and clamp it to a workbench or place it on a scrap piece of wood.
- Use a nail and a hammer to tap a small indentation where you want the hole (this stops the drill bit from slipping).
- Use a standard metal drill bit to create 3-4 holes in the bottom.
- Spray the holes with a clear rust-preventative sealant to extend the life of the tin.
Common Mistakes + Fixes
Mistake: Planting edibles in vintage metal without a liner.
Fix: Some old metals may contain lead or zinc that can leach into soil. If you are growing herbs you intend to eat, simply drop a plastic nursery pot inside the tin rather than planting directly into it.
Mistake: Using small containers without monitoring water.
Fix: Small volumes of soil dry out incredibly fast. In a heated home, a teacup planter might need water every two days. Check moisture levels frequently.
Furniture Flips: Drawers, Chairs, and Crates
Upcycling furniture into planters allows you to play with height and scale, which is essential for successful landscape design. A chair planter or a dresser drawer filled with cascading blooms can act as a focal point on a porch or patio.
When using wooden drawers, you are dealing with a material that will rot if untreated. I recommend painting the interior with a non-toxic liquid rubber sealant. Alternatively, you can use a thick plastic sheet (like a heavy-duty trash bag) as a liner, stapling it to the upper inner rim of the drawer.
The Chair Planter Strategy
Using an old dining chair with a missing seat is a classic cottage-style move.
- Remove the seat cushion completely, leaving the open frame.
- Find a wire basket or a plastic pot with a rim that is slightly larger than the opening of the chair frame.
- Insert the basket so it rests on the frame. If using a wire basket, line it with coco liner (coconut fiber).
- Plant trailing varieties like creeping Jenny, ivy, or petunias to soften the hard lines of the chair legs.
What I’d Do in a Real Project
If I were styling a client’s front porch with an upcycled dresser drawer, I would ensure the drawer is raised off the ground. Wood sitting on damp concrete will rot from the bottom up. I would attach small rubber feet or place the drawer on bricks to ensure airflow underneath.
For visual balance, I would follow the “Thriller, Filler, Spiller” rule.
- Thriller: A tall grass or spiked plant in the center for height.
- Filler: Mid-sized flowering plants to create volume.
- Spiller: Trailing vines to drape over the edges of the drawer, hiding the hard angles.
Bathroom & Utility: Bathtubs, Sinks, and Piping
Salvaged architectural materials like clawfoot tubs, pedestal sinks, and PVC pipes offer a distinct look that works well in industrial or farmhouse designs. These items are generally highly durable and weather-resistant.
Bathtub Planters
A bathtub provides a massive volume of soil, which is excellent for growing vegetables or establishing a large perennial garden. However, weight is a serious consideration. A cast-iron tub filled with wet soil can weigh well over 1,000 pounds. This is strictly for ground-level outdoor use or reinforced concrete slabs.
Drainage is critical here. The existing drain hole is usually insufficient for the volume of soil. I recommend keeping the drain open with a layer of gravel over it to prevent clogging. If possible, drill additional holes if the tub is made of fiberglass or acrylic. If it is cast iron, drilling is difficult; instead, add a deep layer (4-6 inches) of chunky gravel at the bottom to create a water reservoir, though this is less ideal than true drainage.
PVC Pipe Vertical Gardens
For tight spaces or balcony gardens, leftover PVC piping can be transformed into a vertical strawberry or herb tower.
- Cut a 4-inch or 6-inch diameter PVC pipe to your desired height (usually 3-5 feet).
- Use a hole saw drill attachment to cut 2-inch circles along the sides of the pipe. Space them about 6 to 8 inches apart, staggered around the circumference.
- Sand the edges of the holes to remove sharp plastic burrs.
- Cap the bottom of the pipe and drill small drainage holes in the cap.
- Insert a narrower PVC pipe (1-inch diameter) down the center, drilled with tiny holes along its length. This acts as a watering tube to ensure water reaches the bottom plants.
Designer’s Note: Finish Coordination
White PVC can look cheap. To elevate the look, scuff the exterior with sandpaper and spray paint it a matte black, dark green, or a textured stone finish. This helps the planter blend into the landscape rather than looking like exposed plumbing.
Textiles and Soft Containers: Baskets and Boots
Soft materials add texture and warmth to a room, which helps counteract the “showroom” feel of new furniture. Woven baskets, canvas bags, and even old rubber rain boots can serve as whimsical plant vessels.
The Cachepot Method
I rarely plant directly into soft containers. Baskets will rot, and canvas will mold. The best approach is the “pot-in-pot” or cachepot method.
- Keep the plant in its plastic nursery grow pot.
- Place a plastic saucer inside the basket or bag to catch excess water.
- Set the grow pot on top of the saucer.
- Cover the top of the soil with Spanish moss or decorative stones to hide the plastic rim of the inner pot.
Rain Boot Planters
These are excellent for fences or garden gates. Kids usually outgrow rain boots before they wear them out, making them perfect upcycling candidates.
- Drill several holes in the sole of the boot for drainage.
- Fill the toe area with gravel to provide weight; otherwise, the boot becomes top-heavy when the plant grows and may tip over.
- Screw the boots directly onto a wooden fence through the back of the calf area, or use an S-hook to hang them by their loops.
Styling Rule: Grouping
A single boot or a single small basket can look like clutter. In interior design, we rely on the “Rule of Three.” Group three baskets of varying sizes in a corner, or hang a row of three pairs of boots along a fence. Repetition turns a random object into a design feature.
Final Checklist: The Pro Approach to Upcycling
Before you commit to your DIY planter project, run through this mental checklist that I use on job sites. This ensures your project is functional, safe, and aesthetically pleasing.
1. Drainage Verification
Does water have a way out? If you cannot drill it, you must use it as a cover pot (cachepot).
2. Volume Logic
Is the vessel large enough for the mature size of the plant? A tomato plant cannot thrive in a coffee can; it needs at least 5 gallons of soil volume. Match the plant’s root needs to the container size.
3. Weight Distribution
If the planter is heavy (ceramic sink, bathtub), is the floor or ground stable enough to support it? Remember that wet soil weighs roughly 100 lbs per cubic foot.
4. Material Safety
Is the material toxic? Avoid treated lumber (older pressure-treated wood contained arsenic) or painted items that might contain lead if you are growing edible plants.
5. Scale and Proportion
Does the planter fit the space? A tiny tin looks lost on a large patio. A massive crate feels overwhelming in a small bathroom. Measure your space before selecting your upcycled item.
FAQs
Do I need to put rocks at the bottom of my planter?
Contrary to popular belief, you should not put gravel at the bottom of a pot if the pot has drainage holes. This raises the water table closer to the roots, actually increasing the risk of rot. Fill the entire pot with soil. Only use gravel if you are dealing with a sealed container where water has nowhere to go, and even then, be very careful with watering.
How do I waterproof a wicker basket for a plant?
Do not try to waterproof the wicker itself. Instead, line the basket with a thick plastic trash bag or a dedicated plastic planter liner. Trim the excess plastic so it sits just below the rim of the basket. Always use a saucer inside the liner to catch drainage.
What kind of paint should I use on upcycled planters?
For outdoor items, use an exterior-grade spray paint or enamel that is UV resistant. For terracotta or porous clay, use masonry paint. If painting the inside of a container, ensure the product is non-toxic and sealed properly so it doesn’t chip into the soil.
Can I use a wooden crate indoors?
Yes, but you must be vigilant about water leakage. Line the crate with a heavy-duty pond liner or place a plastic tray at the bottom inside the crate. I also recommend putting felt pads on the bottom of the crate to prevent scratching your floors.
Conclusion
Upcycling household items into planters is a rewarding way to personalize your space while reducing waste. It forces you to look at everyday objects—an old boot, a rusted colander, a forgotten drawer—with a creative eye. The key to success lies in balancing the charm of the object with the biological needs of the plant.
By focusing on drainage, material safety, and proper scale, you can create a garden that feels curated and unique. Don’t be afraid to experiment with different textures and finishes. Sometimes the most unexpected item becomes the most talked-about feature in a room. Start with something simple, like a kitchen tin, and work your way up to larger furniture conversions as you gain confidence.
Picture Gallery


