
DIY Shower Door Ideas for a Bathroom Refresh
Replacing a shower door is one of those renovations that sounds simple until you see the quote for custom glass. I recently worked on a guest bathroom project where the client wanted to rip out a perfectly functional, albeit ugly, shower enclosure. The quote for a new frameless glass unit came back at nearly $2,500, which blew our entire styling budget.
We had to get creative. We realized that with the right materials and a bit of patience, you can completely transform the look of a bathroom without the custom price tag. Whether you are dealing with dated brass frames or trying to ditch a flimsy curtain for something substantial, there are actionable solutions.
In this guide, I will walk you through my favorite DIY methods to upgrade your shower entry. If you are looking for visual inspiration before you start, make sure to check out the Picture Gallery at the end of the blog post.
1. The Faux-Industrial “Crittall” Grid Hack
The black steel grid look, often called Crittall style, is timeless and adds immediate architectural interest to a bathroom. Authentic steel doors cost thousands, but you can replicate this look on a plain glass door using high-quality vinyl or electrical tape. This is a purely aesthetic upgrade, but it is incredibly effective.
This method works best on clear, flat glass doors. If your glass has a heavy texture or “rain” pattern, the tape won’t adhere properly, and the visual effect will get lost. You generally want to apply the grid only on the outside of the shower door. This makes cleaning the inside of the glass much easier and prevents water from peeling the adhesive over time.
Materials and Tools
- Black electrical tape (budget) or specialized window grid tape (pro choice)
- Glass cleaner and a razor blade
- Laser level or a long ruler
- Dry erase marker
- Utility knife with a fresh blade
The Process
First, clean your glass aggressively. Any soap scum or mineral deposits will cause the tape to bubble. I use a razor blade to scrape the glass surface, followed by isopropyl alcohol to remove any residue.
Next, decide on your grid pattern. For a standard sliding door or pivot door, a 3-tile or 4-tile vertical stack usually looks best. Avoid making the squares too small, as this makes the bathroom feel cluttered. A good rule of thumb is to aim for rectangles that are roughly 10 to 12 inches high.
Mark your lines on the inside of the glass with a dry erase marker. This allows you to apply the tape on the outside while following a clear guide. Apply the tape in long, continuous strips. Do not stretch the tape as you pull it, or it will eventually shrink back and leave gaps at the edges.
Designer’s Note: Scale and Proportion
The biggest mistake I see with this DIY is the thickness of the grid lines. Standard electrical tape is about 3/4-inch wide, which is visually heavy for smaller showers.
I prefer using 1/2-inch automotive trim tape or ordering custom vinyl strips. The thinner line looks more elegant and mimics the scale of actual steel glazing bars.
Common Mistakes + Fixes
Mistake: Tape peeling at the ends after a few weeks.
Fix: The edges are where the tape fails. Add a tiny dot of clear super glue or clear nail polish under the very tip of the tape where it meets the frame to seal it down.
Mistake: Crooked lines that look messy.
Fix: Do not trust your eye. Use a laser level. If you don’t have one, measure from the floor up at three different points to draw your guide line.
2. Spray Painting Dated Brass or Silver Frames
If you live in a home built between 1990 and 2005, you likely have “builder’s brass” or polished chrome shower frames. The glass is usually fine, but the metal finish dates the room instantly. Painting the frame is a high-impact project, but it requires meticulous preparation.
This is not a project where you can rush the taping process. The success of this DIY depends entirely on preventing overspray and ensuring the paint bonds to the metal. If you skip sanding, the paint will scratch off the first time you clean the shower.
Preparation is Key
You need to protect the rest of the bathroom. I recommend taping plastic drop cloths over the tile walls inside the shower and covering the floor completely. You should also set up a box fan in the window for ventilation, as metal spray paint has strong fumes.
Step-by-Step Application
- Clean: Scrub the metal track with a degreaser to remove soap scum.
- Sand: Use a fine-grit sanding sponge (around 220 grit) to scuff the metal surfaces. You aren’t trying to remove the old finish, just dulling the shine so the new paint sticks.
- Mask: Use high-quality painter’s tape to cover the glass where it meets the metal. Press the tape down firmly with a credit card to prevent bleed-through.
- Prime: Use a self-etching primer formulated for metal. This bites into the surface better than standard primer.
- Paint: Apply 3 to 4 distinct, light coats of appliance epoxy or high-heat enamel. Avoid standard spray paint; it is not durable enough for a high-moisture environment.
What I’d Do in a Real Project
If I am spraying a frame matte black, I always caulk the joints after painting. Often, old silicone needs to be removed before you paint anyway.
Once the paint is dry and cured (wait 24 hours), apply a fresh bead of black silicone caulk where the frame meets the tile. This creates a crisp, professional line that hides any minor tape imperfections and ensures the unit is watertight.
3. Installing a Semi-Frameless Pivot Door Kit
Sometimes the old door is beyond saving. If the track is corroded or the glass is etched with hard water stains that won’t budge, a replacement kit is your best option. While custom glass is expensive, “off-the-shelf” semi-frameless kits from hardware stores are surprisingly affordable and installable by a confident DIYer.
These kits usually cost between $300 and $600. They give you that sleek, modern look without the custom price tag. The key here is understanding your wall conditions before you buy.
Measuring for Success
You cannot assume your walls are straight. You need to measure the width of your shower opening at three distinct points: the top (6 feet up), the middle, and the bottom (at the curb).
If these numbers vary by more than 3/8 of an inch, your walls are “out of plumb.” If you buy a completely frameless glass door for an out-of-plumb opening, it will not close properly, and you will have leaks. Look for kits that have “adjustable wall profiles” or U-channels. These allow for some wiggle room to accommodate uneven walls.
The Installation Logic
Most kits follow a similar sequence. You install a metal channel on the wall side, insert the glass panel into that channel, and secure it.
The hardest part is drilling into the tile. You absolutely need a diamond-tipped drill bit for this. Do not use a standard masonry bit on porcelain or ceramic tile, or you risk cracking the tile. Keep a spray bottle of water handy to keep the drill bit cool while you work.
Designer’s Note: The Curb Width
Before you order a kit, measure the width of your shower curb (the threshold you step over). Standard curbs are roughly 3 to 5 inches wide.
Ensure the bottom track of your chosen door fits comfortably in the center of the curb. You want at least 1/2 inch of tile remaining on both the inside and outside of the track for a proper silicone seal.
4. The High-End Curtain Alternative
I know this post is about “doors,” but sometimes the best door is a well-executed curtain, specifically in small bathrooms or rentals where you cannot drill into walls. The reason people dislike shower curtains is usually because they buy cheap, short, plastic ones.
To mimic the look of a solid partition or a high-end enclosure, you need to treat the shower curtain like window drapery. This approach adds softness to a room full of hard surfaces (tile, porcelain, mirror) and can actually make a small bathroom feel taller.
The Two-Layer System
Never use a single sheet of plastic. You need two separate layers:
1. The Liner: This goes inside the tub/shower. Use a heavy-gauge PEVA liner (avoid PVC if possible for smell/health reasons). It should be long enough to stop just above the floor of the shower pan.
2. The Drapery: This goes on the outside. Use a fabric panel like linen, heavy cotton, or a waffle weave.
Placement Rules
The secret to a luxury look is height. Do not install the tension rod at the standard 72-inch height. Move it up to the ceiling, or as high as your curtain length allows.
I usually buy extra-long curtains (84 or 96 inches). Mount the rod so the outer fabric “kisses” the floor. It shouldn’t pool heavily (which collects dust), but it shouldn’t dangle 4 inches above the floor either. This vertical line draws the eye up and makes the ceiling feel higher.
Common Mistakes + Fixes
Mistake: The “hospital track” look.
Fix: Avoid generic white plastic rings. Upgrade to metal roller rings that match your faucet finish (matte black, brushed nickel, or brass). The metal glides smoother on the rod and looks intentional.
Mistake: A dark, cave-like shower.
Fix: If you don’t have a light inside the shower, stick to a white or clear liner. A dark liner will block all ambient light from the bathroom vanity, making the shower feel claustrophobic.
5. Repurposing Vintage French Doors
This is the most advanced DIY on the list, but it offers the highest design reward. Repurposing an old wooden French door or a set of narrow window sashes as a stationary shower screen creates a stunning, eclectic focal point. This is often seen in modern farmhouse or Parisian-style interiors.
However, this requires significant modification to be safe and functional. Wood and water are natural enemies, and standard window glass is dangerous in a bathroom.
Safety First: The Glass Issue
You cannot use the original glass found in antique doors. It is likely plate glass, which breaks into large, deadly shards. Building code requires shower glass to be tempered (safety glass) or laminated.
You must remove the old glass and have a local glazier cut pieces of laminated safety glass to fit the panes. Do not skip this step. It is a critical safety requirement.
Waterproofing the Wood
To make a wood door survive in a shower, you need marine-grade protection.
- Sand the wood down to raw grain.
- Apply a marine spar varnish or a high-quality exterior polyurethane.
- You need a minimum of 3 coats, sanding lightly between each coat.
- Pay special attention to the bottom edge of the door, where water will pool. I recommend installing the wood door on top of a small 1/2-inch rubber block or aluminum U-channel so the wood never sits directly in standing water.
Designer’s Note: Placement
I only recommend this for “splash zones” that don’t get direct heavy spray, or for large walk-in showers. Use the vintage door as a fixed panel (a splash guard) rather than a moving door. The hinges and hardware on old doors are rarely water-tight enough for a direct hit from a showerhead.
Final Checklist
Before you commit to a method, run through this quick checklist to ensure your bathroom is ready for the upgrade.
- Check for Plumb: Use a 4-foot level on your walls. If the bubble isn’t centered, you need an adjustable solution.
- Ventilation Check: If you are painting, do you have a window or a powerful exhaust fan? If not, you must wear a respirator mask.
- Drill Bit Test: If installing a kit, confirm your tile type. Porcelain requires different bits than ceramic or natural stone.
- Measurements: Measure width at top, middle, and bottom. Measure height from the curb to the maximum clearance (watch out for shower heads or light fixtures).
- Budget Buffer: Add 15% to your budget for consumables like silicone, painter’s tape, sanding blocks, and drop cloths.
FAQs
Can I paint the inside of the shower frame?
Technically yes, but I advise against it. The inside track is constantly subjected to hot water, soap scum, and scrubbing. Even the best epoxy paint will eventually chip in those conditions. If possible, tape off the inside track and only paint the exterior-facing and side-facing surfaces.
How do I clean a DIY grid shower door?
If you used vinyl tape on the outside, simply squeegee the inside glass as normal. For the outside, use a microfiber cloth and glass cleaner. Avoid scrubbing the tape edges aggressively. If you placed tape on the inside (not recommended), you will have to gently hand-wash around the grids.
Is it hard to remove a glued-on shower door track?
It can be labor-intensive. Most tracks are held on by screws and silicone. Once the screws are out, the silicone acts like a strong glue. You will need a utility knife to slice the caulk seal and potentially a heat gun to soften the old silicone. Be very careful not to pry too hard against the tile, or you might crack it.
What is the best paint for shower frames?
Appliance epoxy is the gold standard for durability. It dries very hard and resists moisture. Rust-Oleum and Krylon both make excellent versions. High-heat automotive enamel is a good runner-up. Avoid standard wall latex or general-purpose spray paints.
Can I install a shower door without drilling into tile?
Yes, but your options are limited. There are “compression fit” shower doors available that work similarly to tension rods, but they generally have a heavy frame top and bottom to support the tension. They are less stable than drilled units and are not recommended for households with small children who might pull on the door.
Conclusion
Upgrading your shower entry doesn’t require a demolition crew or a custom glass budget. Whether you choose to refinish what you have with specialized paint, add architectural character with grid tape, or install a fresh semi-frameless kit, the impact on your bathroom’s design will be massive.
The most important part of any of these projects is patience during the prep work. Cleaning the glass, sanding the metal, and measuring twice will ensure your DIY looks like a professional installation. Take your time, follow the safety rules regarding glass types and anchoring, and enjoy your refreshed bathroom sanctuary.
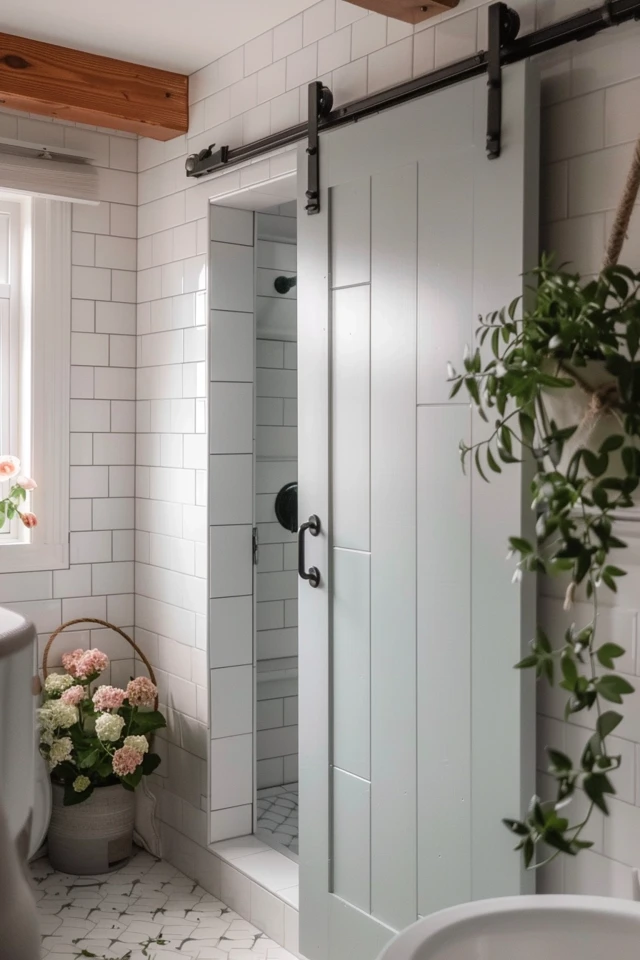
Picture Gallery


