
Easy Rock & Mulch Landscaping Ideas for Your Yard
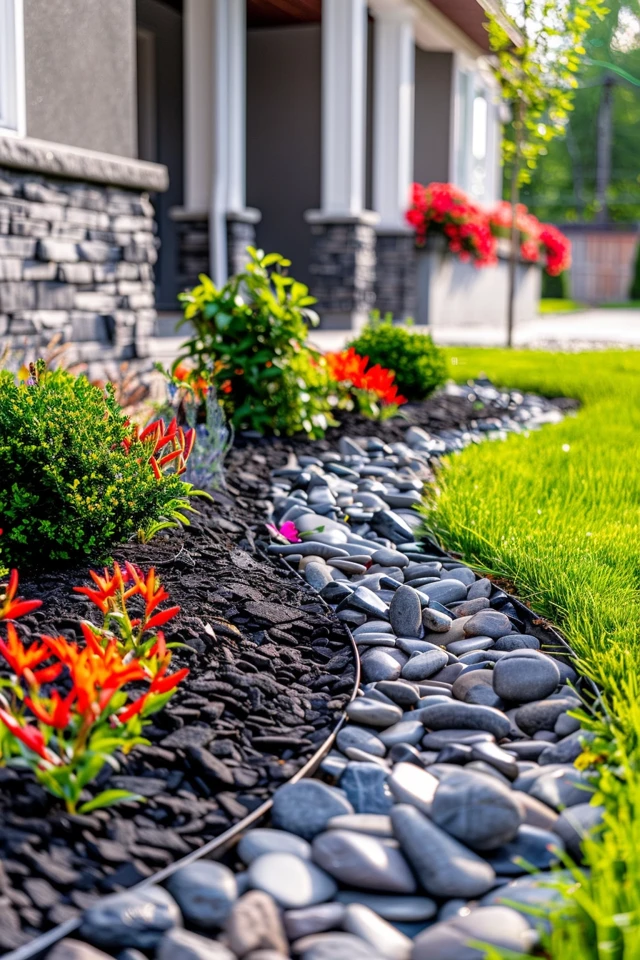
Creating a landscape that balances beauty with low maintenance is the ultimate goal for most homeowners. Integrating rock and mulch into your garden beds offers the best of both worlds: the organic benefits of wood chips and the permanence of stone. This combination provides textural contrast that flat lawns simply cannot compete with.
I have spent years designing exterior spaces, and I have learned that the secret lies in knowing where to place each material for maximum function. For those looking for visual inspiration, I have curated a comprehensive Picture Gallery at the end of the blog post to spark your creativity.
In this guide, we will move beyond basic gardening tips and dive into professional layout strategies. We will cover how to mix materials, manage drainage, and create curb appeal that lasts year-round.
1. Mastering Material Selection and Contrast
The success of a rock and mulch landscape depends entirely on the materials you choose. In interior design, we rely on texture to create interest, and the same rule applies outdoors. You want a distinct visual break between your organic mulch and your hardscape rocks.
If you have a red brick house, avoid red-dyed mulch or red lava rock. The colors will clash or blend muddy. Instead, opt for black shredded hardwood mulch or dark grey slate chips to create a sophisticated, modern contrast.
For the rock element, size matters as much as color. Large river rocks (1–3 inches) are excellent for borders because they are heavy enough to stay put. Pea gravel looks lovely, but it migrates easily and should be reserved for flat pathways or contained areas.
Designer’s Note: The “Migration” Headache
The number one complaint I hear from clients a year after DIY-ing their yard is that “the rocks are in the grass.” This usually happens because they skipped the edging or chose gravel that was too light. Always install a physical barrier between rock and turf. If you have active dogs or kids, skip the pea gravel and go for crushed granite or larger river stones that settle and lock together.
2. Strategic Zoning for Plant Health
One of the biggest mistakes homeowners make is treating rock and mulch as interchangeable ground covers. They serve very different biological functions. I always design “zones” within a flower bed based on what the plants need.
Mulch retains moisture and regulates soil temperature, making it ideal for the immediate area surrounding plant root balls. It breaks down over time, feeding the soil. I recommend keeping a 2-inch to 3-inch layer of organic mulch around your perennials, shrubs, and trees.
Rock, however, absorbs heat and reflects sunlight. This can cook delicate root systems if placed too close to the stem of a shade-loving plant like a Hydrangea. Use rock as the “frame” or the drainage solution, not the blanket for the plant itself.
Common Mistakes + Fixes
Mistake: Volcano Mulching. This is piling mulch high against the trunk of a tree, resembling a volcano.
Fix: Pull the mulch back 3 to 4 inches from the trunk flare. The trunk needs to breathe. If moisture is trapped against the bark, it encourages rot and invites pests.
3. Creating Clean Lines with Edging
You cannot have a professional-looking rock and mulch bed without proper edging. The edge is the frame for the picture. Without it, your yard looks messy and unfinished.
In professional landscape design, we often use steel edging for a crisp, nearly invisible line that separates rock from mulch or grass. It is durable, handles the freeze-thaw cycle well, and keeps aggressive grass runners out of your beds.
If you prefer a more traditional look, stone pavers or concrete curbing work well. The key is ensuring the edging is set deep enough to prevent grass roots from creeping under, but high enough to keep the rock contained.
Specific Measurements for Edging
When installing edging, aim to have it extend at least 1 inch above the soil line to hold back mulch. However, if you are edging against a lawn, ensure the top of the edging is slightly lower than your mower blade height if you want to mow right over it. For trench edging (spade-cut edges), cut down 4 to 6 inches deep for an effective barrier.
4. Solving Drainage and Hard-to-Grow Areas
Every yard has that one spot where grass refuses to grow or water pools after a storm. This is where rock shines. Instead of fighting nature, replace the struggling turf with a decorative rock feature.
I often design “dry creek beds” using river rock to channel water away from the home’s foundation. This turns a functional drainage problem into an aesthetic focal point.
Use larger boulders (12 inches plus) to anchor the curves of the dry creek, and fill the center with medium river rock. Flank the edges with mulch and drought-tolerant grasses like Liriope or ornamental Fescue. This layered approach mimics nature and handles heavy rain without washing away.
What I’d Do in a Real Project: The Mud Solution
If you have a shaded area under a tree that is always muddy, stop buying sod. It will die.
1. Excavate the mud down 3 inches.
2. Lay down heavy-duty non-woven landscape fabric.
3. Fill the area with 5/8-inch chipped rock or crushed slate.
4. Place a few flagstone steppers through it.
5. You now have a mud-free, usable zone that looks intentional.
5. Integrating Pathways and Transition Zones
Pathways are the arteries of your landscape design. They guide the eye and the foot. Mixing rock and mulch here creates a soft, inviting transition between different areas of the yard.
A classic, high-end look involves using large flagstone slabs or rectangular concrete pavers as the walking surface, set into a bed of contrasting gravel. To keep weeds down, place barrier fabric underneath the gravel layer.
When laying out stepping stones, spacing is critical for comfort. You do not want your guests to have to hop or shuffle.
Rules of Thumb for Pathways
Pathway Width: Main paths should be at least 36 inches wide to allow two people to walk comfortably or for you to maneuver a wheelbarrow. Secondary paths can be 24 inches.
Stride Distance: Place stepping stones approximately 24 inches from the center of one stone to the center of the next. This accommodates the average human stride. Test this yourself before setting them permanently.
Final Checklist: Installing Your Rock & Mulch Landscape
If you are ready to tackle this project, follow this checklist to ensure you get pro-level results. This is the exact mental list I run through when managing a site installation.
Phase 1: Preparation
Kill the vegetation: Do not just put rock over grass. It will grow through. Dig out the sod or use a sod cutter.
Grade the soil: Ensure the ground slopes away from your home’s foundation. A slope of 1/4 inch per foot is standard.
Install fabric (Selectively): Use high-quality, non-woven landscape fabric under rock areas only. Do not put fabric under wood mulch; it prevents the mulch from decomposing into the soil and feeding your plants.
Phase 2: The Hardscape
Install edging first: Define your shapes before dumping material.
Place boulders: If you are using large accent rocks, place them now. Bury the bottom 1/3 of the boulder so it looks like it grew out of the earth, rather than just dropped on top.
Add rock layers: Spread your gravel or river rock to a depth of 2 to 3 inches.
Phase 3: Planting and Mulching
Plant first: Install your trees, shrubs, and perennials.
Mulch last: Spread wood mulch to a depth of 2 to 3 inches around plants, tapering off as you get closer to the plant stem.
* Water immediately: This settles the soil and washes the dust off the new rocks.
FAQs
Q: Will rocks overheat my plants?
Yes, rocks absorb and radiate heat. This creates a “microclimate” that can be hotter than the rest of the yard. Avoid using rock mulch around delicate, moisture-loving plants like Ferns or Hostas. It is great for heat-lovers like Lavender, Sedum, and Yucca.
Q: How do I keep leaves out of the rock beds?
This is the main maintenance drawback. You cannot rake rocks easily. You must use a leaf blower. Set the blower to a low setting to move the dry leaves without blowing the gravel out of the bed. Do this frequently in the fall so leaves don’t decompose into the rocks.
Q: How often do I need to replace the mulch?
Organic wood mulch fades and decomposes. To keep the color rich and the weeds suppressed, you should top-dress your beds with a fresh 1-inch layer every spring. Rock, conversely, is a one-time investment that rarely needs topping off unless it sinks into the soil.
Q: Is rubber mulch a good alternative?
As a designer, I generally advise against rubber mulch for residential gardens. While it lasts forever, it does not improve soil health, can smell like hot tires in the summer, and is incredibly difficult to remove once it is mixed with the soil. Stick to natural wood or stone.
Conclusion
Combining rock and mulch is one of the most effective ways to elevate your home’s exterior. It solves functional issues like drainage and maintenance while adding the kind of layered, textural depth that gives a home “curb appeal.”
Remember that landscaping is a balance of hard and soft. Use the rock to provide structure, borders, and drainage. Use the mulch to nourish your plants and soften the look. By following the spacing rules and material guidelines outlined here, you can create a yard that looks professionally designed and stands the test of time.
Picture Gallery


