
Elevate Your Space: Board and Batten Bedroom Wall Ideas
There is nothing quite as uninspiring as a plain, drywall box, especially when trying to create a sanctuary for sleep. Bedroom walls often suffer from a lack of architectural interest, leaving the space feeling temporary or unfinished. Adding millwork is the single most effective way to inject character, history, and perceived value into a room without knocking down structural walls.
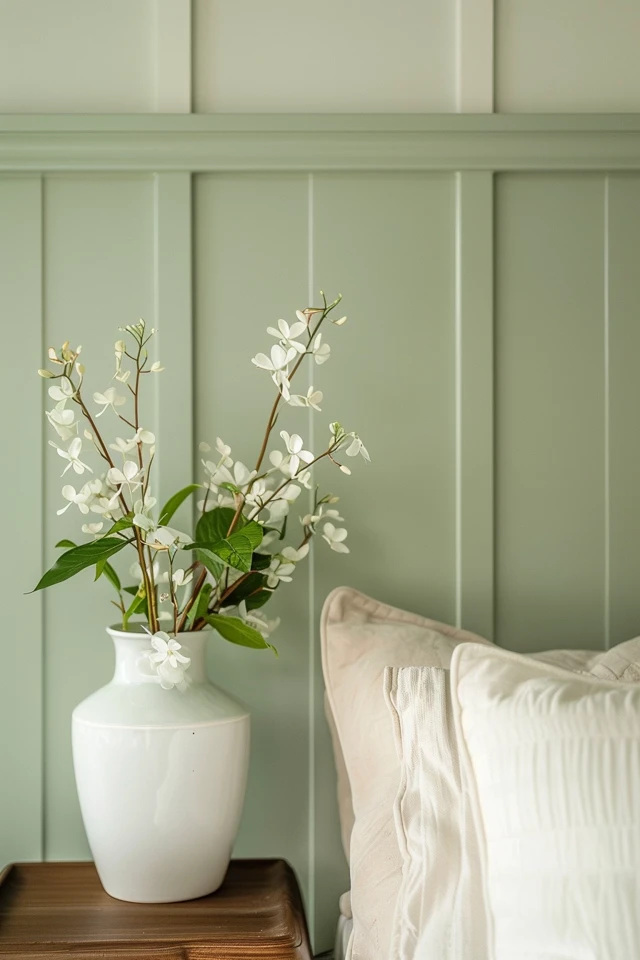
Board and batten is particularly effective in bedrooms because it bridges the gap between cozy farmhouse textures and crisp modern lines. It provides a structured backdrop for your headboard, grounding the bed as the focal point of the room. Whether you choose a full floor-to-ceiling grid or a traditional wainscoting height, the shadow lines created by the battens add depth that paint alone cannot achieve.
If you are looking for visual inspiration to guide your project, be sure to check out the curated Picture Gallery located at the very end of this blog post.
Mastering the Math: Layout and Spacing
The difference between a high-end custom look and a messy DIY project usually comes down to math. Before you buy a single piece of lumber, you must calculate your spacing. A common mistake is prioritizing the “look” of the spacing over the actual dimensions of the wall, leading to awkward slivers of space in the corners.
I always recommend starting from the center of the wall and working outward. Find the exact center point of your headboard wall and place your first batten (or the center of a space) there. This ensures that your bed creates a symmetrical frame within the millwork.
Designer’s Note: The spacing sweet spot
In a standard bedroom with 8-foot ceilings, spacing vertical battens between 16 and 20 inches apart usually looks best. Anything wider than 24 inches can make the ceiling feel lower, while spacing tighter than 12 inches can look busy and jail-like.
Accounting for Outlets and Switches
One issue that ruins the illusion of solid paneling is a batten landing directly on top of an electrical outlet. You have two choices here. You can plan your grid spacing specifically to dodge the outlets, which takes patience but yields the cleanest look.
Alternatively, you can notch the back of the batten or use box extenders to bring the outlet flush with the new wood. Never simply cut the batten short above and below the outlet plate; it breaks the vertical line and looks like an afterthought.
Defining Your Style: Height and Grid Patterns
Board and batten is not a monolith; the geometry you choose dictates the design style. For a modern or transitional bedroom, a full-height grid pattern is currently the gold standard. This creates a “feature wall” effect that feels intentional and architectural.
If you are aiming for a traditional, cottage, or coastal vibe, a partial height install (wainscoting) is appropriate. However, you must be careful with the height. A common error is installing the top rail at 36 inches, which is standard chair rail height.
In a bedroom, 36 inches is often too low because the nightstands and the mattress will obscure the top rail. This creates visual clutter where the furniture meets the trim.
Common Mistakes + Fixes
Mistake: Installing wainscoting that cuts the room exactly in half (4 feet up on an 8-foot wall).
Fix: Follow the Rule of Thirds. Install your molding either at the one-third mark (about 32-36 inches) or the two-thirds mark (about 60-64 inches). In bedrooms, the higher two-thirds height is dramatic and allows the headboard to sit fully against the paneled section.
The Modern Grid vs. The Vertical Stretch
A square grid pattern feels contemporary and masculine. It works exceptionally well in rooms with high ceilings as it brings the scale down to a human level.
Vertical-only battens (no horizontal cross-pieces except the top and bottom) elongate the room. If your bedroom feels cramped or has low ceilings, skip the horizontal cross-battens. The unbroken vertical lines will draw the eye upward, tricking the brain into perceiving more volume.
Material Selection and Installation Realities
While “board and batten” implies wood, using solid lumber is rarely the best choice for painting. Solid pine boards have knots and grain texture that will eventually telegraph through your paint, even with primer. They are also prone to warping.
For a paint-grade finish, MDF (Medium Density Fiberboard) is superior. It is perfectly smooth, stable, and cost-effective. You can buy pre-primed MDF boards (usually 1×2, 1×3, or 1×4 nominal sizes) at most home improvement stores.
Dealing with Texture
Here is the hard truth: you cannot put battens directly over heavy orange-peel or knockdown textured drywall and expect it to look like traditional millwork. The contrast between the smooth wood and the bumpy wall ruins the illusion of solid paneling.
What I’d do in a real project:
If the walls have heavy texture, I install a thin sheet of hardboard or 1/8-inch smooth plywood over the drywall first. Then, I install the battens on top of that sheet. This gives you that glass-smooth, high-end “cabinetry” look inside the boxes.
The Baseboard Dilemma
You generally have two options for handling existing baseboards. The pro method is to pry off the existing baseboards and install a new, flat-stock baseboard (like a 1×6) that is the same thickness as your battens. This allows the vertical battens to die seamlessly into the floor trim.
If you cannot remove the baseboards (for example, if you are renting or they are glued heavily), you can cut the bottom of your vertical battens at a 45-degree angle so they taper back toward the wall just above the baseboard. This is a visual trick that looks intentional rather than messy.
The Power of Paint and Finish
The finish you choose can change the entire mood of the bedroom. The most cohesive look involves “color drenching.” This means painting the baseboards, the battens, the wall space between them, and potentially the crown molding in the exact same color.
When you use a single color, the texture becomes the hero. The shadows cast by the battens create the interest.
Designer’s Note: Sheen matters
Do not use flat or matte paint for board and batten. It is difficult to clean and makes the millwork look like drywall. Use a Satin or Eggshell finish. These sheens are durable enough to wipe down but not so glossy that they highlight every imperfection in your installation.
Contrast vs. Monochrome
White battens on a white wall are classic and airy, perfect for coastal or farmhouse styles. However, moody bedrooms are trending for a reason—they promote better sleep.
Consider deep greens, navies, or charcoal greys. Dark colors absorb light and blur the edges of the room, making a small bedroom feel cozy rather than cramped. If you go dark, ensure your lighting is adequate, as the walls won’t reflect much ambient light.
Styling Around the Wall
Once the wall is up, you have to live with it. The biggest conflict in a bedroom is the headboard. Ideally, you want a headboard that contrasts with the wall.
If your board and batten is painted a deep navy, a beige upholstered headboard looks stunning. If your wall is white, a wood or leather headboard adds necessary warmth.
The “Gap” Issue
If your battens are thick (like 1 inch or more), your headboard will be pushed away from the wall, leaving a gap. This can be annoying if pillows fall through.
To solve this, you can mount a “ledger board” to the wall that the headboard rests against, or simply choose a headboard that is wall-mounted rather than bed-frame mounted. This allows you to mount the headboard directly to the studs or anchors, bypassing the depth of the battens.
Art Placement
Hanging art on a board and batten wall requires strategy. You generally want to center your art within the “negative space” (the flat wall part), not over a batten.
If your grid is tight, this limits the size of art you can use. This is why I suggest planning your grid spacing after you decide if you want to hang a large piece of art above the bed. If you love a large canvas, you might need a spacing design that leaves a large central rectangle specifically for that piece.
Final Checklist: The “What I’d Do” Summary
If I were managing this project for a client, here is the exact workflow I would follow to ensure success:
1. Map the studs: Locate and mark every stud on the wall. You want to nail into studs wherever possible for strength, though construction adhesive (Liquid Nails) allows you to place battens anywhere.
2. Sketch the grid: Draw the wall to scale on paper. Determine your batten width (usually 2.5 or 3.5 inches) and calculate the spacing to ensure equal boxes on the left and right ends.
3. Prep the wall: Sand down any high spots. If adding a smooth backer board, install it now.
4. Install horizontals first: Install the top rail and baseboard first.
5. Install verticals: Cut your vertical battens to fit snugly between the top and bottom rails. Measure each one individually; floors are rarely perfectly level.
6. Caulk is king: Caulk every single seam where wood meets wall or wood meets wood. This is the most tedious step but the most important for a professional look.
7. Fill nail holes: Use wood filler, not caulk, for the nail holes on the face of the boards. Sand smooth.
8. Prime: If using raw wood or cut MDF edges, prime them to prevent paint absorption.
9. Paint: Spraying gives the best finish, but a small foam roller works well for the flat faces of the boards to avoid brush strokes.
Frequently Asked Questions
Does board and batten make a room look smaller?
Generally, no. It adds depth, which can actually make a room feel more substantial. However, if you paint the walls a very dark color in a room with no natural light, it will feel cozier and more enclosed. To maintain an airy feel in a small room, stick to lighter colors and vertical lines to draw the eye up.
Can I install board and batten on just one wall?
Yes, and in a bedroom, this is the most common approach. The headboard wall is the natural focal point. Doing all four walls can sometimes feel overwhelming and significantly increases the budget. If you do all four walls, keep the pattern simple (like a chair-rail height wainscoting) rather than a full floor-to-ceiling grid.
How much does a DIY board and batten wall cost?
For a standard 12-foot wide bedroom wall, materials (MDF boards, adhesive, caulk, paint) typically range from $200 to $400 depending on the complexity of your grid. If you hire a carpenter, expect to pay significantly more for labor, likely in the $1,000 to $2,000 range.
What size boards should I use?
For a standard 8-foot ceiling, 1×3 boards (which are actually 2.5 inches wide) are the most proportional. If you have 10-foot ceilings or higher, bump up to 1×4 boards (3.5 inches wide) so the trim doesn’t look spindly.
How do I clean the top ledges?
Dust will settle on the horizontal ledges. A microfiber duster or a vacuum with a soft brush attachment is the best way to clean them. Using a satin or semi-gloss paint finish will make wiping them down much easier than a matte finish.
Conclusion
Board and batten is more than just a passing trend on social media; it is a timeless design technique that adds legitimate architectural weight to a room. In a bedroom, it provides a sense of enclosure and safety that helps define the space as a retreat.
Whether you opt for a moody, dark floor-to-ceiling grid or a breezy, white coastal wainscoting, the key lies in the preparation. Take the time to do the math, respect the existing outlets, and commit to the sanding and caulking process. The result will be a custom, high-end look that elevates your sleep space far beyond a basic drywall box.
Picture Gallery


