
Elevate Your Space with Floor to Ceiling Fireplace Tile Ideas
A fireplace is naturally the focal point of any living room, but a standard surround often fails to capture the room’s full potential. Taking your tile work from the floor all the way to the ceiling is one of the most effective architectural tricks in the book. It draws the eye upward, makes standard ceilings feel higher, and adds a sense of grandeur to even modest spaces.
I remember a project in a 1980s ranch home where the original fireplace felt squat and disconnected from the rest of the room. By removing the bulky wood mantel and running a textured slate tile vertically to the ceiling line, the entire volume of the room changed. It went from a dated den to a modern sanctuary without moving a single wall.
If you are just looking for visuals, we have curated a stunning Picture Gallery at the end of the blog post. However, if you are ready to plan your renovation, keep reading for the technical details, design rules, and material selections that will ensure your project lasts.
1. Mastering Scale and Proportion
The most common mistake homeowners make with floor-to-ceiling applications is choosing the wrong tile size for the wall’s dimensions. When you cover a large vertical surface, the grid created by the grout lines becomes a major design element.
If your room is small or the fireplace wall is narrow (under 5 feet wide), avoid small mosaic tiles. Thousands of tiny grout lines can make the space feel busy and cluttered. Instead, opt for large-format tiles, such as 24” x 48” slabs.
Large-format tiles minimize visual interruptions. This creates a sleek, monolithic look that tricks the eye into seeing a wider space.
The Rule of Thirds
When laying out your tile, consider the “rule of thirds” regarding the cut pieces. You never want a sliver of tile (less than 2 inches) on the left or right edges of your fireplace.
Designer’s Note: Before installation begins, I always do a “dry layout” on the floor. We measure the exact width of the wall and center the tile pattern. If centering results in thin slivers on the ends, we shift the center line so the end pieces are at least half a tile wide.
Vertical vs. Horizontal Stacking
The direction you lay rectangular tiles changes the room’s energy.
- Horizontal Stack: This widens the room visually. It is great for contemporary spaces or walls that feel too narrow.
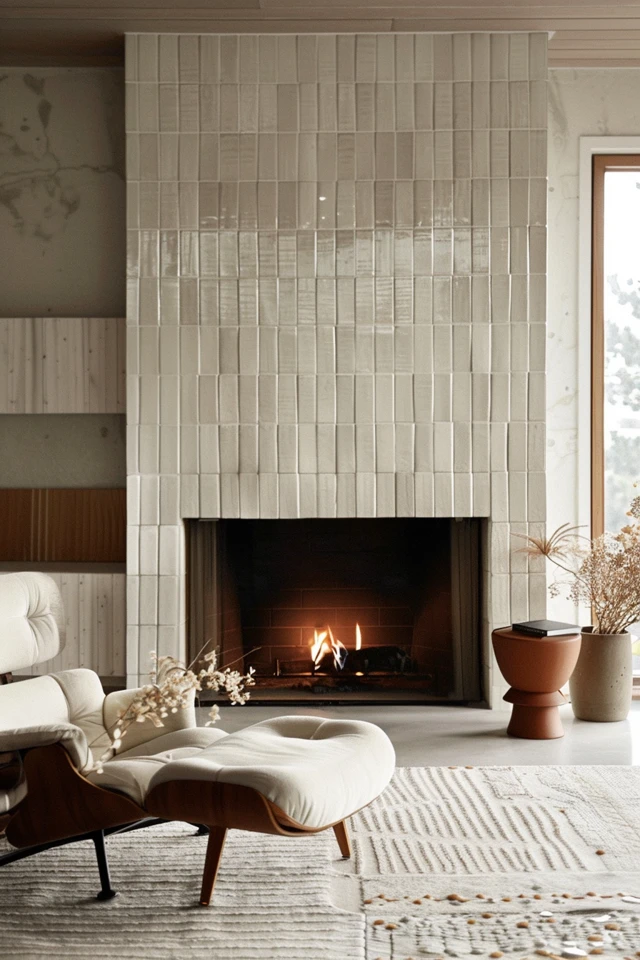
- Vertical Stack: This emphasizes height. Use this in rooms with 8-foot ceilings to make them feel grander.
- Herringbone: This adds traditional elegance and texture but requires about 15% more material due to cuts.
2. Material Selection: Aesthetics Meets Durability
Not all tiles are rated for fireplace surrounds. While the wall above the firebox doesn’t get as hot as the inside (the firebox itself), it is still subject to thermal shock.
You must check the manufacturer’s specifications to ensure the tile is “heat resistant.” Porcelain is generally the workhorse here. It is fired at extremely high temperatures, making it impervious to the heat generated by gas or wood-burning inserts.
Natural Stone Considerations
Marble, slate, and travertine offer unmatched beauty because no two pieces are alike. However, they are porous.
If you have a wood-burning fireplace, soot can stain unsealed natural stone permanently. I recommend honing the stone (matte finish) rather than polishing it, as scratches are less visible on honed surfaces.
Maintenance Alert: If you choose natural stone, you must seal it immediately after installation and reseal it annually. I usually recommend a penetrating sealer that doesn’t change the sheen of the stone.
The Rise of Zellige
Hand-glazed Moroccan Zellige tiles are trending for their shimmering, imperfect texture. They reflect light beautifully, adding depth to a floor-to-ceiling application.
However, they are notoriously difficult to install because they are not perfectly square. They require a skilled setter who knows how to wedge them close together with minimal grout.
3. The Technical Details: Edges and Transitions
The difference between a DIY look and a high-end designer finish usually comes down to how you handle the edges. When you tile a fireplace column that projects into the room, you have exposed outside corners.
Mitered Edges
In luxury projects, we almost always specify mitered edges. This is where the installer cuts the edge of two meeting tiles at a 45-degree angle.
When joined, they form a perfect 90-degree corner with the tile pattern wrapping continuously around the bend. It looks like a solid block of stone rather than tile.
Metal Profiles (Schluter Strips)
A more budget-friendly and durable option is using metal edging, often called Schluter strips. These protect the edge of the tile from chipping.
For a modern look, choose a profile finish that matches your hardware or light fixtures, like matte black or brushed brass. If you want the edge to disappear, choose a powder-coated color that matches the tile grout.
Meeting the Ceiling
Ceilings are rarely perfectly level. If you run a straight line of tile up to a crooked ceiling, the gap will be obvious.
Common Mistake + Fix:
- The Mistake: Leaving a jagged gap at the top and trying to fill it with thick caulk.
- The Fix: Leave a small gap (about 1/4 inch) between the top tile and the ceiling. Install a clean, simple crown molding or a shadow line reveal to hide the discrepancy. If your style is ultra-modern and sans molding, the installer must “scribe” the top row of tiles to match the curve of the ceiling.
4. Managing the Mantel and Hearth
When tiling to the ceiling, the mantel becomes a disruption in the vertical flow. You have three main options: the floating shelf, the full surround, or no mantel at all.
The Floating Mantel
This is the most popular choice for floor-to-ceiling tile. A chunky timber or cast stone beam breaks up the height without hiding the tile work.
Placement Rule of Thumb:
Ideally, mount the mantel 54 to 60 inches from the floor. This places artwork or a TV above it at a comfortable viewing height.
However, you must adhere to fire codes. The National Fire Protection Association (NFPA) generally requires that for every inch the mantel projects out, it must be that much higher above the firebox opening. Always check your local building codes and the fireplace manufacturer’s manual.
The Hearth Design
If your fireplace sits flush with the floor, the floor-to-ceiling tile acts as a pillar. If you have a raised hearth, the transition is critical.
I prefer to use a solid slab of stone (hearthstone) for the seat of the hearth rather than using the same wall tile. This provides a solid surface for sitting and avoids uncomfortable grout lines on the edge.
Designer’s Note: A hearth should overhang the base structure by at least 1 inch to prevent toe-stubbing and create a finished shadow line.
5. Lighting Your Vertical Feature
You are investing heavily in tile; you need to light it properly. Flat, overhead lighting will wash out the texture of your tile.
To truly elevate the space, you need “grazing” light. This involves placing recessed lights or track heads close to the fireplace wall, aiming the beam down the surface.
Positioning the Lights
Place recessed cans or gimbals about 12 to 18 inches away from the wall. This angle catches the edges of stone or the undulation of ceramic, creating dramatic shadows and highlights.
If you are using three-dimensional tile or split-face stone, grazing light is non-negotiable. Without it, the wall will look flat and dull.
Sconces
Adding sconces directly onto the tiled face adds a layer of sophistication. This requires advanced planning, as the electrical boxes must be roughed in before the tile is set.
What I’d do in a real project:
I would measure the width of the fireplace chase. I generally place sconces centered on the “shoulders” of the fireplace (the space to the left and right of the firebox or art). The center of the backplate is usually best placed at 60 to 66 inches from the floor, depending on the ceiling height.
6. Integration with Tech (The TV Debate)
If you plan to mount a TV on your floor-to-ceiling tile, you need to manage the cables. Nothing ruins a beautiful tile job faster than dangling black cords.
The Conduit Solution
Before the cement board goes up, install a structured media box or a wide conduit tube (smurf tube) inside the wall. This allows you to fish HDMI and power cables from behind the TV down to a component cabinet nearby.
The Recessed Niche
For a truly seamless look, we sometimes frame a recessed niche into the wall sized exactly for the TV and its mount. This allows the TV to sit flush with the tile surface rather than protruding 4 or 5 inches.
If you do this, ensure you buy a mount with an articulating arm so you can still access the back of the TV.
Final Checklist: Before You Grout
Before you commit to the installation, run through this quick checklist to ensure no details were missed.
- Substrate Check: Is the wall framed with cement board (like Durock), not standard drywall? Standard drywall cannot support the weight of heavy stone or large tiles.
- Adhesive Selection: Are you using a polymer-modified thin-set? This is required for large-format tiles to prevent them from sagging before they dry.
- Grout Color: Have you tested the grout color? Grout dries lighter than it looks when wet. A high-contrast grout highlights the pattern; a matching grout makes it look like a seamless surface.
- Layout Confirmation: Did you verify where the cuts will fall at the ceiling and floor? Avoid slivers.
- Lighting rough-in: Is the wiring for sconces or potential electric outlets exactly where it needs to be? You cannot move it once the tile is up.
Frequently Asked Questions
Can I tile over an existing brick fireplace?
Yes, but you cannot tile directly onto the brick if it is painted or covered in soot. You generally need to attach a cement board over the brick or use a wire lathe and a scratch coat of mortar to create a flat, bondable surface.
How much does a floor-to-ceiling fireplace renovation cost?
This varies wildly by region and material. However, for a standard 8-foot ceiling, expect to pay between $1,500 and $4,000 for labor, plus the cost of materials. Large-format porcelain is affordable ($5-$10/sq ft), while natural stone or handmade Zellige can run $20-$50/sq ft.
What size grout line should I use?
For a modern, seamless look with rectified tile (tile with perfectly straight edges), go as tight as 1/16th of an inch. For irregular or handmade tiles, you may need 1/8th or even 3/16th to account for size variations.
Does the tile have to match the floor?
No. In fact, it is usually better if it doesn’t. You want the fireplace to stand out. If you have wood floors, almost any stone or ceramic tone works. If you have tile floors, choose a fireplace tile with a different texture or scale to avoid a “commercial bathroom” look.
Conclusion
Taking your fireplace tile from floor to ceiling is a design decision that pays dividends in style and perceived space. It turns a functional heating element into a piece of vertical art.
Whether you choose a moody, dark slate for a cozy den or a bright, white textured ceramic for an airy living room, the key lies in the preparation. Pay attention to the scale of the tile, the lighting that washes over it, and the small edge details that signal high-quality craftsmanship.
With the right planning, your new fireplace will anchor your home for decades to come.
Picture Gallery


One thought on “Elevate Your Space with Floor to Ceiling Fireplace Tile Ideas”