
Fence Line Landscaping Ideas I Love Sharing!
When I walk into a client’s backyard for the first time, the fence is usually the elephant in the room. It is often a stark, wooden, or vinyl boundary that shouts, “This is where your property ends.” Instead of feeling like a garden sanctuary, the yard feels like a box.
My goal in landscape design is always to blur the lines. We want to trick the eye into thinking the garden extends far beyond the property line. By treating the fence line as a canvas rather than a barrier, we can add incredible depth and character to even the smallest urban plots.
In this guide, I am going to walk you through the exact strategies I use to transform rigid perimeters into lush, living backdrops. For a huge dose of visual inspiration, make sure you scroll all the way down because I have curated a stunning Picture Gallery at the end of the blog post.
1. The “Stadium Seating” Approach to Planting
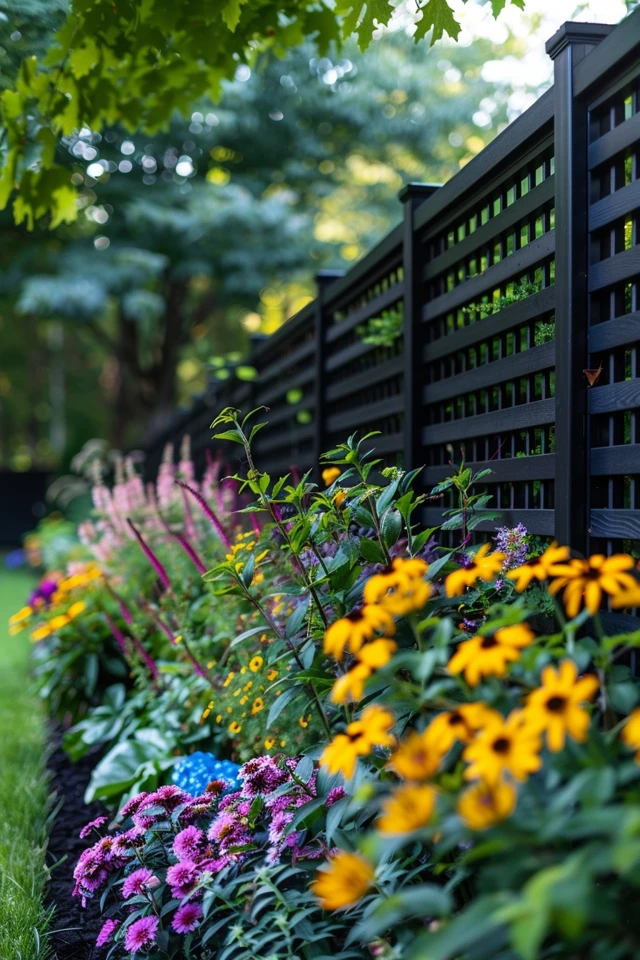
One of the biggest errors homeowners make is planting a single row of identical shrubs right up against the fence. This creates a “green wall” effect that is almost as boring as the fence itself. To create depth, you need to layer your plants.
I use a technique I call “stadium seating.” This involves placing the tallest plants in the back, medium-height plants in the middle, and low-growing ground cover in the front. This tiered arrangement draws the eye upward and creates a sense of abundance.
The Back Layer: Structure
For the back layer, you want height and consistency. I typically choose evergreens here to provide year-round screening. In a standard suburban yard, I look for plants that mature around 6 to 8 feet tall.
Designer’s Note: Avoid planting right against the wood. You must leave at least 18 to 24 inches of space between the fence and the trunk of your back-layer plants. This allows for airflow, prevents the fence from rotting due to trapped moisture, and gives you space to squeeze in for maintenance.
The Middle Layer: Texture and Color
The middle layer is where we have fun. This is where I introduce flowering shrubs or plants with interesting foliage. Hydrangeas, ornamental grasses, or Japanese Maples work beautifully here.
I follow the “Rule of Odds” strictly in this layer. Group your plants in clusters of three or five. This looks much more natural than even pairs, which can feel rigid and formal.
The Front Layer: Spilling Over
The front layer should be low and loose. I love using creeping plants that spill over the edge of the garden bed onto the lawn or patio. This softens the transition from hardscape to softscape.
My Go-To Plantings for the Front Layer:
- Creeping Jenny (for a bright chartreuse pop)
- Liriope (for a structured, grass-like border)
- Mondo Grass (for a deep, dark green contrast)
- Alyssum (for a fragrant, low-maintenance flower)
2. Hardscaping and Vertical Interest
Sometimes, the best solution for a fence line isn’t a plant at all. In modern designs or small courtyards, we often break up the monotony of a fence with architectural elements. This is especially useful if you have a narrow side yard where deep planting beds aren’t an option.
Trellises and Screens
Installing independent trellis panels in front of the fence adds instant dimension. I often use Corten steel panels or cedar slats mounted vertically.
By placing a trellis 6 inches off the fence and uplighting it, you create a dramatic shadow box effect. This turns a boring boundary into an art installation.
The Mirror Trick
It is an old interior design trick, but it works wonders outdoors too. I often mount weather-resistant mirrors on a fence in small city gardens. When framed with climbing vines like Star Jasmine or Clematis, the mirror reflects the greenery and makes the garden feel twice as deep.
Common Mistakes + Fixes:
Mistake: Attaching heavy items directly to old fence posts.
Fix: Always set independent 4×4 posts for heavy trellises or mirrors. Do not rely on the neighbor’s fence to hold up your design elements.
3. Lighting the Perimeter
You cannot invest thousands in landscaping only to have it disappear when the sun goes down. Perimeter lighting is essential for security, but more importantly, for ambiance. It changes the perceived size of the yard at night.
The Grazing Technique
I use a lighting technique called “grazing” for fence lines. This involves placing a light fixture close to the surface (in this case, the fence or the trees in front of it) and aiming the beam steeply upward.
This highlights the texture of the wood, stone, or tree bark. If you have a stone wall or a textured wood fence, grazing is mandatory.
Kelvin Temperature Matters
For residential landscapes, the color temperature of the bulbs is non-negotiable. I exclusively use 2700K (warm white) LEDs.
Anything higher, like 3000K or 4000K, will look blue and clinical, resembling a hospital parking lot. We want the warm, inviting glow of a campfire.
Designer’s Rule of Thumb for Spacing
Do not light every single tree or fence post. That creates a “runway” effect that looks cheap.
Instead, light focal points. Illuminating one large tree in the corner and a cluster of shrubs in the center is often more effective than twelve evenly spaced path lights. Light implies the space between the darkness.
4. Edible and Functional Borders
If you are working with limited square footage, your fence line might need to pull double duty. It can be a beautiful visual barrier and a source of food. I am seeing a huge uptick in requests for “foodscaping” along property lines.
Espalier Fruit Trees
This is one of my favorite high-end looks that is actually quite space-efficient. Espalier is the ancient practice of training a tree to grow flat against a wall or fence.
Apple, pear, and fig trees train very well. You can keep them pruned to a depth of just 12 inches. They require patience and specific pruning cuts, but the architectural payoff is massive.
The Herb Hedge
Instead of traditional Boxwoods, consider rosemary. In zones 7 and higher, rosemary grows into a substantial, woody shrub.
It is evergreen, drought-tolerant, smells incredible when you brush past it, and you can cook with it. A rosemary hedge planted 3 feet on center along a sunny fence line is both practical and stunning.
5. Renter-Friendly and Budget Constraints
Not everyone owns their home or has the budget for mature trees. I work with many renters who hate their fence but can’t drill into it or dig up the yard. We have to get creative with non-permanent solutions.
Container Gardens
Use large, rectangular planter boxes placed along the fence line. The key here is scale. Small pots look cluttered.
I recommend troughs that are at least 36 inches long and 24 inches tall. Plant tall grasses or bamboo in these pots.
A Note on Bamboo:
Never plant bamboo directly in the ground unless it is the “clumping” variety. Running bamboo is invasive and can destroy foundations and relationships with neighbors. Planting it in a metal trough is the safest way to get that Zen look without the legal nightmare.
Bamboo Reed Rolls
If the fence itself is ugly (like chain link), you can buy rolls of bamboo or willow reed fencing. These are affordable and can be zip-tied directly to a chain-link fence.
This instantly provides privacy and a natural backdrop. It usually lasts 3 to 5 years, which is perfect for a standard lease term.
Designer’s Real-World Checklist
When I am finalizing a fence line design for a client, I run through this specific mental checklist to ensure the design is buildable and sustainable.
What I’d Do in a Real Project:
1. Check the Drainage
Look at the base of the fence. Is the ground soggy? If water pools there, standard plants will die of root rot. I would install a French drain or choose water-loving plants like River Birch or Ferns.
2. Validate Sun Exposure
Don’t guess. I stand at the fence line at 10 AM, 1 PM, and 4 PM. A North-facing fence creates a permanent shadow for plants right at its base. I would spec shade-tolerant plants like Hostas or Hydrangeas for that zone.
3. Verify “Mature” Widths
I check the tag for the 10-year width of the plant. If a tree grows 15 feet wide, I am not planting it 3 feet from the fence. I measure out exactly half the mature width plus 12 inches for the setback.
4. Plan for the “Weed Eater” Line
I always design a 4-inch gap of gravel or hard mulch right against the fence wood. This prevents the maintenance crew from hitting the wood with a weed eater, which shreds the posts and accelerates rot.
Common Mistakes + Fixes
Here is a quick troubleshooting guide for the most common issues I see when homeowners DIY their fence line landscaping.
Mistake: Planting a monoculture (only one type of plant).
Fix: If a disease or pest hits that specific species, you lose your entire screen at once. Always mix at least three different species to ensure biodiversity and resilience.
Mistake: Using landscape fabric.
Fix: I never use weed barrier fabric in planting beds. It eventually clogs, suffocates the soil, and weeds grow right on top of it within two years. Use 3 to 4 inches of natural hardwood mulch instead. It suppresses weeds and feeds the soil as it breaks down.
Mistake: Ignoring the neighbor’s view.
Fix: Be mindful of what hangs over. If you plant a tree that drops sticky berries or heavy limbs onto the neighbor’s patio, you are creating a conflict. Keep messy trees away from the boundary.
Final Checklist
Before you head to the nursery, ensure you have ticked these boxes:
- Zone Check: Are the plants rated for your USDA Hardiness Zone?
- Utility Check: Have you called 811 to mark utility lines before digging post holes or planting trees?
- Height Restrictions: Does your HOA limit the height of trellises or hedges?
- Water Access: Will your hose reach the far corners of the fence line for watering?
- Soil Prep: Have you budgeted for compost to amend the soil? (Never plant directly into clay).
FAQs
How much does it cost to landscape a fence line?
For a DIY project using 3-gallon shrubs and mulch, budget roughly $25 to $40 per linear foot. If you are hiring a pro and installing irrigation, lighting, and 15-gallon trees, expect to pay between $150 and $300 per linear foot.
Can I paint my neighbor’s fence if it faces my yard?
Legally, usually no. If the fence is on their property, you cannot alter it without permission. However, many neighbors are happy to let you stain your side if you offer to pay for the materials. Always get this agreement in writing.
What is the fastest-growing plant for privacy?
‘Green Giant’ Arborvitae is the gold standard. It can grow 3 to 5 feet per year once established. However, it gets massive (30+ feet tall). For smaller yards, the ‘Emerald Green’ Arborvitae is slower but stays much narrower.
How do I stop my dog from running a track along the fence?
Dogs are territorial and will patrol the perimeter. Instead of fighting it, I design a “dog run” behind the plants. I leave a 2-foot gap between the fence and the back of the shrubs, covered in cedar chips. The dog stays hidden behind the bushes but can still patrol, and your plants don’t get trampled.
Conclusion
Treating your fence line as an integral part of your home design rather than an afterthought changes everything. It turns a “property line” into a living backdrop. It quiets the noise of the street, softens the hard edges of construction, and makes your home feel finished.
Whether you are a renter using bamboo rolls and pots, or a homeowner installing a tiered evergreen border with uplighting, the principle is the same: add layers.
Start with the structure, fill in with texture, and don’t forget the lighting. Your backyard shouldn’t feel like a cage; it should feel like a garden room.
Picture Gallery


