
Title: Fresh Closet Paint Ideas for a Stylish Upgrade
Introduction
We often treat closets as purely utilitarian spaces, ignoring them until the rest of the house is finished. However, you likely start and end every single day standing in this space. A closet that feels dingy or uninspired can actually impact your mood before you even put your shoes on.
Transforming a closet doesn’t always require a contractor or a custom cabinetry budget. Paint is the single most cost-effective tool we have to change the architecture and feeling of a small room. If you are looking for specific visual inspiration, make sure to check out the Picture Gallery at the end of this post.
Whether you have a sprawling walk-in or a standard reach-in, the right color and finish can make your wardrobe look more expensive. It creates a boutique-like atmosphere that makes getting dressed feel like an event rather than a chore. Let’s look at how to choose the right products and colors for this high-traffic zone.
1. Selecting the Right Finish for High-Traffic Zones
The biggest mistake homeowners make in closets is using the leftover matte paint from their bedroom walls. Closets are high-contact zones. You have zippers, buttons, hangers, and shoes constantly bumping against the walls and shelving.
Matte and flat paints have a porous surface that holds onto scuffs and oils. If you use matte paint in a closet, you will see black marks from rubber shoe soles and metal hangers within weeks. You cannot easily wipe these surfaces clean without burnishing the paint.
For closet walls, I always specify a high-quality Satin or Eggshell finish. These sheens have enough resin to create a protective shell, allowing you to wipe away scuff marks with a damp cloth. They reflect just enough light to keep the space feeling open without looking like a shiny gym locker room.
For shelving and cabinetry, you must go a step further. I recommend a Semi-Gloss or a specialized Urethane Enamel. Standard wall paint, even in semi-gloss, often remains tacky (sticky) for weeks, causing a phenomenon called “blocking.” This is when your painted door sticks to the frame, or a heavy sweater sticks to a painted shelf. Urethane enamels cure harder and faster, creating a furniture-grade finish that won’t peel when you slide a storage bin across it.
2. The Psychology of Color in Small Enclosed Spaces
When choosing a color, you have two distinct design paths: expanding the space or creating a “jewel box.” Most people default to bright white to make a small closet feel larger. While effective, standard builder’s white can feel sterile and cheap under harsh closet lighting.
If you want a light and airy feel, choose an off-white with a specific undertone that matches your flooring. If you have warm oak floors, a stark cool white will make the wood look orange. Instead, opt for a creamy white like Benjamin Moore’s Swiss Coffee or Sherwin Williams’ Alabaster. These have enough warmth to bridge the gap between clothing textures and the floor.
Alternatively, the “jewel box” approach involves painting the closet a deep, moody color. This is my favorite trick for smaller reach-in closets or powder rooms. Dark colors like charcoal, navy, or forest green recede visually, which can actually make the walls feel like they are disappearing.
A dark backdrop also makes clothing pop. Think about high-end retail stores; they often use darker shelving or backdrops because it highlights the fabric and cut of the garments. If you have a chaotic wardrobe with many colors, a dark background unifies the visual noise better than white does.
Designer’s Note: The Lighting Reality Check
In my projects, I constantly remind clients that paint color does not exist without light. A color that looks beautiful in your bedroom will look completely different inside a windowless closet.
Closets usually rely entirely on artificial light. If you have standard 2700K (warm white) bulbs, a crisp gray paint will turn muddy or green. For closets, I strongly suggest upgrading your lighting to 3000K or 3500K LED bulbs with a high CRI (Color Rendering Index) of 90+. This mimics natural daylight and ensures that the navy blue sweater you pick out doesn’t look black until you get to the office.
3. Painting Laminate and IKEA Cabinetry
Many homes feature melamine or laminate closet systems, such as the ubiquitous IKEA PAX. A common question is whether you can paint these slippery surfaces to get a custom look. The answer is yes, but only if you abandon standard wall painting rules.
If you apply standard latex paint directly to laminate, it will scratch off with a fingernail. The surface is non-porous plastic, so the paint has nothing to grip. You must create a chemical bond first.
Step 1: Scuff Sanding. You do not need to strip the surface, but you must scuff it. Use 120-grit sandpaper to rough up the smooth sheen. You are creating microscopic grooves for the primer to bite into. Wipe away every speck of dust with a tack cloth or denatured alcohol before proceeding.
Step 2: The Right Primer. Do not use a standard water-based drywall primer. You need a bonding primer. I exclusively use shellac-based primers (like BIN) or high-adhesion bonding primers (like STIX) for laminate. Shellac smells strong and requires ventilation, but it dries brittle and hard, providing the perfect foundation.
Step 3: Application. Use a flocked foam roller or a mohair roller for the smoothest finish. Standard nap rollers will leave an “orange peel” texture that looks like a painted wall rather than smooth cabinetry. Apply two thin coats of your enamel paint, sanding lightly with 220-grit paper between coats.
What I’d Do in a Real Project: The Laminate Checklist
If I were hired to upgrade a standard laminate closet, here is the exact workflow I would follow:
- Remove hardware: Take off all rods, brackets, and hinges. Never tape around them; it always looks amateur.
- Clean: Scrub surfaces with TSP (Trisodium Phosphate) substitute to remove hand oils.
- Sand: Quick pass with 120-grit sanding block.
- Prime: One coat of shellac-based primer.
- Caulk: This is the secret step. Run a thin bead of paintable caulk along every seam where the shelves meet the wall. This makes the unit look built-in rather than flat-packed.
- Paint: Two coats of urethane alkyd enamel in a satin finish.
- Cure time: I would tell the client they cannot put clothes back on the shelves for 5 to 7 days. Even if it feels dry, it needs to cure to hardness.
4. Strategies for Ceilings and Trim
In a standard room, we usually paint the ceiling flat white. In a closet, specifically a walk-in, I prefer to wrap the wall color up onto the ceiling. This is a technique called “color drenching.”
When the walls and ceiling are the same color, your eye doesn’t stop at the corner. This blurs the boundaries of the room, making a small walk-in feel like a cozy, singular volume. It is especially effective if you have angled ceilings or awkward bulkheads, which are common in closet framing.
For trim and baseboards, you have two options. First, you can paint them to match the closet walls in a higher sheen (semi-gloss). This looks modern and custom.
Second, if the closet has a door that stays open, you can match the trim to the main bedroom’s trim color. This visually connects the two spaces. However, if the closet is small, breaking up the wall with a white baseboard can make the walls look shorter. I generally vote for painting the baseboards the same color as the closet walls to maximize verticality.
5. Coordination with Hardware and Metals
Paint does not live in a vacuum. It must coordinate with your hanging rods, drawer pulls, and lighting fixtures. The contrast between your paint color and your metal finishes dictates the style of the closet.
Brass and Gold: These warm metals look incredible against dark, cool paint colors. A navy blue (like Hale Navy) or a deep charcoal (like Iron Ore) with unlacquered brass hardware feels luxurious and masculine. It creates a high-contrast, “gentleman’s lounge” aesthetic.
Chrome and Polished Nickel: These cool metals sparkle against crisp whites and light grays. If you are using a color like Benjamin Moore’s Stonington Gray, chrome hardware keeps the look fresh and airy. This combination is ideal for linen closets or spaces where you want a sense of extreme cleanliness.
Matte Black: This is the most versatile finish. It looks graphic and modern against white walls, but it can get lost against dark walls. If you want a moodier closet with black walls, avoid black hardware unless you are going for a monochrome, texture-focused look.
When painting, remember that closet rods usually sit 12 inches off the back wall. However, the hangers are wider—usually 17 to 18 inches. This means your clothes will obscure the top 60 to 80 inches of the wall. If you want a pop of color in a reach-in closet, focus on the back wall, but know that you will only see slivers of it between garments.
Common Mistakes + Fixes
Mistake: Ignoring the “Blocking” Effect.
The Fix: Many people paint their shelves and immediately stack towels or sweaters on them the next day. The paint acts like glue. You must wait for the full cure time listed on the can (often 7-14 days for full cure), or use wax paper between the shelf and the items for the first month.
Mistake: Poor Lighting Choice.
The Fix: Painting a closet a rich color without upgrading the lighting results in a cave. If you can’t hardwire new lights, use rechargeable motion-sensor LED strips under the shelves. These illuminate the clothes directly and make the new paint color read true.
Mistake: Painting the Rod Sockets.
The Fix: Plastic or metal rod cups should not be painted. The friction of the rod moving back and forth will chip the paint immediately, leaving ugly flakes on your clean clothes. Remove them, paint the wall, and reinstall them.
Final Checklist for Your Closet Paint Project
Before you head to the paint store, run through this list to ensure you haven’t missed a critical step in the planning phase.
Measurements & Logistics
- Measure the square footage of the walls (Length x Height). Subtract doors.
- Measure linear feet of shelving if you plan to paint the organizers.
- Check the depth of the closet. If it is a standard 24-inch depth, you will need a short-handled roller frame to maneuver easily.
- Determine where you will stage your clothes for 3-5 days while the closet dries.
Materials
- Wall Paint: 1-2 gallons of High-Quality Latex in Satin or Eggshell finish.
- Trim/Shelf Paint: 1 quart to 1 gallon of Urethane Enamel in Satin or Semi-Gloss.
- Primer: Shellac-based (for laminate/wood bleed) or high-quality latex primer (for drywall).
- Applicators: Microfiber rollers (3/8 inch nap for walls), foam or mohair rollers (for shelves), and a 2-inch angled sash brush.
- Prep: Spackle, 120 and 220 grit sandpaper, tack cloths, painter’s tape, and paintable caulk.
Lighting Assessment
- Turn on the current light. Does it cast yellow shadows?
- Buy a sample pot of paint. Paint a large poster board.
- Place the board behind your hanging clothes to see how the color interacts with the fabric shadows.
FAQs
Should I paint the inside of my closet lighter or darker than the room?
There is no hard rule, but generally, lighter colors make it easier to see your clothes. Dark colors feel more luxurious but require excellent lighting. If the closet has no light source, stick to light tones with a high Light Reflectance Value (LRV) to maximize whatever ambient light comes in from the bedroom.
Can I use chalk paint for a closet makeover?
I generally advise against chalk paint for closet shelving unless you seal it heavily with a topcoat. Chalk paint is porous and has a drag to it. You want closet surfaces to be slick so fabrics glide over them. If you love the matte look, use a matte polyurethane topcoat over the paint.
How do I prevent paint smell from lingering in the closet?
Closets have poor airflow. Use low-VOC or zero-VOC paints to minimize fumes. After painting, place a bowl of baking soda or activated charcoal in the closet for a few days to absorb odors before moving your clothes back in. A box fan pointing out of the closet during the drying process helps significantly.
Is it worth painting the ceiling of a small reach-in closet?
Usually, no. In a reach-in closet, the header of the doorframe blocks the view of the ceiling. Unless you are very tall or the closet is very deep, you won’t see it. Focus your energy on the back wall and the side returns.
Conclusion
Upgrading your closet with paint is one of the most satisfying weekend projects you can undertake. It forces you to declutter, reassess your wardrobe, and create a space that respects your belongings.
By choosing the right durable finishes, prepping your surfaces correctly, and considering the lighting, you can turn a builder-grade box into a custom dressing area. Remember that the goal is not just a pretty color, but a durable backdrop that withstands the daily rhythm of your life.
Take the time to sand that laminate, wait for that cure time, and test your swatches. The result will be a closet that makes you smile every time you open the door.
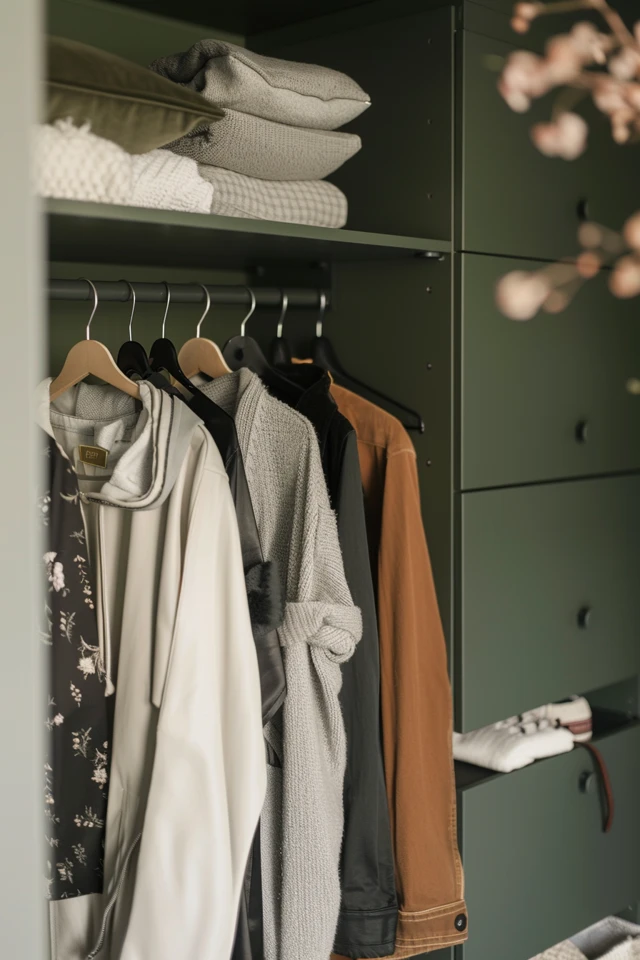
Picture Gallery


