
Fresh Kitchen Floor Tile Ideas 2025 | Top Trends
Introduction
Selecting kitchen flooring is one of the highest-stakes decisions you will make during a renovation. Unlike a backsplash or a paint color, ripping out floor tile is expensive, messy, and disruptive to your daily life. Over the last decade of designing kitchens, I have seen homeowners agonizing over durability versus aesthetics more here than in any other room.
We are seeing a massive shift in 2025 away from the stark, high-gloss sterile look and toward materials that feel grounded and organic. For those who want to skip straight to the visuals, please note that a curated Picture Gallery is available at the end of this blog post to spark your imagination. The goal this year is “lived-in luxury,” prioritizing materials that actually look better with a little wear and tear.
In this guide, I am going to break down the top five tile trends I am currently specifying for clients. We will look at practical considerations like slip resistance, grout maintenance, and how these choices impact the perceived size of your kitchen. Let’s get your foundation right so you can enjoy your kitchen for decades.
1. The Renaissance of Warm Terracotta and Brick
For years, gray porcelain was the default safe choice for developers and homeowners alike. However, 2025 is ushering in a return to warmth, specifically through the use of terracotta and brick-look pavers. This trend is driven by a desire for kitchens that feel cozy and established rather than showroom-perfect.
Real terracotta offers a beautiful, varied texture that hides crumbs and dust exceptionally well. If you have pets that shed or small children dropping cereal, this variation is a lifesaver. The color palette ranges from deep rust to soft, sandy peaches, which pairs beautifully with the trending creamy white and green cabinet colors.
Material Choices: Authentic vs. Porcelain
You have two distinct paths here: authentic clay or porcelain lookalikes.
- Authentic Terracotta: This requires sealing upon installation and regular resealing every few years. It develops a patina over time, which some clients love and others find frustrating.
- Porcelain Brick/Terracotta: This gives you the visual warmth without the porous nature of clay. It is waterproof, stain-proof, and requires zero sealing.
Designer’s Note: The Thickness Factor
Real brick veneers or authentic terracotta tiles are often thicker than standard porcelain.
If you are renovating and keeping your existing cabinets, check your dishwasher clearance. I have seen projects where the new flooring trapped the dishwasher in place because the tile buildup was too high. Always measure the gap between the subfloor and the bottom of your countertop overhang or appliance feet.
Common Mistakes + Fixes
Mistake: Using bright white grout with terracotta or brick.
Fix: Use a “natural gray” or “sand” colored grout. White grout will stain immediately against the rustic edges of these tiles and look dirty within weeks. Match the grout to the mid-tone of the tile to create a seamless, expansive look.
2. Large-Format “Quiet” Stone
The era of the standard 12×12 tile is effectively over for high-end kitchen design. The trend for 2025 is “quiet luxury” using large-format porcelain that mimics natural limestone, travertine, or slate. We are talking about sizes like 24×24, 24×48, or even 30×30 inches.
The logic here is simple: fewer grout lines mean less visual clutter and less scrubbing. When you use a large tile that mimics a soft limestone, the floor reads as one continuous surface. This is particularly effective in open-concept homes where the kitchen bleeds into the living area.
The Rectified Edge Rule
To pull this off successfully, you must specify “rectified” porcelain tile.
Rectified tile has been mechanically finished on all sides to ensure it is perfectly square and precise. This allows you to install the tile with extremely tight grout joints, typically 1/16 of an inch.
What I’d Do in a Real Project
If I am designing a small kitchen (under 150 sq ft), I actually prefer using larger tiles.
A common myth is that small rooms need small tiles. The opposite is true; many grout lines chop up the floor and make the room feel smaller. I would spec a 24×24 matte porcelain in a warm greige tone with a matching grout color to visually expand the floor plan.
Installation Criticality: Lippage
Large tiles have a tendency to bow slightly in the middle during manufacturing.
To prevent “lippage” (where one corner sticks up higher than the neighbor), use a leveling clip system during installation. Do not let your contractor skip this step, or you will feel sharp edges every time you walk across the kitchen in socks. Additionally, avoid a 50% offset brick pattern with large tiles; stick to a 1/3 offset or a stacked grid to minimize unevenness.
3. Checkerboard 2.0: Softer Contrasts
The classic black and white diner floor had a major resurgence recently, but for 2025, the look is softening. We are moving away from high-contrast black and white toward subtler, tone-on-tone pairings. Think honed marble in soft white and grey, or beige and terracotta squares.
This updated checkerboard feels historic and European rather than retro-American. It adds instant character to a new build and works exceptionally well in L-shaped or galley kitchens. The pattern creates a sense of movement that draws the eye through the space.
Diagonal vs. Straight Lay
The orientation of your checkerboard changes the room’s energy completely.
- Straight Lay (Square to walls): This feels more traditional and static. It highlights the architecture of the room but can accentuate walls that aren’t perfectly square.
- Diagonal Lay (Diamond): This is my preferred method for 2025. It makes narrow kitchens look wider and hides the fact that a room might be slightly out of square.
Material Pairing for Durability
If you are using real stone for this look (like Marble and Limestone), be aware that different stones wear differently.
Ensure both stones have similar abrasion resistance ratings. You do not want the darker stone to wear down faster than the lighter stone, creating an uneven walking surface. Using porcelain lookalikes eliminates this technical risk entirely.
Common Mistakes + Fixes
Mistake: Using a border when the room shape is irregular.
Fix: In most residential kitchens, skip the border. Let the checkerboard pattern run directly into the toe kick of the cabinets. Borders can look cluttered and often highlight awkward cuts where the cabinets jut out.
4. The Textural Shift: Tumbled and Chiseled Edges
Smooth, high-gloss floor tiles are out. They are slippery when wet and show every smudge, water droplet, and dog hair. The 2025 kitchen is embracing texture through tumbled stone, chiseled-edge porcelain, and honed finishes.
This trend is partly aesthetic and partly functional. A tile with surface variation provides grip, which is essential in a “wet zone” like the kitchen. Visually, these imperfect edges add a sense of history and depth that flat, laser-cut tiles simply cannot achieve.
The Slip Resistance Standard
When shopping for floor tile, you need to look at the DCOF (Dynamic Coefficient of Friction) rating.
For a kitchen, you want a rating of 0.42 or higher. Textured and tumbled tiles naturally score high here. However, there is a balance; if the texture is too aggressive, it becomes a nightmare to mop because the texture shreds your mop head.
Grout Haze Warning
Textured tiles are notorious for holding onto grout during installation.
If the installer does not clean the surface aggressively while the grout is wet, you will end up with “grout haze” caught in the texture. This creates a cloudy film that dulls the color of the tile. I always insist on a pre-sealing step for real stone or a grout release agent for textured porcelain before grouting begins.
Designer’s Note: The “Sock Test”
Before purchasing 500 square feet of tumbled stone, buy one sample piece.
Place it on the floor and walk on it in socks. Then walk on it barefoot. If the edges feel sharp or uncomfortable, it is not the right choice for a kitchen where you stand for long periods. It should feel like a worn river stone, not a piece of sandpaper.
5. Engineered Wood-Look Tile (The Refined Plank)
Wood-look porcelain has been around for a while, but the technology has improved drastically. For 2025, the trend is moving toward “blonde” and “white oak” visuals with very matte finishes. We are avoiding the dark, heavy faux-barnwood looks of the past.
This is the ultimate solution for homeowners who want the flow of hardwood throughout the first floor but fear water damage in the kitchen. It is arguably the most durable floor you can install, impervious to dishwasher leaks and dropped pots.
Sizing and Layout Logic
To make wood-look tile convincing, size matters.
Avoid short planks (under 36 inches). Look for planks that are at least 48 inches long and 8 inches wide. The longer and wider the plank, the more it mimics expensive engineered hardwood.
Herringbone for Impact
If you want to elevate the look, install wood-look tile in a herringbone pattern.
This layout signals “custom design” immediately. However, be aware that herringbone installation requires roughly 15-20% extra material for waste (cuts), and labor costs are typically 30% higher due to the complexity of the cuts.
The Grout Color Secret
The biggest giveaway that a floor is tile and not wood is the grout line.
Select a grout color that is slightly darker than the lightest tone in the wood grain. Never go lighter. You want the grout to disappear into the shadows of the “planks.” Use the smallest spacer possible, ideally 1/16″, to keep the illusion intact.
Final Checklist: Before You Order
Before you swipe your card, run your choice through this practical checklist to ensure it works for your specific life.
- The Water Test: Pour a spoonful of water on your sample. Does it bead up or soak in? If it soaks in (like unsealed terracotta), are you prepared to seal it annually?
- The Light Check: Place the sample on the floor, not on a table. The light hits the floor differently. A tile that looks light gray on a counter might look dark charcoal in the shadow of an island.
- Appliance Clearance: Have you measured the height of your new floor plus the mortar bed? Will your refrigerator still fit under the upper cabinet?
- Underfloor Heating: If you live in a cold climate, stone and porcelain are cold on the feet. Have you budgeted for an electric heating mat? It is much cheaper to add now than to regret it later.
- Attic Stock: Always order 10-15% extra for cuts and waste. I recommend keeping 2 extra boxes in your garage forever. If a pipe bursts or a cabinet layout changes in 10 years, that tile batch will likely be discontinued.
FAQs
Q: Is checkerboard flooring a fad that will look dated in 2026?
A: High-contrast black and white can feel trendy, but softer combinations like limestone and marble are timeless. They have been used in European kitchens for centuries. If you stick to natural stone tones, it acts as a neutral base rather than a loud statement, ensuring longevity.
Q: Can I tile over my existing vinyl or tile floor?
A: Technically, yes, products exist for this, but I strongly advise against it. It raises the floor height, creating trip hazards at doorways and trapping appliances. It also relies on the old floor’s adhesion. If the old floor lifts, your new expensive tile cracks. Always demo down to the subfloor.
Q: What is the best tile for a kitchen with big dogs?
A: Textured porcelain is the winner. It is scratch-proof (unlike real hardwood) and provides grip for dog paws (unlike polished marble). Look for a “stone look” porcelain with a matte finish. Avoid high-gloss finishes as they scratch easily and are slippery for pets.
Q: Should I put tile under the cabinets or just up to them?
A: Always install tile wall-to-wall, underneath the cabinets. If you ever change your cabinet footprint in the future, your floor is already there. Furthermore, installing cabinets on top of the subfloor and tiling up to them creates a “well” that can trap water if a leak occurs, potentially rotting the cabinets from the bottom up.
Conclusion
The kitchen flooring trends for 2025 are a refreshing step back toward authenticity and comfort. We are trading the “showroom shine” for materials that feel good underfoot and forgive the messes of daily life. Whether you gravitate toward the rustic warmth of terracotta or the clean lines of large-format limestone looks, the key is prioritizing texture and scale.
Remember, the floor is the largest surface area in your kitchen. It anchors the entire palette. Don’t rush the decision. Order samples, live with them for a few days, and test them against your cabinet finishes in morning, noon, and evening light. A well-chosen floor is one you shouldn’t have to think about—it should just work, day in and day out.
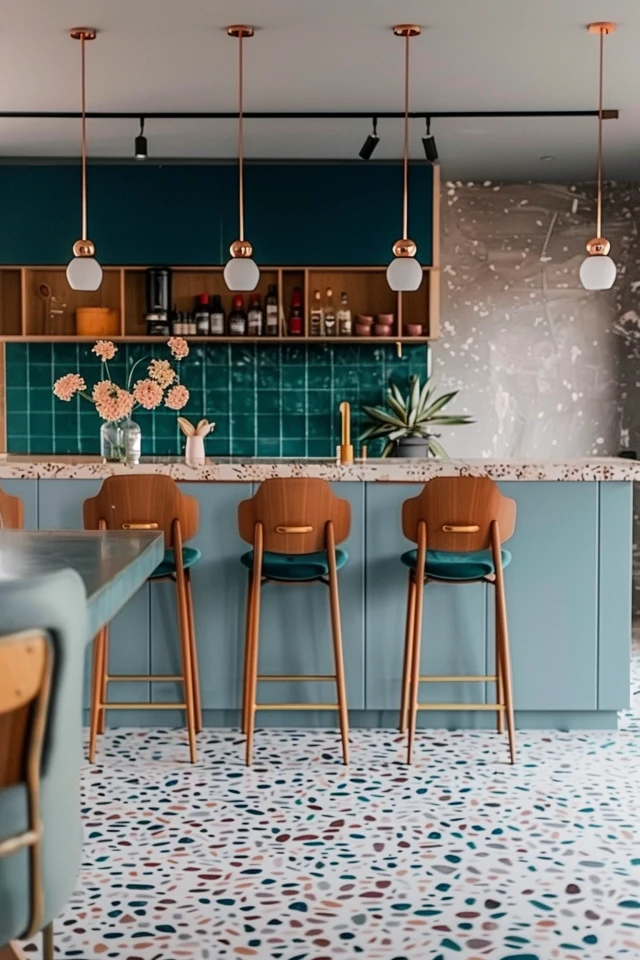
Picture Gallery


