
Title: Garage Paint Ideas to Transform Your Space
Introduction
For many homeowners, the garage is the forgotten stepchild of the house, often relegated to a dark, cluttered storage unit for holiday decorations and sports gear. However, I constantly remind my clients that for most families, the garage is actually the true front door; it is the first space you see when you come home and the last you see when you leave. For plenty of visual inspiration, make sure to check out the Picture Gallery at the end of the blog post.
Treating your garage with the same design consideration as your mudroom or kitchen can fundamentally shift how you feel about arriving home. A coat of paint is the most cost-effective tool we have to change the atmosphere from “utility storage” to “sleek extension of the home.” When we approach garage design, we look for a balance between extreme durability and aesthetic flow.
In this guide, I will walk you through professional strategies for selecting colors, finishes, and layouts that handle the unique stress of a garage environment. We will move beyond basic white walls and explore how zoning, finish selection, and lighting interactions can create a space that is as functional as it is beautiful.
1. The Foundation: High-Performance Floor Coatings
When we talk about painting a garage, the floor is usually the highest-impact surface you can change. Standard concrete is porous, prone to staining from oil leaks, and constantly generates dust.
However, standard porch and patio latex paint is rarely sufficient for a garage floor due to a phenomenon known as “hot tire pick-up.” This happens when hot tires from a recently driven car soften the paint, causing it to delaminate and stick to the tire.
For a professional finish that lasts, I always recommend a two-part epoxy or a polyaspartic coating rather than a one-part paint. These chemical coatings cure rather than dry, creating a bond that is significantly stronger than standard paint.
If you are determined to use a standard concrete paint for budget reasons, you must focus on preparation. The concrete must be acid-etched to open the pores, similar to sanding wood before staining.
Designer’s Note:
The biggest mistake I see DIYers make is skipping the moisture test. Tape a 2×2 foot square of plastic sheeting to the concrete floor and leave it for 24 hours. If the concrete is darker underneath or you see water droplets on the plastic, your floor has too much moisture for standard paint or epoxy. You will need a moisture-vapor barrier primer first, or the coating will bubble and peel within six months.
Choosing the Right Floor Color
- Solid Grays and Tans: These are the standard for a reason; they reflect light well and hide light dust. However, solid light gray shows tire marks instantly.
- Decorative Flake: From a maintenance perspective, a heavy flake distribution (terrazzo look) is the best option for a working garage. The multi-colored chips hide dirt, bugs, and scratches better than any solid color.
- Metallic Finishes: These look like marble and are stunning for “showroom” garages, but they can be slippery. If you live in a rainy or snowy climate, I advise against smooth metallics unless you add a significant anti-slip aggregate.
2. Selecting Wall Finishes: Sheen Matters More Than Color
In a living room, I might suggest a matte or eggshell finish to hide drywall imperfections. In a garage, those rules go out the window.
Garage walls take a beating from car doors, leaning bikes, and flying sawdust. A flat or matte paint holds onto dirt and is impossible to scrub without burnishing (creating a shiny spot).
For garage walls, I specify a minimum of a Satin finish, but Semi-Gloss is often the smarter choice. The higher the sheen, the tighter the paint resin structure, which creates a harder shell that resists moisture and mildew.
If you are worried that semi-gloss will highlight the bad tape-and-bed jobs often found in unfinished garages, you have two options. You can skim coat the walls for a smooth level-5 finish (expensive), or you can lean into a textured paint or heavy-nap roller to mask the imperfections intentionally.
Common Mistake + Fix:
Mistake: Using exterior paint inside the garage because “it’s basically outside.”
Fix: Exterior paints often contain mildewcides and chemicals that off-gas for a long time, which can be harmful in an enclosed space with poor ventilation. Always use a high-quality interior paint that is rated for high-traffic areas or specifically formulated for scuff resistance.
3. Color Theory for Low-Light Spaces
Most garages have minimal natural light, relying on a few small windows or overhead fluorescent strips. This lighting environment changes how paint colors read.
Colors with cool undertones (blues, cool grays, bright whites) tend to look cleaner and crisp under the 4000K-5000K LED shop lights that are standard in garages. Warm tones (yellows, beiges, warm whites) can sometimes look dingy or dirty in a garage setting, especially if the lighting is inadequate.
The Two-Tone Wainscot Technique
One of my favorite tricks for making a garage feel designed is the two-tone wall, often called a painted wainscot.
I recommend painting the bottom 36 to 48 inches of the wall a darker color (charcoal, navy, or slate) and the top portion a bright white or light gray.
There is a functional reason for this measurement. The average car bumper and door edge hit below the 40-inch mark. By painting the lower section dark, you camouflage the inevitable scuffs and tire rubs that happen over time.
What I’d do in a real project:
- Step 1: Measure 48 inches up from the floor (this aligns with standard plywood sheets if you ever want to add wood protection later).
- Step 2: Use a laser level to tape a crisp line.
- Step 3: Paint the lower section Scuff-X in “Kendall Charcoal” or a similar dark gray.
- Step 4: Paint the upper section and ceiling in a high-reflective white to maximize the efficacy of your overhead lights.
4. The Fifth Wall: Strategies for the Ceiling
Garage ceilings are often filled with visual clutter: garage door tracks, motors, conduit, and exposed rafters.
If your garage is finished with drywall, painting the ceiling bright white is the best way to make the space feel larger and brighter. It reflects the light down onto your workspace.
However, if you have an unfinished garage with exposed rafters, painting everything white can be a nightmare to execute and difficult to keep clean. In these instances, I often recommend “blacking out” the ceiling.
By spraying the rafters, conduit, and ductwork a flat black (like “Tricorn Black”), you effectively make the clutter disappear. The eye stops traveling up, making the ceiling feel infinite rather than messy. This creates a very cool, industrial-look vibe often seen in coffee shops or modern lofts.
If you choose a black ceiling, you must upgrade your lighting. You will lose the bounce-light effect of a white ceiling, so you will need to increase your lumen count by about 20% to compensate.
5. Zoning with Accent Colors
If you use your garage for multiple purposes—parking, woodworking, and a home gym—paint is the easiest way to define those zones without building walls.
I use “color blocking” to designate specific areas. For example, if you have a workbench area, paint that specific section of the wall (width of the bench plus 12 inches on each side) in a bold accent color like “International Orange” or a deep “Hunter Green.”
This visually anchors the workbench and signals that this is a creative zone. For gym areas, I often use energizing colors or a distinct stripe pattern to separate the workout mat area from the parking zone.
Designer’s Note:
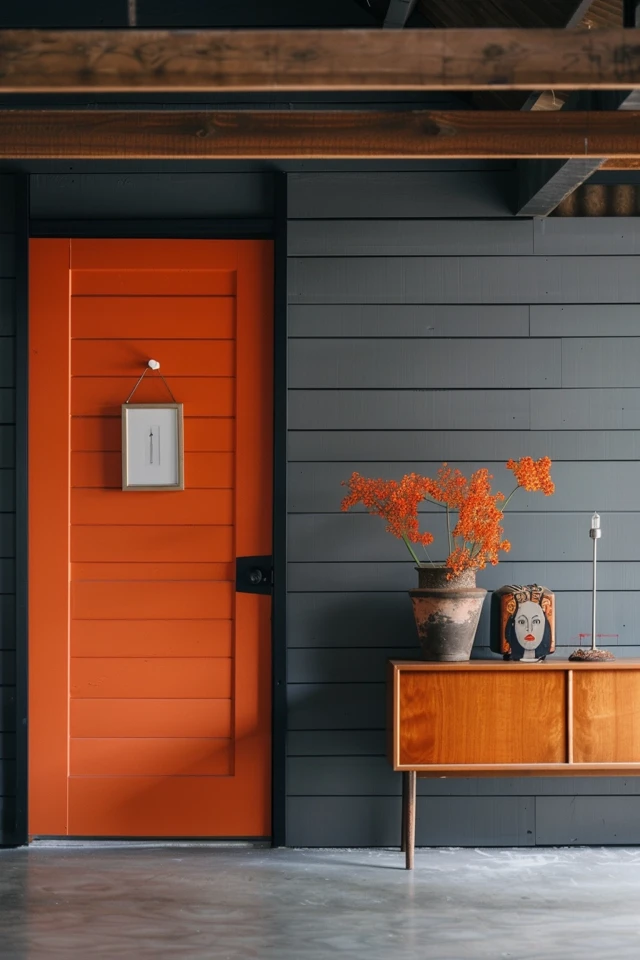
Don’t forget the door entering the house. Painting this door a specific, welcoming color signals “you have arrived.” I often match this door color to the kitchen cabinetry or the front door of the home to create a sense of continuity.
Final Checklist: Executing the Transformation
Before you buy your first gallon of paint, run through this checklist to ensure you are ready for a professional-grade renovation.
1. The Clean-Out
You cannot paint around clutter. The garage must be completely empty. Use this opportunity to purge items you haven’t touched in two years.
2. Surface Prep
Vacuum the walls. Garages accumulate cobwebs and sawdust that will ruin your paint finish. Wash walls with a TSP (Trisodium Phosphate) substitute to remove exhaust residue and oils.
3. Repairing Damage
Fill nail holes and dings. If you have unpainted drywall, you must use a PVA drywall primer before applying paint, or the paper will suck the moisture out of your topcoat, leading to a patchy finish.
4. Lighting Check
Upgrade your lighting before you paint. If you are replacing fixtures, do it now so you can patch holes. Aim for 50 to 75 lumens per square foot for a workshop garage.
5. Ventilation Plan
Ensure you can keep the garage door open for at least 6-8 hours a day during the process. If you are using epoxy, you may need respiratory protection.
FAQs
Q: Can I paint my metal garage door?
A: Yes, and you should. Painting the interior of the garage door helps insulate the metal slightly and improves aesthetics. Use a high-quality direct-to-metal (DTM) acrylic paint. Avoid dark colors on the exterior side of the door if it gets direct sun, as the heat buildup can warp the metal panels.
Q: What is the best temperature for painting a garage?
A: Aim for temperatures between 50°F and 85°F. If it is too cold, the paint won’t coalesce (form a film) properly. If it is too hot, it dries too fast, leaving brush marks. Humidity should be below 70%.
Q: Do I really need primer if I buy “Paint and Primer in One”?
A: For previously painted walls in good condition, the all-in-one products are fine. However, for raw drywall, raw wood, concrete, or stained surfaces, a dedicated primer is non-negotiable. It acts as the bonding agent that ensures your topcoat sticks.
Q: How do I clean painted garage walls?
A: If you used a semi-gloss finish as recommended, you can wash walls with warm water and a mild dish soap. Avoid abrasive sponges that can dull the sheen. For grease marks, a degreaser like Krud Kutter is effective but should be rinsed off quickly.
Conclusion
Transforming your garage with paint is about more than just aesthetics; it is about reclaiming square footage that you have already paid for. By applying the same design principles used inside the home—proper lighting, thoughtful color palettes, and durable finishes—you turn a dumping ground into a functional extension of your living space.
Remember that the garage is a high-utility zone. Always prioritize the durability of the finish over the specific shade of color. A beautiful matte gray that scuffs the first time you park your car will frustrate you endlessly, but a robust satin finish will serve you for years.
Start with the floor, work your way up to the walls, and don’t be afraid to add personality with color blocking. Your garage is the welcome mat to your sanctuary; it deserves to look the part.
Picture Gallery


