
Gravel Driveway Wood Border Ideas for Your Home
There is something inherently charming about the crunch of gravel under tires as you pull into a driveway. It feels organic, classic, and less severe than a sprawling slab of concrete or asphalt. However, the biggest headache with gravel driveways is migration; without a solid containment strategy, those small stones inevitably end up in your lawn, your flower beds, and your garage.
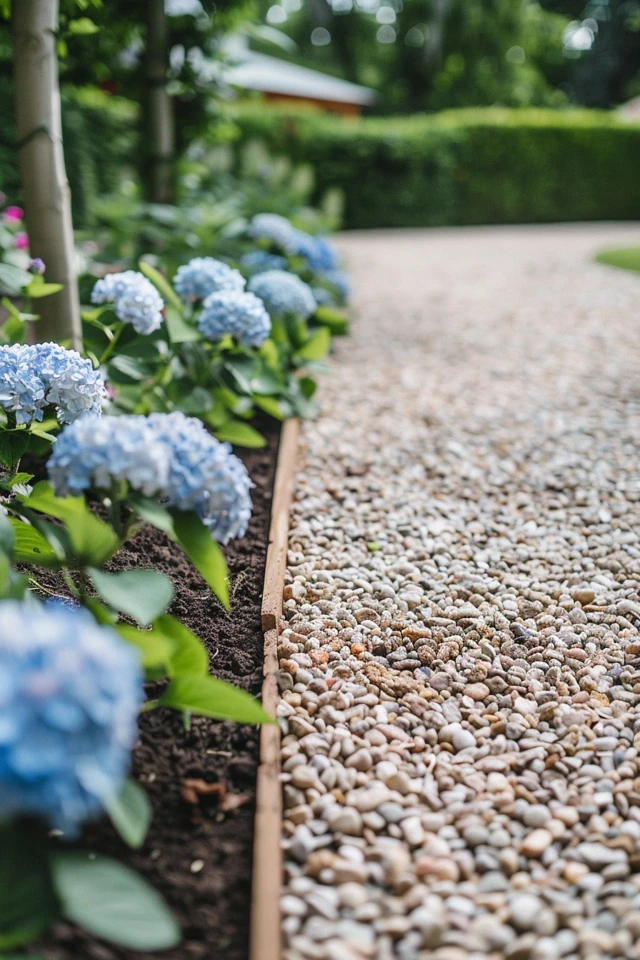
For plenty of visual inspiration to help you visualize these concepts, be sure to check out the Picture Gallery at the end of the blog post.
Using wood as a border is one of my favorite solutions for this problem. It softens the transition between the hardscape of the driveway and the softscape of your garden, adding a natural texture that ages beautifully over time. Unlike sleek metal edging or plastic strips, wood adds architectural weight and definition to the property line.
1. Selecting the Right Timber for Ground Contact
The most critical decision you will make in this project is material selection. You cannot simply grab standard framing lumber from the hardware store and lay it on the dirt. Standard pine will rot within two years when in constant contact with soil and moisture.
You need timber specifically rated for “ground contact.” This usually means pressure-treated southern yellow pine treated to a higher retention level of preservatives, or naturally rot-resistant species.
Cedar and Redwood
These are the premium choices for landscape design. They are naturally resistant to rot and insects without heavy chemical treatments. They start with a warm, reddish tone and weather to a distinguished silver-gray.
Pressure-Treated Pine (Ground Contact Rated)
This is the budget-friendly workhorse of driveway borders. It is durable and highly resistant to decay, though it can warp if not installed correctly. If you choose this, ensure the tag explicitly says “Ground Contact” and not just “Exterior.”
Reclaimed Railroad Ties
These offer an immediate rustic, farmhouse aesthetic. They are incredibly heavy and durable due to the creosote treatment. However, be cautious using these near vegetable gardens or water runoff areas due to the chemicals involved.
Designer’s Note: The “Scale” Rule
One common mistake I see is using timber that is too small for the scale of a driveway. A 4×4 timber often looks flimsy next to a large SUV or a wide driveway.
I almost always specify 6×6 timbers for driveway borders. The extra width provides visual weight that matches the scale of a vehicle, and the added heaviness helps keep the border in place against the pressure of shifting gravel.
2. Proper Installation and Anchoring Techniques
A wood border is only as good as its anchor. If you simply lay timbers on the grass, the freeze-thaw cycle and the pressure of the gravel will push them out of alignment within a single season.
Trenching is Mandatory
You must dig a trench for your border. The timber should sit partially below grade—typically about one-third to one-half of its height. This creates a physical barrier that prevents gravel from sliding under the wood and gives the timber lateral stability.
The Rebar Method
To lock the timbers in place, we use reinforcement bars (rebar).
1. Drill a 1/2-inch hole through the center of the timber every 4 to 6 feet.
2. Drive a 24-inch piece of
4 rebar through the timber and deep into the subsoil.
3. Countersink the hole slightly so the rebar doesn’t stick up and damage tires or feet.
Connecting Joints
Where two timbers meet, don’t just butt them together and hope for the best. Use heavy-duty landscaping screws or timber screws (at least 8 to 10 inches long) to toe-nail them together. For corners, a simple butt joint is usually sufficient for landscape timbers; mitered corners (45-degree cuts) tend to open up outdoors as the wood expands and contracts.
Common Mistakes + Fixes
Mistake: Failing to account for water drainage.
Wood creates a dam. If your driveway slopes toward the border, water will pool there, accelerating rot and creating a mud pit.
Fix: Drill horizontal drainage holes every few feet along the bottom edge of the timber, or install a perforated pipe (French drain) beneath the gravel edge to direct water away.
Mistake: Ignoring the “crown.”
Driveways should be slightly higher in the middle than on the sides.
Fix: When setting your border height, ensure the top of the timber is at least 1-2 inches higher than the surface level of the gravel to account for displacement.
3. Design Styles and Visual Layouts
Once you understand the mechanics, you can have fun with the layout. The way you arrange the wood borders changes the entire personality of your home’s exterior.
The Minimalist Linear Look
For modern homes or mid-century renovations, straight lines are key. Use square-cut 6×6 timbers with precise 90-degree corners. I recommend staining the wood a dark charcoal or black to create a high-contrast look against light-colored pea gravel.
The Rustic Tiered Approach
If your driveway is on a slope, a single layer of timber might not be enough. Stack two or three layers of timbers to create a low retaining wall. This is functional for erosion control but also allows you to create a raised planting bed immediately adjacent to the driveway.
The Softened Curve
While wood is rigid, you can create curves using shorter segments of timber. By cutting 6x6s into 12-inch or 18-inch lengths and setting them vertically (like pickets), you can follow a meandering driveway edge. This is labor-intensive but creates a stunning, custom look.
What I’d Do in a Real Project: Integrated Lighting
Lighting is often an afterthought, but it creates safety and ambiance.
I would use the wood border to house low-voltage lighting.
- Drill a channel on the backside of the timber to hide the wire.
- Mount small “step lights” or puck lights on the inner face of the timber, shining down onto the gravel.
- This defines the driveway edge at night without the glare of floodlights.
4. Managing Gravel Migration and Weed Control
The wood border stops the gravel from moving sideways, but you also need to manage what happens underneath. The interaction between the wood, the soil, and the stone is where the battle against weeds is won or lost.
Geotextile Fabric is Non-Negotiable
Before you lay your gravel or set your timbers, you must install a heavy-duty geotextile fabric. This is not the cheap black plastic weed barrier. You want a non-woven, permeable fabric that separates the soil from your stone.
Ideally, the fabric should run under the gravel and extend up the side of your trench, sandwiched between the soil and the wood timber. This prevents grass from creeping under the timber and into your driveway.
The “Buffer Zone” Strategy
Grass growing directly against a wood border is a maintenance nightmare. You can’t mow it easily, and weed whackers chew up the wood.
I recommend creating a 6-inch buffer zone on the outside of the wood border. Fill this narrow strip with river rock or mulch. This allows you to mow without hitting the timber, preserving the aesthetic longevity of the wood.
5. Maintenance and Long-Term Durability
Wood is organic; it will eventually decay. However, with proper care, a timber border can last 15 to 20 years.
Sealing and Staining
Pressure-treated wood comes wet. You need to let it dry out for a few months before applying any finish. Once dry, apply a high-quality semi-transparent stain or water sealer.
Pigmented stains offer more UV protection than clear sealers. Re-apply this every 2 to 3 years to prevent the wood from turning gray and cracking (checking).
Dealing with Rot
Keep an eye on the areas where the timber touches the ground. If you notice soft spots after a few years, you don’t always have to replace the whole timber. You can use wood hardener products to reinforce small areas of decay.
Gravel Maintenance
Over time, gravel will break down and settle. Every 3 to 5 years, you will likely need to top dress the driveway with fresh stone. When you do this, check your timber height. If the gravel has risen too high, it might spill over. You may need to rake the edges to keep the level below the top of the wood.
Final Checklist: Planning Your Project
Before you head to the lumber yard, run through this list to ensure you have covered all the bases.
- Measure twice: Calculate the total linear footage of the driveway perimeter. Add 10% for waste and cuts.
- Check utilities: Call 811 (in the US) or your local utility service to mark underground lines before driving rebar into the ground.
- Choose your width: Decide between 4×4 (light duty) or 6×6 (heavy duty/aesthetic) timbers.
- Hardware count: Calculate one 24-inch rebar spike every 4 feet. Calculate two 10-inch timber screws per joint.
- Tool check: You will need a sledgehammer, a drill with a long auger bit (1/2 inch diameter), a circular saw (or reciprocating saw for thick timbers), and a shovel.
- Drainage plan: Identify the lowest point of the driveway and plan where the water will exit the border.
FAQs
Can I use landscaping bricks instead of wood?
Yes, but the aesthetic is totally different. Bricks are more permanent and don’t rot, but they are harder to keep level over time. Individual bricks tend to sink or heave with frost. Wood acts as a single, unified beam, which is often easier to maintain level lines.
How deep should the trench be for a 6×6 timber?
I recommend digging about 3 to 4 inches deep. This buries the bottom half of the timber, leaving 2 to 3 inches exposed above ground. This ratio provides excellent stability while keeping enough wood visible to serve as a proper curb.
Do I need concrete to set the timbers?
Generally, no. For a driveway border, rebar spikes are sufficient. Concrete can actually trap water against the wood, accelerating rot. It also makes it incredibly difficult to replace a timber if one gets damaged by a car.
What is the best gravel size to use with wood borders?
“Processed gravel” or “crushed stone” with fines (stone dust) packs the best and stays in place. For the top decorative layer, 3/8-inch pea stone or 3/4-inch angular stone works well. Avoid smooth river rock for driveways as it shifts too much under tires.
Can I use railroad ties for a vegetable garden border?
I advise against it. Old railroad ties are soaked in creosote, a coal-tar preservative that is toxic. While the risk of it leaching into vegetables is debated, it is better to be safe. Use raised bed cedar or untreated tough woods for anything involving food.
Conclusion
Adding a wood border to a gravel driveway is one of those high-impact projects that completely transforms the curb appeal of a home. It brings order to the chaos of loose stone and creates a polished, intentional look.
Whether you opt for the rugged look of reclaimed timber or the clean lines of stained pine, the key is in the preparation. Trenching properly, using adequate anchoring, and managing water flow will ensure your investment lasts for decades.
Take the time to plan your layout, buy the right materials for ground contact, and treat the wood before installation. It is a weekend of hard work that pays off every time you pull into your driveway.
Picture Gallery


