
Greenhouse Shelving Ideas: Maximize Your Space
Introduction
There is nothing quite as chaotic as a greenhouse without a plan. I recently visited a client who had a beautiful glass structure in her backyard, but inside, it was a mess of pots on the floor and tangled hoses. We often forget that a greenhouse is essentially a utility room for nature; it requires the same rigorous spatial planning as a kitchen or a laundry room to function correctly.
To reclaim the space, you have to look up. Utilizing vertical space is the only way to turn a cramped “hot box” into a functional plant studio. When we designed my client’s layout, we focused on zoning—creating distinct areas for propagation, potting, and display—using shelving as the defining architecture.
If you are ready to transform your growing area from cluttered to curated, the following strategies will help you build a system that lasts. If you are looking for visual inspiration, don’t miss the Picture Gallery included at the end of this article.
1. Layout and Zoning: The Foundation of Function
Before you buy lumber or order wire racks, you must tape out your floor plan. A greenhouse layout fails when you prioritize shelf depth over movement. As a general rule, your primary walkway needs to be at least 30 inches wide comfortably, though 36 inches is the designer standard for ensuring you can turn around while holding a tray of seedlings.
I typically recommend a U-shaped or L-shaped configuration for standard 8×10 or 10×12 greenhouses. This maximizes the perimeter sunlight while keeping the center clear for movement. If your greenhouse is larger, a “galley” style with a central peninsula bench can double your surface area.
Designer’s Note: The “Knee-Knock” Rule
In my early projects, I made the mistake of putting deep storage shelves right at ground level. This forces you to stand too far back from the workbench to avoid hitting your shins.
The fix: Recess your bottom shelves by 4 to 6 inches relative to the counter above it. This toe-kick area allows you to stand flush against your work surface, saving your back from unnecessary strain.
2. Material Selection: Durability Meets Aesthetics
The environment inside a greenhouse is brutal on furniture. You are dealing with high humidity, direct UV exposure, and constant water contact. Choosing the right material is not just about looks; it is about structural integrity over time.
Wire Shelving (The Ventilated Choice)
Metal wire shelving is the workhorse of commercial growing. From a design perspective, it is visually lightweight, meaning it doesn’t make a small glasshouse feel claustrophobic.
- Pros: Excellent airflow prevents fungal issues; light passes through to lower tiers.
- Cons: Can rust if not properly coated; small pots can tip over on the wire gaps.
- Pro Tip: Look for “NSF Certified” epoxy-coated green or black wire shelving. These are designed for wet environments (like walk-in coolers) and resist rust significantly better than standard chrome.
Cedar and Redwood (The Aesthetic Choice)
If you want your greenhouse to feel like an extension of your living space, go with rot-resistant wood. Cedar and redwood contain natural oils that repel moisture and insects.
- Pros: Beautiful, warm aesthetic; customizable sizing; naturally sturdy.
- Cons: Expensive; requires annual oiling to maintain color; bulkier than metal.
- Sizing logic: Use 2x4s for legs and 1x6s or 2×2 slats for the shelf surface. Leave a 1/2-inch gap between slats for drainage.
Composite Materials (The Low-Maintenance Choice)
Recycled plastic lumber or composite decking material is becoming a favorite for my clients who want the “wood look” without the maintenance. It will never rot, warp, or splinter. However, be aware that dark composite boards can get extremely hot in direct sun, potentially burning delicate roots sitting directly on them.
3. Staging and Tiering for Light Optimization
The biggest functional error I see is shelving that blocks light from the plants below it. In interior design, we talk about “sightlines,” but in greenhouse design, we talk about “sun lines.” You need a tiered approach, often called stadium seating or benching.
The Pyramid Method
Instead of stacking shelves directly on top of each other like a bookcase, offset them. The bottom shelf should be the deepest (say, 24 inches), the middle shelf narrower (18 inches), and the top shelf the narrowest (12 inches).
This creates a slope that allows sunlight to reach the back of the bottom shelf. It is essential for preventing “leggy” seedlings that stretch desperately for light.
Common Mistakes + Fixes
Mistake: Solid shelf surfaces (like plywood) on upper levels.
Fix: Always use open slats or wire mesh for upper tiers. If you have a solid shelf, it creates a “dead zone” of deep shade immediately underneath it. If you must use solid shelves for storage, place them at the very bottom level only.
4. The Potting Bench: Your Command Center
Every greenhouse needs a focal point, and the potting bench is it. This is where the work happens. In terms of ergonomics, standard kitchen counter height (36 inches) is usually perfect for standing work. If you are tall, bump it up to 38 or 40 inches to avoid hunching.
Key Features to Include:
- Soil containment: I like to cut a hole in the countertop and drop in a stainless steel hotel pan or a heavy-duty plastic bin. This creates a recessed mixing bowl for soil that sits flush with the surface.
- Tool storage: Use a pegboard or a magnetic knife strip on the back wall of the bench. It keeps trowels and shears off the workspace but within arm’s reach.
- The “Dry Zone”: Designate one high shelf above the bench for things that cannot get wet, like seed packets, paper journals, and electronics (like your phone or Bluetooth speaker).
5. Integrating Lighting and Utilities
Shelving isn’t just for holding pots; it is the infrastructure for your life support systems. When planning your shelves, you must plan for electricity and water routing.
Under-Shelf Grow Lights
Even in a greenhouse, winter days are short. I recommend attaching T5 fluorescent or full-spectrum LED strip lights to the underside of your shelves.
- Spacing: For seedlings, lights need to be 4 to 6 inches above the foliage.
- Rigging: Use adjustable chain hangers. As the plants grow, you hoist the lights up. If you fix the lights permanently, you will lose the flexibility needed for different crop stages.
Water Management
Run your main hose line along the ceiling or high on the wall, then drop coiled hoses down at key points. However, for shelving specifically, I love capillary mats. You line your shelf with a water-wicking mat, placing one end in a water trough. This automates watering for seedlings and keeps the shelf surface cleaner than hand-watering.
What I’d Do in a Real Project
If I were building a greenhouse shelf system today for a client with a moderate budget ($500-$1000), here is my exact shopping list:
1. Base: Heavy-duty galvanized steel pipe for the legs (industrial chic and bombproof).
2. Surface: Rough-sawn cedar 2x4s, sanded smooth but unfinished, spaced 3/4 inch apart.
3. Height: 36-inch main bench height.
4. Accessories: A row of S-hooks underneath the front lip of the bench to hang spray bottles and towels.
Final Checklist: Designing Your System
Before you finalize your greenhouse shelving, run through this quick checklist to ensure you haven’t missed any critical design or functional elements.
Space & Layout
- Is the main aisle at least 30 inches wide?
- Can I turn around comfortably without knocking over pots?
- do I have a dedicated “dry zone” for seeds and tools?
Materials & Build
- Are the materials rot-resistant (Cedar, Redwood, PVC, Coated Metal)?
- Can the shelves support heavy wet soil (approx. 50lbs per sq ft)?
- Do the shelves allow for drainage (slats or wire)?
Light & Environment
- Do upper shelves block light for lower plants? (Check the angles).
- Is there space to mount grow lights if needed?
- Is the bottom shelf at least 6 inches off the ground to allow for cleaning?
FAQs
How much weight does greenhouse shelving need to support?
A well-watered 1-gallon pot can weigh between 5 and 8 pounds. A flat of seedlings can weigh 10 to 15 pounds. I always aim for shelving that can support at least 50 pounds per linear foot. Never use standard particle-board bookcases; they will sag and eventually collapse under the weight of wet soil.
What is the best way to prevent mold on wooden shelves?
Airflow is your best defense. Ensure your greenhouse has proper ventilation (automatic roof vents are a lifesaver). For the wood itself, seal it with a non-toxic, plant-safe sealer like raw linseed oil or a marine-grade varnish. Re-apply this every 1-2 years. If you see mold, scrub it immediately with a vinegar and water solution.
Can I use Ikea shelving in a greenhouse?
Generally, no. Most indoor furniture is made of MDF or untreated pine, which will swell and disintegrate in high humidity. However, their galvanized steel outdoor units (like the HYLLIS or OMAR series) can work if you are on a strict budget, though they may eventually rust. If you use them, spray them with a clear coat of Rust-Oleum before assembly.
How far apart should shelf tiers be?
This depends on what you are growing. For starting seeds and propagation, 12 to 15 inches of height is sufficient. For mature houseplants or vegetable starts, you need 18 to 24 inches. Adjustable tracks (like the Rubbermaid twin-track system mounted to a wall) are excellent because they allow you to change shelf heights as seasons change.
Conclusion
Designing the interior of a greenhouse is a balancing act between the rugged utility of a farm and the peaceful aesthetic of a sanctuary. By prioritizing durable materials, respecting the need for light and airflow, and zoning your workspace, you can create a greenhouse that is a joy to work in.
Remember that your shelving system is the skeleton of the operation. If the bones are good, the plants will thrive. Take the time to measure twice, invest in water-resistant materials, and don’t be afraid to leave some empty space—plants have a habit of filling every inch you give them.
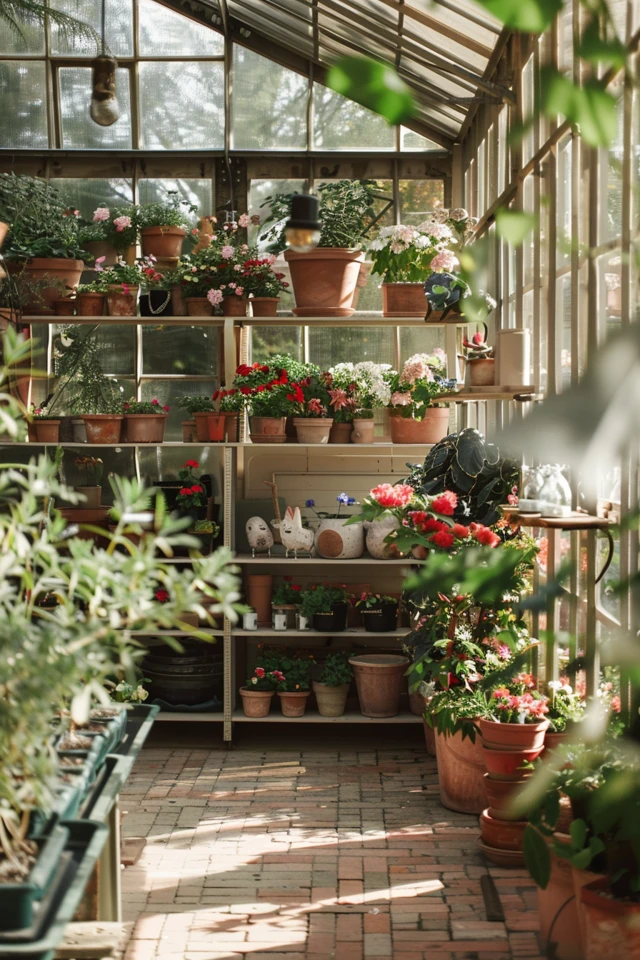
Picture Gallery


