
Title: Half Wall in Kitchen Ideas: Stylish Upgrades
Introduction
The kitchen half wall, often affectionately (or begrudgingly) called a pony wall, is a staple in many homes built between the 1980s and early 2000s. It serves a distinct purpose by visually separating the culinary chaos from the living or dining area without blocking light or conversation. However, these architectural features can often feel dated, unfinished, or simply like wasted space.
Rather than tearing it down and dealing with the headache of flooring repairs, many homeowners are choosing to embrace the structure. With the right design approach, a half wall can become a functional focal point that bridges the gap between rooms beautifully. If you are looking for visual inspiration, scroll down to the Picture Gallery at the end of the blog post to see these ideas in action.
Transforming this space requires a mix of aesthetic vision and practical know-how. Whether you want to add seating, increase storage, or simply update the cladding, there are dozens of ways to modernize this divider. Let’s explore how to turn that awkward partition into a purposeful design element.
1. Enhancing the Structure with Architectural Millwork
One of the most effective ways to upgrade a builder-grade drywall partition is by applying architectural millwork. This approach adds weight and history to the wall, making it look intentional rather than accidental.
Board and Batten or Box Molding
For a transitional or traditional home, box molding is a game-changer. This involves applying trim in square or rectangular shapes directly over the drywall.
In my projects, I typically use 1×4 trim pieces for the vertical stiles and horizontal rails. The key to making this look high-end is scale; if the boxes are too small, it looks cluttered. If they are too large, it looks sparse.
Shiplap and Beadboard
If your style leans toward coastal, farmhouse, or cottage, vertical shiplap or beadboard is an excellent choice. It adds texture and durability to a surface that often gets kicked by shoes or bumped by furniture.
When installing vertical paneling, always ensure your baseboard is thicker than the paneling material. This creates a proper foundation for the visual weight of the wall.
Designer’s Note: The Cap Matters
The biggest mistake I see DIYers make is neglecting the top cap. A standard pony wall usually has a drywall top painted to match the wall, which is a magnet for dust and handprints.
Replace that drywall top with a piece of hardwood, stone, or painted MDF that overhangs the wall by at least one inch on all sides. This “sill” protects the structure and provides a finished furniture look.
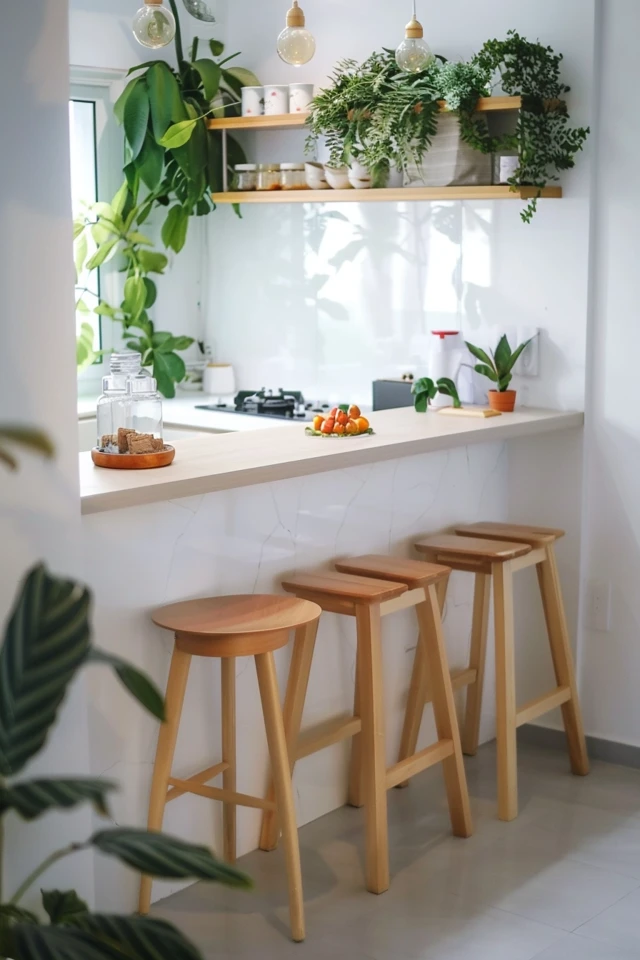
2. Converting to a Functional Breakfast Bar
Functionality is paramount in kitchen design, especially in smaller footprints. Turning a half wall into a breakfast bar is a brilliant way to gain seating without expanding the room.
To do this, you need to widen the top surface. A standard wall is roughly 4.5 inches wide, but a breakfast bar needs a countertop that is at least 12 to 15 inches deep.
Overhang and Leg Room Rules
Comfort is non-negotiable here. You need a minimum of 10 to 12 inches of overhang for knee clearance. Anything less, and your guests will be knocking their knees against the wall or sitting sideways.
If you are using a heavy material like quartz or granite, you must have proper support. Generally, an overhang exceeding 10 inches requires steel support brackets hidden under the stone or decorative corbels that match your cabinetry.
Selecting the Right Stools
The height of your half wall dictates your seating. Most half walls are around 42 inches high (bar height).
You must purchase “bar height” stools, which have seats 28 to 30 inches off the floor. Do not confuse these with “counter height” stools (24 to 26 inches), which are meant for standard 36-inch kitchen islands.
Common Mistakes + Fixes
Mistake: Extending the countertop too far into a narrow walkway.
Fix: Ensure you have at least 36 inches of clearance behind the stools when they are tucked in. If people need to walk behind seated guests, you ideally need 44 to 48 inches of clearance.
3. Playing with Texture: Tile and Stone Integration
If you want your kitchen to feel like a custom renovation, stop painting the half wall the same color as the living room. Treat it as an extension of the kitchen materials.
Tiling the Living Side
Applying tile to the “living room” side of the pony wall can be a stunning design move. I love using a darker, moody subway tile or a textured zellige tile here.
This creates a distinct zone and turns the wall into a feature rather than a divider. It is also incredibly durable against scuffs from kids and pets.
Waterfall Edges
For a modern, sleek aesthetic, consider a waterfall edge. This is where the countertop material continues down the side of the wall to the floor.
This works best with veined marble or quartz. It simplifies the visual lines and removes the need for baseboards or trim on the wall, offering a clean, minimalist look.
Stone Cladding
If you are aiming for a rustic or organic modern vibe, thin brick veneers or stacked stone can be applied to the wall. This adds immense warmth and texture.
However, be mindful of the transition to the floor. Stone can be uneven, so you will need to scribe the baseboard or grout carefully where the wall meets your flooring material.
4. Adding Privacy and Separation (Without Losing Light)
Sometimes, the issue with a half wall is that it is too open. You want to hide the dirty dishes from the sofa, but you don’t want to close off the room entirely.
Glass Partitions
Installing a glass partition on top of the pony wall is a massive trend right now. Industrial black metal frames (Crittall style) with glass panes define the space beautifully.
This blocks noise and cooking smells while letting sunlight pour through. It is a fantastic compromise for those who regret the “open concept” trend but don’t want a dark kitchen.
Wooden Slat Dividers
Vertical wood slats running from the top of the pony wall to the ceiling create a mid-century modern or Japandi aesthetic.
By spacing the slats 2 to 3 inches apart, you obscure the direct view into the kitchen while maintaining an airy feel. This also adds verticality to the room, making low ceilings feel higher.
Open Shelving Units
You can mount open shelving columns on top of the half wall. This utilizes vertical space for displaying ceramics, plants, or cookbooks.
If you choose this route, ensure the items on display are curated. Since they are visible from the living area, clutter here will ruin the aesthetic of the entire room.
5. Lighting and Electrical Considerations
A half wall is often an electrical hub. It likely houses switches for the kitchen lights or outlets required by code. You can use this to your advantage.
Outlet Placement
If you are converting the wall to a breakfast bar, you need power for laptops or phone chargers. I recommend installing outlets on the side of the wall, tucked directly under the countertop overhang.
Use distinct faceplates that match your hardware (like brass or matte black) rather than standard white plastic. If possible, opt for USB-integrated outlets for added utility.
Adding Sconces
Wall sconces are not just for hallways. Installing two small sconces on the “living side” of the pony wall can create a cozy ambiance in the evening.
This provides soft, low-level lighting that is perfect for watching movies in the adjacent room without the glare of overhead kitchen lights.
Under-Counter Lighting
If you have a deep overhang, install an LED strip light underneath the countertop. This acts as a nightlight and highlights the texture of the wall material (especially if you used stone or beadboard).
Real-Project Checklist: Electrical
1. Check if the wall contains plumbing vents or load-bearing posts before cutting into it.
2. Determine if you need to move switches to the side or top of the wall during tiling.
3. Ensure all new electrical work meets local code requirements for kitchen spacing (usually one outlet every 4 feet of usable wall space).
Final Checklist: What I’d Do in a Real Project
If I were consulting on your kitchen half wall right now, this is the step-by-step logic I would follow to ensure the upgrade adds value and style.
1. Assess the Traffic Flow
Before adding a bar, I would tape out the overhang on the floor. I would walk past it carrying a laundry basket. If it feels tight, I would skip the seating and focus on millwork instead.
2. Check the Heights
I would measure the current wall height. If it is a strange height (like 40 inches), I might frame it up to standard 42-inch bar height or cut it down to 36-inch counter height to make buying stools easier.
3. Select Durable Materials
For the face of the wall, I would choose a semi-gloss or satin paint finish, or a wipeable material like tile. Flat paint on a knee wall is a disaster waiting to happen.
4. Coordinate the Cap
I would ensure the material used to cap the wall relates to the kitchen. It doesn’t have to match the countertops exactly, but it should be in the same color family or a complementary wood tone.
5. Plan the Transition
I would look closely at where the half wall meets the main wall. I would ensure the baseboards wrap around seamlessly and that the molding doesn’t terminate awkwardly against a door frame or cabinet.
Frequently Asked Questions
Can I remove a kitchen half wall easily?
Not always. While half walls are rarely load-bearing in terms of holding up the roof, they often contain “mechanical loads.” This means they may hide plumbing pipes, HVAC vents, or electrical bundles. You must cut a small exploratory hole in the drywall to check inside before taking a sledgehammer to it.
What is the standard height for a kitchen half wall?
The most common height is 42 inches. This is designed to hide standard 36-inch countertops and dirty dishes from view while allowing for bar-height seating. Some older homes may have 36-inch half walls, which feel more like a peninsula.
How can I update a half wall in a rental?
For renters, paint is the easiest option if allowed. If not, peel-and-stick wallpaper is a fantastic solution for the face of the wall. You can also use a peel-and-stick wood plank product to create a faux shiplap look that can be removed when you move out.
Does a half wall need a backsplash?
On the kitchen side, yes. If there is a sink or prep area behind the half wall, you need a backsplash of at least 4 to 6 inches to protect the drywall from water damage. Many people simply tile up to the bottom of the top cap.
Conclusion
The kitchen half wall is frequently misunderstood, but it possesses immense potential. It defines zones without closing them off, offers storage opportunities, and provides a canvas for creative material use. By treating it as a piece of furniture rather than just a partition, you elevate the entire design of your home.
Whether you choose to wrap it in elegant molding, top it with a sleek quartz slab for coffee mornings, or install glass for a modern industrial look, the key is intentionality. Stop ignoring the pony wall and start styling it. With the right measurements and materials, it can easily become your favorite feature in the house.
Picture Gallery


