
How To Add Sheer Curtains To Blackout Curtains: Layered Looks
Introduction
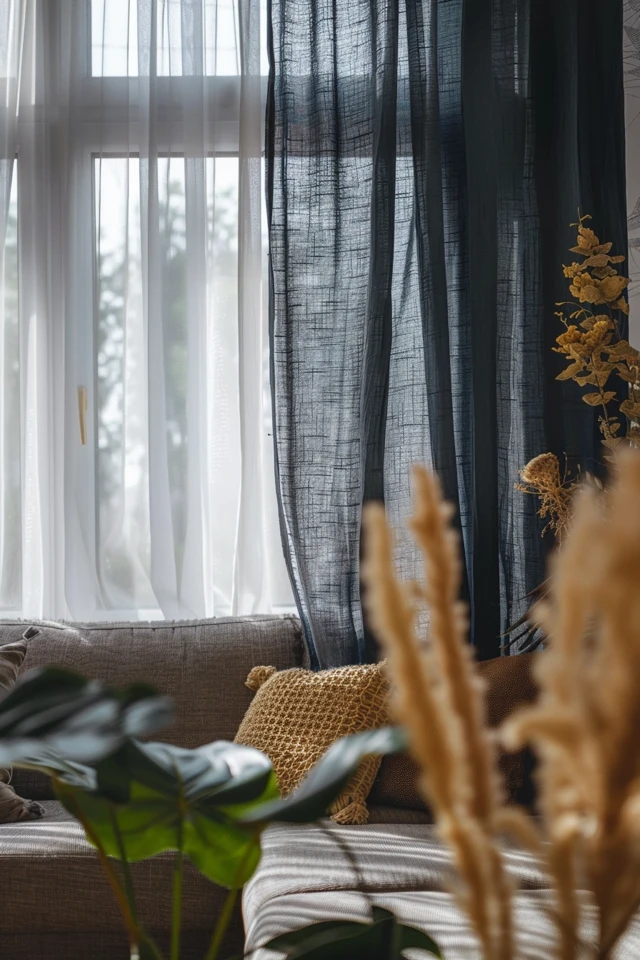
There is a reason high-end hotels always feel more luxurious than a standard bedroom, and the secret often lies in the window treatments. Layering sheer curtains under blackout drapes offers the best of both worlds: soft, filtered natural light during the day and complete privacy and darkness at night. As an interior designer, I find this combination to be one of the most functional upgrades you can make to a home.
However, getting the mechanics right can be tricky if you have never installed a double layer before. You have to consider bracket projection, weight distribution, and how the two fabrics interact with one another. If you are looking for visual inspiration before diving into the technical details, please note that the Picture Gallery is at the end of the blog post.
In this guide, I will walk you through the specific hardware, measurements, and styling techniques required to achieve this look. We will move beyond basic aesthetics and cover the practical rules of thumb that ensure your curtains operate smoothly. Whether you are a renter needing a temporary fix or a homeowner ready for a custom installation, this layered approach will elevate your space.
1. Selecting the Right Hardware System
The most critical component of a layered curtain look is the hardware. If your rod system is weak or poorly spaced, the curtains will not hang correctly. You generally have three main options for installation.
The Double Rod Set
This is the most common and user-friendly solution for homeowners. A double rod bracket holds two rods: a thinner one in the back for the sheers and a thicker one in the front for the blackout panels.
When buying a double rod, pay close attention to the “projection” of the brackets. You need enough space between the wall and the first rod, and between the first rod and the second rod. If they are too close, the fabrics will drag against each other every time you open them.
Ceiling Mounted Tracks
For a modern, architectural look, I often use ceiling-mounted tracks. This is my preferred method for spaces with low ceilings because it draws the eye up and makes the room feel taller.
You can install two parallel tracks on the ceiling. This allows the curtains to glide effortlessly and eliminates the issue of sagging rods in the center.
The “Hacker” Method (Rod + Tension Rod)
If you are renting or working with a tight budget, you can sometimes keep your existing exterior rod for the blackout curtains. You then install a tension rod inside the window frame (inside mount) for the sheers.
This only works if you have a deep enough window casing (at least 2–3 inches). It creates a very clean look, but the sheers will not cover the side gaps of the window completely.
Designer’s Note: The Weight Calculation
Here is a lesson I learned the hard way on an early project. Blackout curtains are heavy, often lined with three layers of material.
If your window is wider than 60 inches, you absolutely need a center support bracket. Without it, the rod will bow in the middle, causing the curtains to slide toward the center and look sloppy.
2. Determining the Perfect Sizes and Placement
Most people hang their curtains too low and make their windows look small. To get that professional, high-end look, you need to ignore the window frame and focus on the wall.
Height Rules
I almost always mount the curtain rod at least 4 to 6 inches above the top of the window frame. If you have standard 8-foot ceilings, mounting the rod just below the crown molding is usually the best move.
This creates verticality. Your sheers and blackout panels should share the same hemline length. Do not have your sheers shorter than your blackout drapes; it looks unfinished.
Width and Stack Back
“Stack back” refers to the amount of space the curtains take up when they are fully open. You want your curtains to clear the glass so you don’t block natural light.
Rule of thumb: Extend your rod 10 to 12 inches past the window frame on each side. This ensures that when the blackout curtains are open, they frame the window rather than covering it.
Hemline Logic
- The Float: The curtain hangs less than an inch off the floor. This is best for high-traffic areas.
- The Kiss: The curtain barely touches the floor. This is the standard for custom tailoring.
- The Puddle: The fabric pools on the floor (1-3 inches). This is romantic but high maintenance.
Avoid “high water” curtains at all costs. If your panels are more than an inch off the floor, the ceiling height will visually collapse.
3. Coordinating Fabrics and Textures
The magic of layering comes from the contrast between the two materials. If the fabrics are too similar in weight, the look falls flat. You want a heavy, substantial outer layer and a light, ethereal inner layer.
The Outer Layer (Blackout)
For the front layer, look for fabrics with body. Velvet is excellent for insulation and total darkness. Linen blends with a blackout liner offer a more casual, breezy aesthetic.
Ensure the blackout liner is high quality. Cheap liners can feel like plastic and will make a crinkling sound when you move the drapes.
The Inner Layer (Sheer)
Your sheer layer doesn’t have to be basic white polyester.
- Voile: Crisp and smooth. Good for modern spaces.
- Linen Sheer: Has a visible weave and texture. Adds warmth and organic character.
- Patterned Sheer: Very subtle geometric patterns can add depth without overwhelming the room.
Mixing Colors
My advice for most clients is to keep the sheers neutral (white, off-white, or ivory). This mimics the quality of daylight.
For the blackout curtains, you can go bold with navy, charcoal, or forest green. Alternatively, a tone-on-tone look (cream sheers with beige blackout drapes) creates a serene, spa-like atmosphere.
Common Mistakes + Fixes
Mistake: Using bright white sheers with cream blackout drapes.
Fix: Always match the undertone. If your drapes are warm (cream/beige), use an ivory sheer. If your drapes are cool (grey/blue), use a stark white sheer.
4. Heading Styles and Operation
The “heading” is the top part of the curtain that attaches to the rod. Mixing heading styles is possible, but it requires care.
Grommets
Grommets (metal rings punched into the fabric) are modern and slide easily. However, they take up a lot of space front-to-back.
I generally avoid using grommets for both layers on a double rod. The metal rings will clang against each other and get stuck.
Pinch Pleats
This is the gold standard for a tailored look. Pinch pleats are attached to rings via drapery hooks. They stack very neatly.
Using pinch pleats for the front blackout layer creates a structured, architectural feel.
Rod Pockets
This is where the rod slides through a channel in the fabric. While cheap, it is terrible for functionality. It is difficult to slide the curtain back and forth.
My Recommendation: Use a rod pocket for the sheer layer if you plan to leave them closed 99% of the time. Use rings or grommets for the blackout layer so they are easy to open and close daily.
What I’d Do in a Real Project
If I were designing a master bedroom tomorrow, here is exactly what I would specify:
- Outer Layer: Double pinch-pleat velvet drapes on rings.
- Inner Layer: Ripple-fold sheer curtains on a track or smooth rod.
- Hardware: Matte black double rod with French return (curved) ends to block side light.
5. Functional Considerations for Daily Life
Beyond aesthetics, you need to think about how you live in the room. Layered curtains serve different purposes in different spaces.
Insulation and Energy Efficiency
The air gap between the sheer and the blackout curtain acts as an insulator. In the winter, this traps cold air from the window. In the summer, the white reflective backing of blackout drapes repels heat.
To maximize this, ensure your curtains return to the wall. Some rods wrap around the corner, sealing the gap so air doesn’t escape.
Privacy Control
In ground-floor living rooms, sheers are essential. They allow you to see out during the day while preventing passersby from seeing in.
At night, however, the physics reverse. If your lights are on inside, people can see through sheers. This is why the blackout layer is mandatory for evening privacy.
Pet and Kid Limitations
If you have cats that climb or toddlers with sticky hands, avoid puddling your curtains. The extra fabric on the floor collects pet hair and dust bunnies rapidly.
Stick to the “kiss” hem or a 1/2-inch hover. Also, ensure your hardware is anchored into studs. A child pulling on a double curtain setup exerts a massive amount of leverage on the wall brackets.
Final Checklist
Before you drill a single hole, run through this list to ensure you have everything covered.
- Stud Finder: Have you located the studs? Double rods are heavy.
- Level: Never eyeball the height. Ceilings are rarely perfectly level.
- Hardware Projection: Do you have at least 5-6 inches of total projection from the wall?
- Curtain Width: Is the total width of your panels at least 2x the width of the window for fullness?
- Iron/Steamer: Have you removed the package creases before hanging?
FAQs
Can I add sheers to existing blackout curtains without changing the rod?
Yes, but you will need to add a second mounting mechanism. You can install a tension rod inside the window frame for the sheers, or mount a ceiling track specifically for the sheers behind your existing wall-mounted rod.
How much wider should the sheer be compared to the window?
Ideally, sheer curtains should have 2.5x to 3x fullness. If your window is 40 inches wide, you want about 100 to 120 inches of sheer fabric width. Skimping on fullness makes sheers look like cheap sheets.
Do the sheers and blackout curtains need to be the same brand?
No, absolutely not. In fact, mixing sources often looks more custom. You might find great affordable sheers at a big-box store and splurge on custom velvet drapes from a specialty retailer.
How do I clean layered curtains?
Sheers catch a lot of dust acting as a filter. They usually need washing more often than the heavy drapes. Check the label, but many poly-blend sheers are machine washable on delicate. Blackout drapes usually require professional dry cleaning or careful vacuuming.
Conclusion
Adding sheer curtains to blackout drapes is one of the most effective ways to make a room feel finished and versatile. It moves your window treatments from a purely utilitarian function to a design feature that anchors the space. By carefully selecting your hardware, respecting the rules of proportion, and mixing textures intentionally, you can achieve that layered, hotel-chic look in your own home.
Remember that measurements are everything. Take your time planning the bracket placement and ensure you have enough fullness in your fabric. Once installed, this combination gives you total control over your environment, from bright, sun-filled mornings to cozy, private evenings.
Picture Gallery


