
How To Build A Murphy Bed In A Closet: Space-Saving Solution
Introduction
We all struggle with the classic “guest room dilemma.” You want a comfortable space for friends and family when they visit, but you hate sacrificing an entire room that sits empty for 350 days a year. I recently helped a client in a cramped city apartment who was using her guest room as a chaotic storage unit because the queen-sized bed ate up all the floor space.
The solution was reclaiming that square footage by hiding the bed in plain sight, specifically within an existing reach-in closet. Transforming a closet into a sleeping nook allows you to double the functionality of a room, turning a home office or playroom into a guest suite in seconds. Make sure to check out the Picture Gallery at the end of this blog post to see some incredible examples of finished projects.
This project requires precision and patience, but the payoff is massive. In this guide, I will walk you through the structural requirements, the build process, and the design nuances that elevate a DIY Murphy bed from a utility project to a high-end custom feature.
1. Assessing Space, Depth, and Structural Requirements
Before you buy a single sheet of plywood, you must understand the geometry of your closet. Standard reach-in closets are usually about 24 inches deep, while most Murphy bed cabinets range from 16 to 20 inches in depth. This usually leaves you with a little wiggle room, but vertical height and door clearance are often the trickier variables.
Measuring for the Mechanism
You need to purchase your hardware kit before you start building. The specifications of the hardware dictate the exact cut list for your lumber. Most hardware kits require a specific ceiling clearance to allow the bed leg to pivot over the top edge of the mattress when closing.
- Height Check: Measure from the floor to the top of the closet door header. If your closet header is lower than 85 inches (for a standard vertical queen), you might need to modify the header or opt for a horizontal (side-tilt) orientation.
- Depth Check: Ensure you have at least 16 inches of clear depth inside the closet, past the door tracks.
- Projection Length: Measure how far the bed extends into the room when open. A queen bed usually extends about 85 to 87 inches from the wall.
Designer’s Note: Walkway Clearances
One of the biggest mistakes I see in DIY layouts is forgetting the “walk-around” space. Just because the bed fits when lowered doesn’t mean the room works.
- The 30-Inch Rule: You generally need a minimum of 30 inches of clearance around the sides and foot of the bed to walk comfortably.
- Hard Furniture: If you have a heavy desk or dresser nearby, ensure you don’t have to move it every time you lower the bed.
- Visual Weight: If the room is small, a vertical Murphy bed can feel imposing when open. Ensure the path to the door isn’t blocked.
2. Selecting the Right Hardware and Materials
The difference between a bed that feels like a luxury hotel amenity and one that feels like a dangerous mousetrap lies in the hardware. There are two main types of mechanisms: spring-loaded and piston-driven.
Spring vs. Piston Mechanisms
- Spring Mechanisms: These are traditional and adjustable. You can add or remove springs to balance the weight of the mattress. They are durable but can be squeaky if not maintained.
- Piston Mechanisms: These use gas struts, similar to a hatchback car trunk. They offer a smoother, quieter lift and have a modern feel. However, they are less adjustable if you change mattress weights significantly.
Lumber Selection
Do not use particle board or MDF for the structural box. The torque and tension placed on the pivot points are immense.
My Recommendation:
Use ¾-inch Cabinet Grade Plywood. Baltic Birch is the gold standard because it is void-free and holds screws incredibly well. It finishes beautifully whether you choose to paint or stain it. You will need roughly 3 to 4 sheets for a queen-sized project.
Common Mistakes + Fixes
Mistake: Buying a heavy, pillow-top mattress after building the frame.
Fix: Check the “maximum mattress thickness” rating on your hardware kit first. Most Murphy beds can only accommodate a mattress up to 11 or 12 inches thick. If you go thicker, the legs won’t fold in, and the cabinet won’t close. I always recommend a high-quality 10-inch memory foam hybrid to save weight and space.
3. Construction Phase: Building the Cabinet and Frame
Building a Murphy bed involves constructing two main components: the “cabinet” that anchors to the wall and the “bed frame” (or face panel) that holds the mattress. Precision is paramount here; if your angles aren’t exactly 90 degrees, the bed will scrape the sides of the cabinet.
Step 1: Cutting and Prepping
Rip your plywood sheets according to the cut list provided with your specific hardware kit.
- Label every piece with painter’s tape immediately (e.g., “Left Vertical Side,” “Header,” “Kick Plate”).
- Sand all edges before assembly. It is much harder to smooth out rough plywood edges once the box is built.
- Use iron-on edge banding on exposed plywood edges for a professional, furniture-grade look.
Step 2: Assembling the Inner Frame
The inner frame usually consists of wood struts and the metal hardware frame. Use a carpenter’s square constantly during this process.
- Lay the face panels (what you see when the bed is closed) face down on a soft surface to avoid scratching.
- Attach the side rails and stiffeners using pocket hole screws and wood glue.
- Install the mattress retention bars or straps at this stage.
What I’d Do in a Real Project
I always paint or stain the components before final assembly. Painting inside a closet is a nightmare, and painting the complex corners of the bed frame leads to drips.
- Prime: Use a high-quality shellac-based primer to prevent wood tannins from bleeding through.
- Paint: Apply two coats of durable cabinet enamel (semi-gloss or satin). This finish resists scuffs from the moving parts better than flat paint.
4. The Installation: Anchoring and Safety
This is the most critical safety step. A Murphy bed is essentially a giant lever. When you pull the bed down, the force tries to rip the cabinet away from the wall. If it is not anchored correctly, it can tip over and cause serious injury.
Preparing the Closet Space
You usually need to remove existing closet organizers, shelves, and baseboards.
- Remove Baseboards: The vertical sides of the bed cabinet must sit flush against the back wall and the floor. Carefully pry off the baseboard inside the closet.
- Carpet Issues: Ideally, install the bed on a hard surface. If the closet is carpeted, you may need to cut away a strip of carpet or use shims to prevent the cabinet from settling and leaning forward.
Finding the Studs
Never use drywall anchors for a Murphy bed. You must lag bolt the header rail into the wooden wall studs.
- Use a magnetic stud finder to locate the studs along the back wall of the closet.
- Mark the locations clearly with tape.
- You generally need to hit at least three studs for a queen-sized bed.
Leveling and Squaring
Once the cabinet is in place, use a 4-foot level to check the sides. If your floors are uneven (and they almost always are), use composite shims under the vertical panels.
- If the cabinet isn’t level, the bed face will drift open or scrape the sides.
- Drive your lag bolts through the upper stretcher rail into the studs only after you are 100% sure the box is square.
5. Styling and Integrating into the Closet
Now that the bed works, we have to make it look intentional. A Murphy bed in a closet shouldn’t look like a plywood box shoved into a hole; it should look like built-in cabinetry.
Handling the Closet Doors
You have three main options for the existing closet doors:
- Remove them completely: This exposes the bed face. If you make the bed face look like a beautiful armoire with molding and nice handles, this is a great look.
- Bi-fold doors: These are standard for closets, but the track usually gets in the way of the bed tilting down. You often have to mount the bi-fold track outside the closet header, closer to the room, to gain clearance.
- Curtains: For a softer, romantic look, install a high-end ceiling track and use heavy velvet drapery to hide the bed. This is excellent for sound dampening as well.
Lighting and Interior Design
Since the bed is inside a “cave,” it can feel dark.
- Reading Lights: Install recessed LED puck lights into the header of the bed cabinet. Ensure they are positioned so they don’t hit the mattress when closed.
- Switch Placement: Route the wiring so the switch is accessible from inside the bed. A remote-controlled outlet is an easy DIY workaround if you aren’t comfortable with electrical wiring.
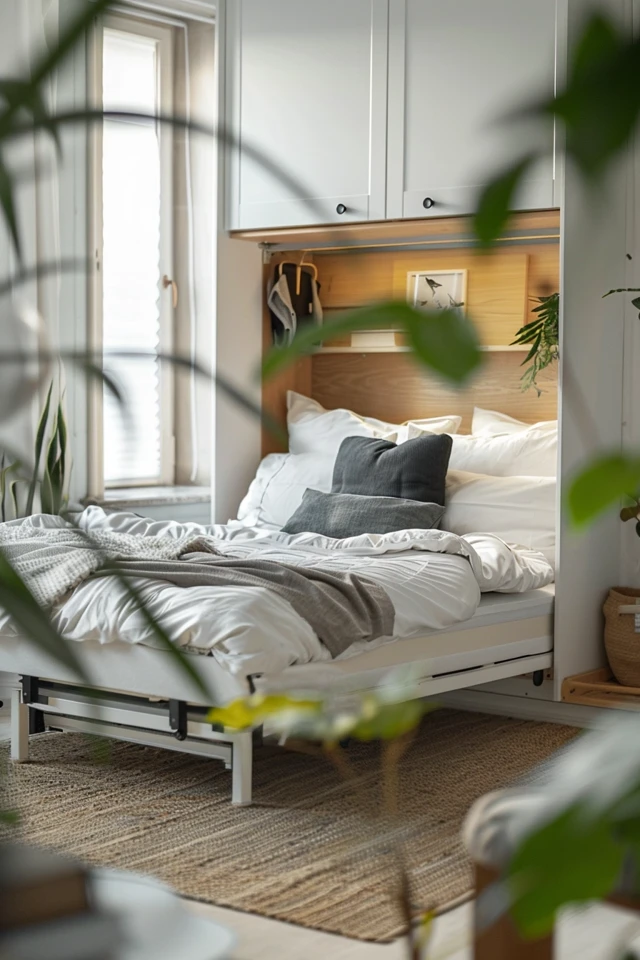
- Interior Color: Paint the back wall of the closet (which becomes the “headboard” wall) a contrasting color or use peel-and-stick wallpaper. A dark navy or charcoal creates depth, while a fun botanical print adds surprise when the bed opens.
Designer’s Note: The “Headboard” Gap
One annoyance with Murphy beds is the gap between the mattress and the wall. Pillows tend to fall into the abyss.
The Fix: Build a slight upholstered wedge or buy a bolster pillow that stays at the head of the bed. Alternatively, some hardware kits come with a fold-up headboard attachment—it’s worth the extra $50.
Final Checklist
Before you invite your first guest, run through this safety and finish list.
- Anchor Check: Yank firmly on the top of the cabinet. It should not budge even a millimeter.
- Leg Deployment: Do the legs drop automatically or smoothly? If they stick, add a little dry silicone lubricant.
- Balance Test: Open the bed to a 45-degree angle. It should hover there. If it slams down, you need to remove springs or adjust the piston. If it flies up, you need to add weight or springs.
- Mattress Strap: Ensure the retention strap is tight enough to hold the mattress and bedding in place when vertical.
- Clearance Check: Lower the bed slowly and watch the sides. Ensure no screw heads or trim pieces are rubbing.
FAQs
Can I install a Murphy bed if I rent?
Technically, yes, but it requires drilling heavy-duty holes into the studs. You will have significant patching and painting to do when you move out. Because it is custom-fitted to the closet, you usually can’t take it with you easily. Always get landlord permission first.
How much does a DIY Murphy bed cost?
A high-quality hardware kit costs between $300 and $600. The lumber (cabinet-grade plywood) and finish materials will cost another $400 to $600 depending on current wood prices. Expect a total material cost of around $800 to $1,200, which is still significantly cheaper than buying a pre-made wall bed unit ($2,500+).
Do I need a box spring?
No. Murphy beds are designed to support the mattress on a platform or a slat system included in the kit. Using a box spring would make the assembly far too thick to close.
Can I leave the bedding on when I close it?
Yes, but keep it minimal. A fitted sheet, flat sheet, and a thin quilt usually fit fine. Fluffy duvets and thick comforters usually need to be removed and stored elsewhere, or compressed with the mattress strap.
Conclusion
Building a Murphy bed inside a closet is one of the most rewarding space-saving projects you can tackle. It reclaims lost square footage and creates a versatile home that adapts to your life, rather than the other way around.
While the carpentry requires attention to detail, the result is a custom piece of furniture that adds real value to your home. By following the “measure twice” philosophy and respecting the structural forces at play, you can create a safe, comfortable, and stylish guest suite that vanishes when you need your office back.
Picture Gallery


