
How To Clean Porcelain Tile Floors That Look Like Wood
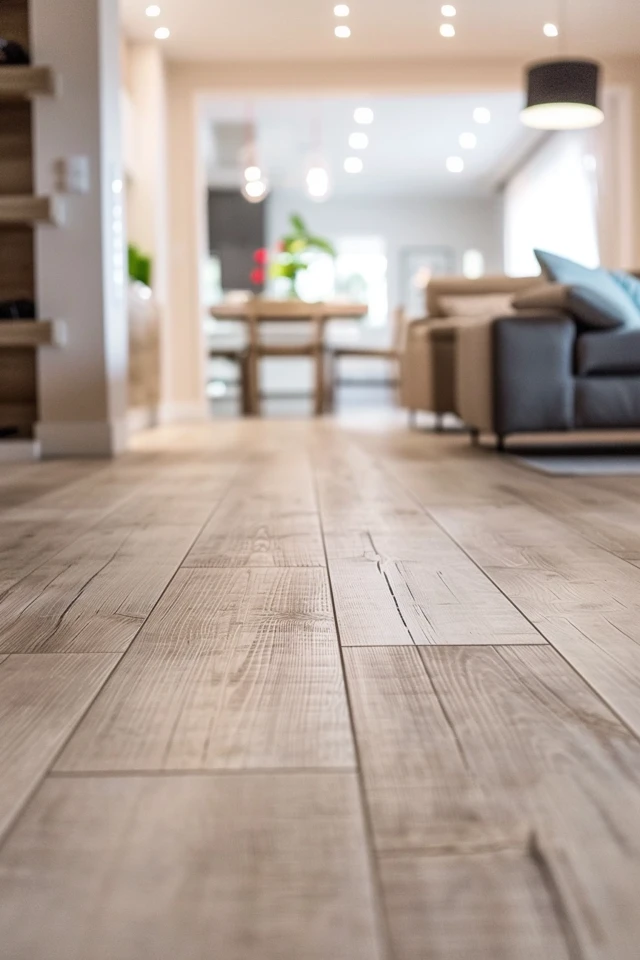
Wood-look porcelain tile has completely dominated my project specifications over the last five years, specifically for high-traffic family homes. It offers the aesthetic warmth of hardwood without the panic that sets in when a dog runs across the floor with muddy paws. However, many of my clients call me six months after installation with the same complaint: the floors look dull or the texture is trapping dirt.
The very thing that makes these tiles look realistic—the textured grain and the matte finish—is exactly what makes them slightly more complex to clean than a standard glossy square tile. The grooves mimic wood grain, but they also act as tiny reservoirs for dust, grease, and detergent residue. If you treat them exactly like real hardwood or exactly like smooth ceramic, you will likely end up with a hazy film.
If you are looking for visual inspiration on how these floors look in finished spaces, be sure to check out the Picture Gallery located at the very end of this blog post. Today, I am going to walk you through the maintenance protocols I give to my clients to keep their porcelain looking high-end for decades.
Understanding the Material: Why “Wood” Tile Gets Dirty
Before you grab a mop, you have to understand the mechanics of the surface you are cleaning. Unlike natural stone which is porous, or real wood which is organic and soft, porcelain is fired at extremely high temperatures to be dense and non-porous. This means the tile itself does not absorb stains easily.
However, to make the tile look like white oak or walnut, manufacturers press a physical texture into the surface. These micro-crevices are excellent at trapping grout haze during installation and everyday dust during daily use. If you are noticing your socks getting dirty even after mopping, the issue is usually that the dirt is stuck in the “grain” and your mop is gliding over the top.
The second factor is the grout joint. In my designs, I strictly specify rectified tile with a 1/16-inch or 1/8-inch grout line to mimic real wood planks. While thin lines look better, they are harder to scrub if they are not sealed properly. The grout is the porous weak link in the floor system.
Designer’s Note: The Grout Color Trap
One of the biggest lessons I learned early in my career involved specifying a light gray grout with a dark “walnut” tile. While it looked graphic and cool on the sample board, in a real home, the light grout highlighted every speck of dirt.
If you are currently choosing materials, always match the grout color to the darkest tone found within the wood grain of the tile. This creates a seamless look and hides the inevitable discoloration that happens in high-traffic zones like entryways.
The “Dry Run”: Vacuuming and Sweeping Protocols
You cannot wet mop a floor that hasn’t been thoroughly vacuumed. If you add water to dust, you create mud, and that mud will settle into the wood-grain texture of the porcelain. This is the number one reason homeowners see streaks.
I recommend vacuuming rather than sweeping for textured porcelain. A broom tends to sweep fine dust over the grooves, leaving debris behind in the lower crevices. A vacuum with strong suction pulls that debris out of the texture.
Vacuum Settings for Porcelain
- Turn off the beater bar: Even though porcelain is harder than granite, a spinning beater bar can scatter debris rather than sucking it up. It can also wear down your grout sealer over time.
- Use the “bare floor” setting: This lowers the vacuum head to create a better seal against the tile, ensuring you pull dust from the grain.
- Frequency: For households with pets, this needs to happen every two days. Pet hair loves to cling to the texture of wood-look tile.
Common Mistakes + Fixes
Mistake: Using a Swiffer-style dry pad on highly textured tile.
The Fix: The texture of the tile often shreds these pads or catches on the rough surface. Stick to a microfiber dust mop or a canister vacuum with a horsehair floor attachment.
Deep Cleaning: The Two-Bucket Method
When it is time to wash the floors, the goal is to lift dirt out of the texture without leaving a soapy residue. Porcelain is virtually stain-proof, but it is very prone to “soapy haze.” If you use too much detergent, it dries in the grain and attracts more dirt, creating a cycle of dinginess.
I advise my clients to use the “Two-Bucket Method.” It sounds tedious, but it is the only way to actually clean the floor rather than just spreading dirty water around.
The Setup
- Bucket 1 (Cleaning Solution): Fill this with hot water and your cleaning agent. Hot water cuts through grease better than cold.
- Bucket 2 (Rinse Water): Fill this with plain, hot water.
- The Mop: Use a spin mop or a microfiber string mop. Avoid sponge mops; they tend to push dirty water into the grout lines rather than lifting it up.
The Solution Recipe
You do not need expensive specialized cleaners for porcelain. In fact, most commercial cleaners contain waxes or oils that ruin the matte finish of wood-look tile.
- The Vinegar Solution: Mix 1/4 cup of white vinegar with 1 gallon of hot water. This is safe for porcelain (but never use it on natural stone like marble or travertine). The acidity helps cut through grease and residue.
- The pH Neutral Option: If you are worried about your grout sealer, or if your vinegar smell is off-putting, purchase a pH-neutral tile cleaner. Use half the recommended amount on the bottle.
The Process
Dip your mop in the cleaning solution and wring it out until it is damp, not soaking. Mop a 5×5 foot section. Then, rinse the dirty mop in the plain water bucket. Wring it out, dip it back into the cleaning solution, and move to the next section. This ensures you are always applying clean water to the floor.
Tackling Grout Lines
Even with tight 1/16-inch spacing, grout will eventually darken. This is often what makes a floor look old before its time. Because grout is lower than the tile surface, water pools there during mopping.
To restore grout to its original color, you need to be targeted. I generally recommend doing a deep grout clean once every six months, or whenever you notice the color shifting.
The DIY Grout Scrub
- Make a paste using baking soda and water. It should be the consistency of toothpaste.
- Apply the paste to the grout lines in a 10-square-foot area.
- Spray the paste with a 50/50 mix of water and hydrogen peroxide. It will bubble slightly.
- Let it sit for 10 minutes to break down the grease.
- Scrub with a stiff nylon brush (never metal, which scratches tile).
- Wipe clean with a damp cloth.
What I’d Do in a Real Project
If I am managing a renovation for a client, I always ensure the grout is sealed with a high-quality penetrating sealer 72 hours after installation. I then instruct the homeowner to reseal the grout once a year.
How do you know if you need to reseal? Perform the “water test.” Sprinkle a few drops of water on the grout. If it beads up, your sealer is working. If the grout darkens and absorbs the water immediately, it is time to reseal. This prevents permanent staining.
Removing Haze and Tough Stains
Sometimes a floor looks dull immediately after installation. This is called “grout haze”—a thin film of cement dust left behind by the installers. If you don’t remove this, it will trap dirt forever.
For new floors, you can buy a dedicated “Grout Haze Remover” from a hardware store. Follow the instructions exactly, as these are mild acids. Wear gloves and ensure the room is ventilated.
Paint Drips and Renovation Debris
In a recent project, the painters didn’t drop-cloth the edges of the room effectively, leaving small white speckles on the dark wood-look tile.
Do not try to scrub dried paint with a scouring pad; you might polish the matte finish of the tile, creating a shiny spot. Instead, use a plastic putty knife or a credit card. Wet the paint spot with hot soapy water to soften it, then gently scrape it off with the plastic edge.
The “Wax” Problem
The most common disaster I see is when a homeowner treats the tile like real wood and uses an oil soap or a “glow-restoring” wax product. These products are disastrous for porcelain. They sit on top of the tile, turn sticky, and attract hair and dust.
If you have done this, you need to strip the floor. Mix a solution of strong ammonia and water (follow bottle safety ratios) and scrub the floor to cut through the wax buildup. You may need to do this twice to get back to the bare tile.
Final Checklist: The Pro Maintenance Schedule
To keep your wood-look porcelain looking like the day it was installed, follow this abbreviated schedule. This is the exact list I leave in my clients’ digital handover binders.
Daily:
- Spot sweep high-traffic areas (entryway, kitchen triangle).
- Wipe up spills immediately, especially red wine or tomato sauce, to protect the grout.
Weekly:
- Thorough vacuuming using the “hard floor” setting.
- Damp mop using the Two-Bucket Method and a vinegar/water solution.
Monthly:
- Check for grout discoloration near the stove and sink.
- Spot clean grout with baking soda paste if needed.
Annually:
- Perform the water drop test on grout lines.
- Reseal grout if absorption occurs.
FAQs
Can I use a steam mop on wood-look porcelain tile?
Yes, but with a caveat. Porcelain itself loves steam; the heat sanitizes the surface without chemicals. However, if you have cheap or damaged grout, forcing high-pressure steam into the cracks can sometimes loosen it over time. If your grout is in good shape, a steam mop is actually one of the best ways to clean textured tile because the steam penetrates the grooves.
Why does my floor look smudgy right after I mop it?
This is almost always due to detergent residue. You likely used too much soap, or you didn’t rinse the mop head often enough. Try mopping again with just hot water and a splash of vinegar to cut the soap film. Also, check your mop water—if it looks like mud, you are just painting your floor with dirt. Change the water more frequently.
Can I use bleach to clean the grout?
I advise against using straight bleach. While it whitens, it can degrade the grout sealer over time, making the grout more porous and susceptible to stains in the future. Oxygenated bleach (like OxiClean) or hydrogen peroxide are safer, more effective alternatives for long-term maintenance.
Is it safe to use a scrubber machine on these floors?
For large open spaces, a residential floor scrubber can be excellent. The bristles on these machines are designed to get into the texture of the tile. Just ensure the brushes are non-abrasive nylon. Avoid scrubbing pads that look like steel wool or heavy-duty stripping pads, as they can alter the sheen of the tile.
Conclusion
Wood-look porcelain tile is one of the most practical flooring choices available today. It bridges the gap between the aesthetic desire for warmth and the practical need for durability. While the texture that makes it beautiful can be a magnet for dust, adjusting your cleaning technique makes all the difference.
By switching to a vacuum instead of a broom, using the two-bucket mopping method, and keeping harsh waxes away from the surface, your floors will remain indistinguishable from natural hardwood for years. It isn’t about scrubbing harder; it is about scrubbing smarter and respecting the unique texture of the material.
Picture Gallery


