
How To Clean Travertine Shower Tile: Natural Stone Care
Introduction
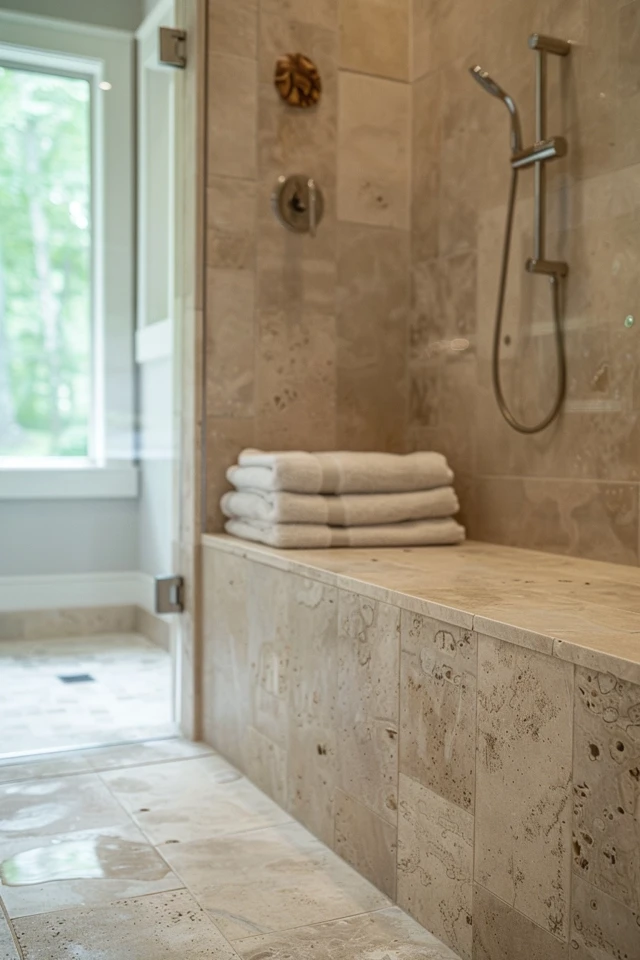
There is nothing quite like the warmth and organic texture of natural travertine in a bathroom. It instantly elevates a space from a standard builder-grade washroom to a European-inspired spa retreat. However, I often see clients panic the first time they realize their beautiful, porous stone requires a very different maintenance routine than the ceramic subway tile they had in their previous apartment.
The reality is that travertine is durable, but it is chemically sensitive. If you treat it like porcelain, you will end up with etched surfaces, damaged grout, and a shower that looks perpetually dingy. The good news is that once you understand the geology of the stone, the cleaning routine becomes second nature and actually quite simple.
We are going to walk through exactly how to maintain that creamy, matte finish without ruining the seal or the stone itself. For visual inspiration on how these stones look in finished bathrooms, check out the Picture Gallery at the end of the blog post.
Understanding Your Material: Why Travertine is Different
Before you grab a spray bottle, you need to understand what you are working with. Travertine is a form of sedimentary limestone deposited by mineral springs.
Because it is calcium carbonate, it reacts violently with acids. This is the most important rule of owning natural stone: acid is the enemy.
If you use vinegar, lemon juice, or standard bathroom cleaners containing citric acid, you will cause “etching.” Etching looks like a dull water spot or a ring that won’t wipe away because the acid has literally dissolved a thin layer of the stone.
Furthermore, travertine is naturally porous. In a shower setting, we typically use “filled” and “honed” travertine.
“Filled” means the natural Swiss-cheese-like holes have been packed with an epoxy or cement mixture to create a smooth surface. “Honed” means it has a matte finish rather than a high gloss. Your cleaning routine must protect both the stone and the filler material.
Designer’s Note: The “Filled” vs. “Unfilled” Trap
In my design practice, I have seen a few DIY disasters where homeowners installed unfilled travertine in a shower because they loved the rustic look.
This is a major functional error. Those natural pits and voids are perfect breeding grounds for pink mold and soap scum.
If you have unfilled travertine in a wet zone, your cleaning routine will take twice as long. You have to scrub into every divot. If you are currently planning a renovation, always specify “filled and honed” for shower walls and floors.
The “Do Not Use” List
Let’s start by clearing out your cleaning caddy. Remove anything that isn’t specifically formulated for natural stone.
Avoid these products entirely:
- Vinegar (white or apple cider)
- Lemon or orange-based cleaners
- Bleach or ammonia
- Abrasive scouring powders (like Comet or Ajax)
- Generic “tub and tile” foam sprays
- Rough scouring pads (green Scotch-Brite pads)
These products strip the sealer and damage the surface. Using them voids the longevity of your installation.
The Essential Tool Kit
You do not need expensive machinery to keep travertine clean. You just need the right gentle tools.
What I keep in my own cleaning kit:
- pH-Neutral Stone Cleaner: Look for brands like StoneTech or Miracle Sealants.
- Soft Microfiber Cloths: Buy these in bulk. They grab dust and grime without scratching.
- A Soft-Bristle Nylon Brush: Use a handheld brush for grout lines. Never use wire brushes.
- A Quality Squeegee: This is your best defense against buildup.
- Stone Sealer: For annual maintenance (more on this later).
Daily Maintenance: Prevention is Key
The easiest way to clean a travertine shower is to prevent it from getting dirty in the first place.
Natural stone is thirsty. If water sits on it, the water evaporates and leaves behind mineral deposits (calcium and magnesium) that bond to the stone.
The 30-Second Daily Rule:
- Squeegee immediately: After every shower, squeegee the water off the walls and floor. This prevents 90% of soap scum and hard water spots.
- Ventilate: Run your exhaust fan for at least 30 minutes after showering. Travertine holds moisture longer than ceramic.
- Open the door: If you have a glass enclosure, leave the door open to allow cross-ventilation.
In my projects, I always verify that the bathroom exhaust fan is rated for at least 110 CFM (Cubic Feet per Minute) for a master bath. If your mirror fogs up and stays foggy, your fan isn’t strong enough to protect your stone.
Weekly Cleaning Routine: Step-by-Step
Once a week, you need to do a gentle wash to remove body oils and soap residue.
Step 1: Prep the Area
Clear out all shampoo bottles, loofahs, and razors. You need clear access to the walls and floor.
Step 2: Pre-Wet the Stone
Spray the walls with warm water. This helps loosen grime and prevents the cleaner from drying instantly on the surface.
Step 3: Apply pH-Neutral Cleaner
Spray your stone-specific cleaner generously. Let it sit for 3 to 5 minutes. This “dwell time” allows the chemistry to break down the soap scum so you don’t have to scrub as hard.
Step 4: Agitate Gently
Use a soft microfiber cloth or a soft sponge to wipe down the tiles. Move in circular motions.
For the floor—which usually holds more grime—you may need your soft nylon brush. Scrub gently, paying attention to the grout lines.
Step 5: Rinse Thoroughly
Use your handheld showerhead or a bucket to rinse every inch of the shower. Residual cleaner can leave a film that attracts more dirt later.
Step 6: Dry It Off
Do not air dry. Use a clean, dry microfiber towel to buff the stone dry. This prevents water spots and leaves a nice satin sheen.
Deep Cleaning: Dealing with Soap Scum and Mildew
Sometimes life gets busy, and you miss a few weeks of cleaning. You might notice a hazy film (soap scum) or pinkish slime in the corners (mildew).
Removing Soap Scum:
If your standard cleaner isn’t working, do not reach for a harsher chemical. Instead, use a “stone soap scum remover.” These are formulated to cut through lipids and fats without acid.
Apply the remover and let it dwell for 10 minutes. Scrub with a nylon brush, then rinse.
Removing Mildew:
Since you cannot use bleach, mold is tricky. Bleach might kill the mold, but it can degrade the stone’s surface over time.
Look for a “stone-safe mold and mildew remover.” These usually rely on specialized enzymes or non-acidic oxidizers.
Alternatively, if the mold is strictly in the grout and not on the stone face, you can carefully use a 50/50 mix of hydrogen peroxide and water. Apply it with a Q-tip directly to the grout line. Rinse immediately.
Addressing Grout Haze and Grime
Grout is usually the first thing to look dirty in a travertine shower. Because travertine is usually installed with unsanded or specialized sanded grout, it is also porous.
If your grout is looking dark or discolored, use a focused nylon brush. A toothbrush works wonders for tight corners.
Scrub the grout lines with your pH-neutral cleaner. If that fails, you can make a paste of baking soda and water.
Apply the paste to the grout line (baking soda is mildly abrasive but generally safe for travertine if not scrubbed aggressively). Let it sit for 5 minutes, scrub gently, and rinse.
Dealing with “Lippage” and Water Pooling
“Lippage” is a design term for when one tile edge sits higher than its neighbor.
In natural stone installations, slight variations in thickness are common. However, these ledges can trap water.
Run your hand over the floor tiles. If you feel sharp ridges where water collects, you must be extra diligent with your squeegee in those areas.
If water pools in a corner and doesn’t drain, that is an installation defect in the slope of the shower pan. No amount of cleaning will fix standing water. You will need to physically dry that spot with a towel after every use to prevent stone rot.
The Importance of Sealing
You cannot discuss cleaning travertine without discussing sealing. The sealer is the sacrificial layer that takes the abuse so the stone doesn’t have to.
When I hand over a project to a client, I ensure the stone has been sealed twice. But sealers wear off.
The Water Drop Test:
To know if you need to reseal, flick a few drops of water onto your shower wall.
- If the water beads up and runs down: Your seal is good.
- If the water darkens the stone and soaks in: You need to reseal immediately.
How to Reseal:
1. Clean the shower perfectly and let it dry for 24 hours. It must be bone dry.
2. Apply a “penetrating” or “impregnating” sealer. Do not use a topical surface sealer (which looks like plastic).
3. Wipe on the sealer with a clean cloth.
4. Let it penetrate for the time listed on the bottle (usually 15 minutes).
5. Wipe off all excess. This is critical. If you let sealer dry on the surface, it leaves a sticky, hazy mess that is a nightmare to remove.
6. Cure for 24 to 48 hours before using the shower.
Common Mistakes + Fixes
Here are the most frequent errors I see homeowners make, and how to correct them immediately.
Mistake: Using a Magic Eraser on stains.
The Fix: Magic Erasers are actually abrasive, like super-fine sandpaper. They will sand down the polish of your stone. Stop using them. Use a poultice powder for stains instead.
Mistake: Ignoring the caulking.
The Fix: Stone tiles meet at corners (changes of plane). These joints should be caulked, not grouted. If the caulk is moldy, scrape it out and replace it with 100% silicone that color-matches your stone. Don’t try to scrub moldy silicone; just replace it.
Mistake: Letting spillages sit.
The Fix: If you use bath oils or hair masks, rinse the floor immediately. Oil can penetrate stone deeply and leave a permanent dark shadow.
What I’d Do in a Real Project: A Mini Checklist
If I were renovating a bathroom for my own family using travertine, this is exactly how I would manage the maintenance aspect from day one.
- Select Large Format Tiles: I would use 12×24 inch tiles or larger. Fewer grout lines mean less scrubbing.
- Install a Handheld Wand: I would never design a shower without a handheld sprayer. It makes rinsing down the walls significantly easier.
- Upgrade the Grout: I would specify an epoxy grout or a high-performance sealant-impregnated grout. It costs more upfront but saves hours of scrubbing later.
- Keep Ventilation High: I would install the fan on a timer switch so it runs for 60 minutes automatically after I leave the room.
Troubleshooting Stains: The Poultice Method
If you have a stubborn stain that scrubbing won’t touch, the stone has absorbed the contaminant. You need to draw it out.
You do this with a poultice. You can buy premixed stone poultice powder at hardware stores.
The Process:
1. Mix the powder with water (or the specific chemical for that stain type) to make a peanut-butter consistency paste.
2. Spread it over the stain about 1/4 inch thick.
3. Cover it with plastic wrap and tape down the edges.
4. Poke a few holes in the plastic.
5. Let it sit for 24 to 48 hours. The paste will dry and pull the stain out of the stone pores.
6. Scrape it off and rinse.
Final Checklist: Your Cleaning Routine
Print this out and keep it in your cleaning cabinet to ensure you never accidentally damage your investment.
- Daily: Squeegee all walls and floors. Run the exhaust fan.
- Weekly: Spray with pH-neutral stone cleaner. Wipe with microfiber. Rinse well. Buff dry.
- Monthly: Inspect grout lines. Spot clean corners with a soft brush.
- Annually: Perform the water drop test. Reseal if necessary (usually every 1-2 years for showers).
- Always: Avoid vinegar, bleach, lemon, and abrasives.
FAQs
Can I use steam cleaners on travertine?
Proceed with caution. While steam is chemical-free, the intense heat can sometimes force moisture deep into the stone or expand the air in the pores, causing spalling (flaking) over time. It can also degrade the sealer. I prefer warm water and manual agitation.
Is scrubbing bubbles safe for travertine?
Generally, no. Most commercial foaming cleaners contain chelating agents that can break down the minerals in the stone or damage the sealer. Stick to products labeled “Safe for Natural Stone.”
How do I fix etched spots (dull marks)?
If you accidentally used vinegar and have a dull spot, you might be able to fix it with a “marble polishing powder” (etch remover). You buff it into the stone to restore the shine. However, for deep etching or large areas, you need to call a professional stone restoration specialist.
Why does my travertine shower smell musty?
Travertine is porous. If it wasn’t sealed properly, water might be trapped inside the stone or behind it. It could also be the “unfilled” holes trapping bacteria. Deep clean with an enzyme cleaner, let it dry for 3 days with a fan running, and then reseal heavily.
Conclusion
Choosing travertine for your shower is a commitment to beauty, but it is also a commitment to care. Unlike ceramic or porcelain, natural stone is alive in a geological sense—it reacts to its environment. It changes, it breathes, and it ages.
By following a strict pH-neutral cleaning regimen and keeping up with your sealing schedule, your travertine won’t just last; it will develop a wonderful patina that adds character to your home. The key is consistency. A quick squeegee every day is worth more than hours of scrubbing once a month. Treat the stone gently, and it will remain the centerpiece of your bathroom for decades.
Picture Gallery


