
How To Decorate A Chandelier With Greenery: Elegant Touches
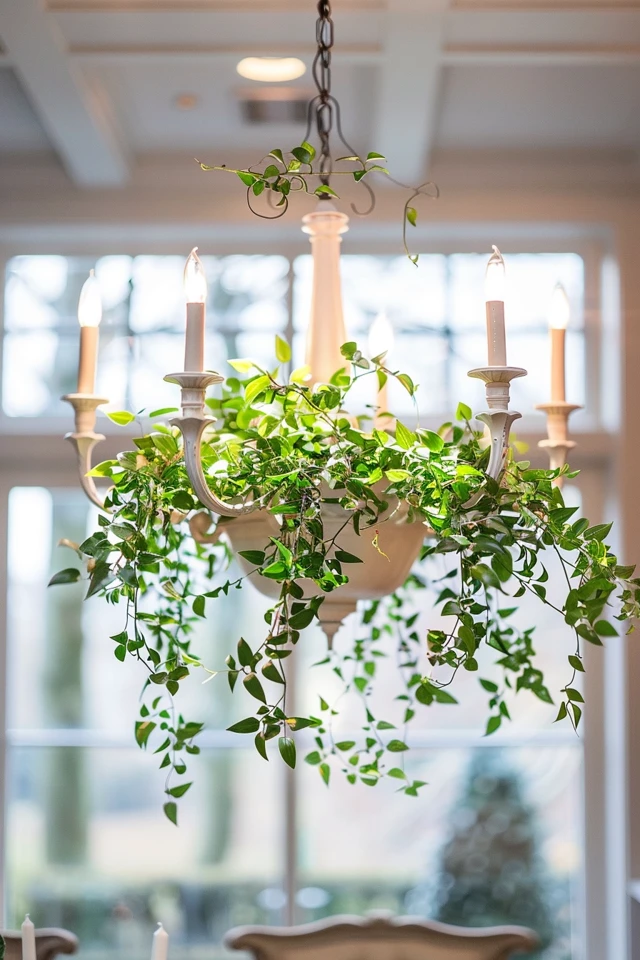
There is something undeniably magical about bringing the outdoors inside, especially when it involves elevating your lighting fixtures. Adding greenery to a chandelier instantly softens the hard lines of metal or glass and adds a layer of organic luxury to any room. It acts as a focal point that draws the eye upward, making the ceiling feel higher and the room more expansive.
I recall a project where a dining room felt too cold and industrial, despite the beautiful furniture. We draped a simple garland of seeded eucalyptus over the iron chandelier, and the entire atmosphere shifted from stark to inviting in minutes. If you are looking for visual inspiration, make sure to check out our curated Picture Gallery at the end of this blog post.
However, suspending foliage above a dining table or in an entryway requires more than just throwing a garland over a light. It requires a balance of safety, mechanics, and artistic composition. This guide will walk you through the professional methods I use to dress chandeliers for holidays, events, or everyday elegance.
1. Selecting Your Materials: Fresh, Faux, or Preserved?
The first decision you face is the material type. Each option has a distinct look and maintenance requirement, and your choice should depend on how long you intend the installation to last.
Fresh Greenery
Fresh clippings offer the best texture and movement, plus they provide a wonderful natural scent. However, they have a short lifespan. Without a water source, most fresh greens will dry out within 24 to 48 hours.
I recommend fresh greenery primarily for single-day events like a dinner party or a wedding. If you choose fresh, look for hardy varieties that dry gracefully rather than wilting into a limp mess.
Best fresh options:
- Olive Branches: These dry out beautifully, retaining their shape and a silvery-green hue.
- Magnolia Leaves: The waxy front and velvet back offer great contrast, and they hold their structure for days.
- Cedar and Pine: Excellent for winter, these are woody and retain moisture longer than soft-stemmed plants.
Faux Greenery
High-quality faux stems are an investment that pays off over time. In my design projects, I often lean toward faux for residential installations because homeowners do not want to clean up shedding needles.
The key is to buy “real touch” or high-end silk varieties. Avoid plastic-looking stems with shiny seams. When selecting faux garlands, look for wired stems that allow you to bend and shape the foliage to mimic gravity.
Preserved Greenery
This is the middle ground and often my personal favorite for semi-permanent installations. Preserved boxwood or eucalyptus has been treated with glycerin to stay soft and pliable for months or even years.
Designer’s Note:
The biggest giveaway of a fake arrangement is perfection. I often mix 70% faux greenery with 30% fresh or preserved stems. The fresh elements distract the eye and add the “perfectly imperfect” droop that makes the whole arrangement look real.
2. The Mechanics of Suspension and Safety
Before you climb the ladder, we need to talk about safety and mechanics. A chandelier is an electrical fixture, not a trellis. Neglecting safety can lead to fire hazards or a damaged fixture.
Weight Restrictions
Chandeliers are hung from junction boxes rated for specific weights. Adding five pounds of wet greenery and wire might exceed that limit, especially on vintage fixtures.
Always test the weight of your garland before lifting it. If your fixture is delicate, stick to lightweight vines like smilax or airy fern fronds rather than heavy pine boughs.
Heat Management
This is non-negotiable: You must switch your bulbs to LEDs before decorating. Old-school incandescent bulbs generate significant heat that can dry out fresh greens instantly or melt faux plastic leaves.
Common Mistakes + Fixes:
- Mistake: Letting foliage touch the bulb.
- Fix: Install a “cage” or spacer using chicken wire around the center stem, or use stiff floral wire to keep branches at least 3 inches away from the light source.
The Toolkit
You need the right tools to secure the look without damaging the finish of your light. Do not use tape or glue.
What I keep in my installation kit:
- Paddle Wire (22-gauge): Green for foliage, silver for chrome fixtures, or gold for brass.
- Zip Ties (4-inch and 8-inch): Get them in black, white, or clear depending on your fixture.
- Wire Cutters: Don’t ruin your ribbon scissors on wire stems.
- Command Hooks (Clear): Useful for ceiling anchoring if you want to create a draping effect away from the fixture.
3. Composition Rules for a Balanced Look
The difference between a professional installation and a messy one is usually composition. You want the greenery to look like it belongs there, not like it is attacking the light fixture.
The Rule of Scale
The volume of the greenery must match the scale of the chandelier. A thin, modern linear pendant will look overwhelmed by a thick spruce garland. Conversely, a massive tiered crystal chandelier needs substantial foliage to make an impact.
My rule of thumb:
The greenery should never obscure more than 40% of the fixture itself. The goal is to accent the light, not hide it. You want to see the sparkle of the crystal or the patina of the brass peeking through the leaves.
Asymmetry and Flow
Avoid making a perfect circle. Perfect symmetry rarely exists in nature and can look stiff in design.
I prefer an asymmetrical approach. Build up the volume slightly more on one side, or let a few vines trail down lower at a single point. This creates visual tension and interest.
Step-by-Step Styling:
- Create the base: Secure your main garland along the arms or center stem using zip ties. Don’t pull them fully tight yet; leave room for adjustment.
- Establish the drape: Allow parts of the garland to dip slightly between the arms. This mimics how vines grow in nature.
- Add volume: Insert individual stems (picks) into the garland to thicken specific areas. Wire them in place.
- Edit the bottom: Check the view from below. This is the angle most people will see. Ensure mechanics (zip ties/wire) are hidden by foliage.
4. Styles for Different Fixture Shapes
Not all chandeliers are created equal. The shape of your fixture dictates how you should apply the greenery.
The Wagon Wheel
This is the easiest shape to decorate. You can lay a garland directly on top of the ring.
To elevate this look, do not just wrap the garland like a candy cane. Instead, lay it loosely on top and secure it at intervals. Let the greenery spill over the edges. Intertwine battery-operated fairy lights for a magical evening glow.
The Linear Pendant (Island Light)
Common in kitchens and dining rooms, these long fixtures require a linear application.
I prefer to dress the suspension rods (the down-rods) rather than the light bar itself. Winding ivy or ruscus down the two supporting rods creates a vertical garden effect without interfering with the light distribution on the island below.
The Crystal Chandelier
This requires a delicate touch. You do not want to tangle greenery in the crystal strands.
Focus your decoration on the top crown (where the chain meets the body) or the very bottom finial. A small “collar” of greenery at the top looks sophisticated and keeps the crystals free to refract light.
The Drum Shade
Drum shades are tricky because they offer fewer attachment points.
I usually create a wreath of greenery that is slightly larger than the shade diameter. I rest this lightweight wreath on top of the shade’s spider fitting. This creates a halo of leaves crowning the fabric shade without needing sticky adhesives.
5. Seasonal Variations and Occasions
While greenery is timeless, the type of foliage can set the tone for the season. Swapping out stems is an easy way to refresh a room without buying new furniture.
Winter and Holidays
This is the most popular time for chandelier decor. I recommend mixing textures: long-needle pine, flat cedar, and glossy magnolia.
Pro Tip:
Add velvet ribbon. Tie long, loose bows at the base of the chain. Let the tails of the ribbon dangle down. For a standard 8-foot ceiling, keep tails around 12–15 inches. For higher ceilings, you can go up to 24 inches for drama.
Spring and Summer
Transition away from heavy woods. Use lighter, airier elements like fern fronds, eucalyptus, or olive branches.
Incorporating dried florals like lavender or baby’s breath adds a soft, romantic texture. Keep the application sparse. A “less is more” approach works best for warmer months to keep the room feeling airy.
Autumn
You don’t have to use orange maple leaves to signal fall. I prefer a more subtle approach using dried wheat, brown preserved oak leaves, or branches with berries.
Mixing dried hops vines into your greenery adds a lovely architectural texture that feels autumnal but sophisticated.
Final Checklist: What I’d Do in a Real Project
If I were standing in your dining room today, ready to install, this is the mental checklist I would run through to ensure success.
Pre-Installation:
- Measure the clearance. For a dining table, the bottom of the chandelier (or the lowest hanging greenery) should be 30 to 36 inches above the table surface.
- Clean the fixture. Dusting a chandelier after the greenery is up is impossible.
- Condition fresh greens. If using fresh, cut the stems and soak the entire branch in a bathtub of cool water for an hour, then let dry. This hydrates the leaves and extends their life.
During Installation:
- Work in layers. Start with the “spine” (the main garland), then add “flesh” (volume), then “skin” (delicate trailing pieces).
- Step back frequently. Get off the ladder every 10 minutes to view the fixture from the doorway and from a seated position at the table.
- Hide the mechanics. Use small bits of moss or extra leaves to cover any visible wire or zip ties.
Post-Installation:
- Check for heat. Turn the light on and leave it for 30 minutes. Touch the greenery nearest the bulb. If it’s warm, move it.
- Mist daily. If using fresh greens, mist them lightly with a spray bottle every morning to keep them looking lively.
FAQs
Is it a fire hazard to put greenery on a chandelier?
It can be if you are not careful. Always use LED bulbs, which emit very little heat. Never let dry or faux foliage touch a bare bulb. Keep a safety clearance of 2–3 inches from the light source.
How do I keep fresh greenery from dropping leaves into my food?
This is a common issue with spruce or hemlock. To prevent this, spray your fresh greenery with an anti-transpirant spray (often found at floral supply stores) before hanging. This seals the moisture in and acts as a glue for the needles. Alternatively, choose broad-leaf varieties like salal or magnolia, which do not shed needles.
Can I decorate a chandelier if I rent my home?
Absolutely. Since you aren’t drilling holes, this is a renter-friendly upgrade. Just ensure you use zip ties or wire rather than adhesives that might leave a residue on the fixture. Be sure to remove everything carefully before moving out.
How much greenery do I need?
Always buy 20% more than you think you need. For a standard 24-inch diameter chandelier, I usually budget for 6 to 8 feet of garland to allow for draping and swags.
Conclusion
Decorating a chandelier with greenery is one of the most high-impact, low-cost styling moves you can make in a home. It bridges the gap between the architecture of the room and the living space below.
Whether you choose a simple sprig of olive for a summer dinner or a lush cedar garland for the holidays, the key is confidence. Trust your eye, respect the scale of the room, and always prioritize safety. With these elegant touches, your lighting will become a true centerpiece.
Picture Gallery


