
How To Decorate Bookshelves For Christmas: Holiday Display Ideas
Christmas decorating often stops at the tree and the mantel, leaving one of the largest focal points in a room completely untouched. Your bookshelves offer prime real estate for holiday cheer, yet they are frequently ignored because people find the logistics of rearranging them daunting. Styling shelves requires a delicate balance between your everyday items and seasonal accents without creating visual chaos.
I have found that treating bookshelves as a series of small vignettes rather than one massive display makes the process much more manageable. You do not need to remove every single book to make an impact, but you do need a strategy for layering textures and light. If you are looking for visual inspiration, we have curated a stunning Picture Gallery at the end of this blog post with specific examples of these techniques.
This guide will walk you through the exact process I use when styling clients’ homes for the holidays. We will cover everything from handling negative space to selecting the right lighting temperature, ensuring your shelves look curated rather than cluttered.
1. The Clean Slate: Editing and Spacing Rules
Before you buy a single ornament, you must address what is currently on your shelves. The biggest mistake homeowners make is trying to squeeze holiday decor in front of existing clutter.
Start by removing approximately 40% of your current decor items. Leave the books, but take down the small picture frames, paperweights, and standard vases. You need to create “negative space” to allow the Christmas elements to breathe.
If your shelves are packed tightly with books from edge to edge, remove a few distinct stacks. I usually recommend leaving at least 4 to 6 inches of empty horizontal space on every other shelf. This prevents the final look from feeling heavy or overwhelming.
Group your remaining books by color or size to create a calm backdrop. If your book spines are too colorful and clash with your holiday palette, consider flipping them so the page edges face outward. This creates a neutral, textural white-and-cream background that works with any color scheme.
2. Establishing a Cohesive Holiday Palette
Interior design relies heavily on repetition to create rhythm, and holiday styling is no exception. Choose a specific color story before you begin styling. This does not mean everything must match perfectly, but the tones should belong to the same family.
For a sophisticated look, stick to a “Scandi-Neutral” palette. This involves natural wood tones, whites, creams, and matte black accents. It is perfect for modern homes and allows greenery to be the main pop of color.
If you prefer a “Classic Nostalgia” vibe, focus on deep hunter greens, rich burgundies, and antique brass. This works exceptionally well in traditional homes with dark wood cabinetry.
For a “Winter Glamour” approach, use mixed metallics. Combine silver, champagne gold, and mercury glass. The key here is to mix finishes; pair shiny gold with brushed brass to add depth.
Once you pick a palette, stick to it rigorously. If you introduce a bright blue nutcracker into a red and green scheme, the eye will stop there, disrupting the flow of the entire unit.
3. The Triangle Method and Scale
Now comes the actual placement of decor. I use the “visual triangle” method to ensure balance. Imagine a triangle connecting three items across your shelves.
Place your largest items first. This might be a tall ceramic house, a large bottle-brush tree, or a substantial lantern. Distribute these large items in a zig-zag pattern: top left, middle right, bottom left. This guides the eye diagonally down the shelving unit.
Once the anchors are in place, fill in the gaps with medium-sized items. This is where you place your smaller trees, decorative boxes, or reindeer figurines. Always group these items in odd numbers. A grouping of three items is generally more visually pleasing than a pair.
Designer’s Note: The Rule of Scale
One of the most common issues I see is “small object syndrome.” When you fill a large shelf with dozens of tiny items (under 3 inches tall), it looks like clutter, not decor.
The Fix: Use fewer, larger items. If you have small ornaments you love, group them inside a glass cloche or bowl to create one single visual unit.
4. Layering Greenery and Organic Elements
Greenery is the bridge that connects your holiday decor to the room’s architecture. However, you must be careful not to inhibit the functionality of the shelf or block the books entirely.
I prefer using cypress or cedar sprays rather than heavy pine garlands for bookshelves. Cedar drapes beautifully and lies flatter than stiff pine. You can tuck individual stems behind book stacks to let them spill over the edge of the shelf.
For a built-in look, attach a lightweight garland to the front face of the shelves. Use small, clear Command hooks positioned on the top of the shelf lip. This frames the books without obscuring them.
Incorporate different organic textures to avoid the display looking too plastic.
- Pinecones: Use bleached pinecones for a modern look or cinnamon-scented ones for tradition.
- Wood beads: Drape a strand of natural wood beads over a stack of books to break up the straight lines.
- Dried citrus: Slices of dried orange add a beautiful stained-glass effect when backlit.
If you are a renter, avoid nailing anything into the millwork. Tension rods can be used inside the shelf frame to hang wreaths without damaging the paint.
5. Lighting: The Secret Ingredient
Lighting changes a display from “nice” to “magical.” Because bookshelves are often deep, they can become dark voids at night. Adding light brings the decor forward.
Use battery-operated LED fairy lights with a copper wire. The thin wire is nearly invisible, allowing you to weave it around books and figurines effortlessly. Look for lights with a timer function so you don’t have to manually turn them on every evening.
Lighting Temperature is Critical:
Always check the Kelvin rating on your LED lights. You want “Warm White” (2700K to 3000K). Avoid “Cool White” or “Daylight” (5000K), which casts a harsh, blue clinical light that kills the cozy atmosphere.
For a sophisticated touch, use battery-operated tapered candles. Place them in brass holders on top of horizontal book stacks. The flickering LED flame adds movement and warmth.
If you have open shelving, consider placing a small portable table lamp on one of the lower shelves. This adds a layer of “task lighting” that elevates the furniture piece.
Common Mistakes + Fixes
Mistake 1: Ignoring Vertical Space
The Issue: Placing everything directly on the shelf surface leaves the top half of the shelf empty and awkward.
The Fix: Use risers. Stack books horizontally to create a platform for an ornament. Lean a piece of art or a framed holiday card against the back wall of the shelf to add height and depth.
Mistake 2: Over-Symmetry
The Issue: Mirroring the left and right sides perfectly creates a stiff, showroom feel.
The Fix: Embrace asymmetry. If you have a heavy greenery arrangement on the left, balance it with a visual “weight” on the right, like a stack of dark books, rather than an identical greenery arrangement.
Mistake 3: Forgetting the Bottom Shelf
The Issue: The bottom shelf is visually heavy and often overlooked.
The Fix: Use large, sturdy baskets on the bottom shelf. Fill them with birch logs, a cozy plaid throw blanket, or wrapped faux gifts. This anchors the unit.
What I’d Do in a Real Project: Mini Checklist
If I were styling your home tomorrow, this is exactly what I would bring in my kit. This list balances aesthetics with practical stability.
The Hardware:
- Clear Command Hooks (Micro and Medium size).
- Green floral wire (22 gauge) for securing garland.
- Museum Putty (Quake Hold) to secure breakables, especially if you have cats or kids.
- Double-sided velcro tape for securing battery packs to the underside of shelves.
The Decor Elements:
- Ribbon: 2-inch wide velvet ribbon in a complementary color (moss green or slate blue).
- Filler: A bag of faux snow or epsom salts if using glass apothecaries.
- Height: 3-5 Acrylic or wooden risers to vary the height of objects.
The Strategy:
I always start by removing all dust jackets from hardcover books if the colors are too loud. The linen texture of the naked book spine is much more elegant. I group books by size, not subject, for styling purposes.
Final Checklist for Holiday Shelf Styling
Before you consider your shelves finished, run through this quick audit to ensure the display is polished and practical.
Safety Check:
- Are heavy items secured with museum putty?
- Are trailing garlands out of reach of pets?
- Are real candles kept away from paper products (or better yet, swapped for LEDs)?
Visual Check:
- Is the lighting temperature consistent (all warm white)?
- Is there enough negative space, or does it feel cluttered?
- Is the color palette distributed evenly from top to bottom?
- Do you have a mix of textures (shiny, matte, soft, rough)?
Functionality Check:
- Can you still access books you might need to read?
- Are battery packs hidden but accessible for changing batteries?
- Are the shelves sagging under any new weight?
FAQs
How do I decorate shelves without removing my books?
You don’t need to remove them all. Clear small pockets of space—about 8 inches wide—on various shelves. Use these pockets for focused vignettes. Alternatively, hang a small wreath on the front of the bookshelf frame using a ribbon and a tack on the top edge. This adds festivity without disturbing the shelf contents.
Can I use real garland on bookshelves?
You can, but be cautious. Real garland dries out quickly indoors due to heating. Dry needles can fall into books and be difficult to clean. If you use real greenery, mist it daily and place it on a layer of felt or plastic wrap to protect the wood finish from sap. I generally recommend high-quality “real-touch” faux cedar for bookshelves for this reason.
How do I hide the battery packs for fairy lights?
The best trick is to tape the battery pack to the “ceiling” of the shelf compartment using double-sided mounting tape or Velcro. Push it all the way to the back. This keeps it hidden from view but allows you to reach in and switch it on. Alternatively, hide the pack behind a large picture frame or inside a decorative box.
What if my shelves are already full of colors?
If your books are colorful and you can’t flip them, lean into a “maximalist” holiday theme. Use multicolored lights and bright ornaments that complement the books rather than fighting them. Alternatively, cover the books with kraft paper for a unified, gingerbread-house aesthetic.
Conclusion
Decorating bookshelves for Christmas is one of the most effective ways to change the atmosphere of a room. It draws the eye up and creates a sense of cozy enclosure that fits the season perfectly.
Remember that perfection is not the goal. The goal is to create a display that brings you joy when you walk into the room. Start with a good edit, choose a lighting scheme that adds warmth, and layer your personal treasures with seasonal greens. By following the rules of scale and the triangle method, you can create a professional-looking display that celebrates the holiday season without sacrificing the function of your home.
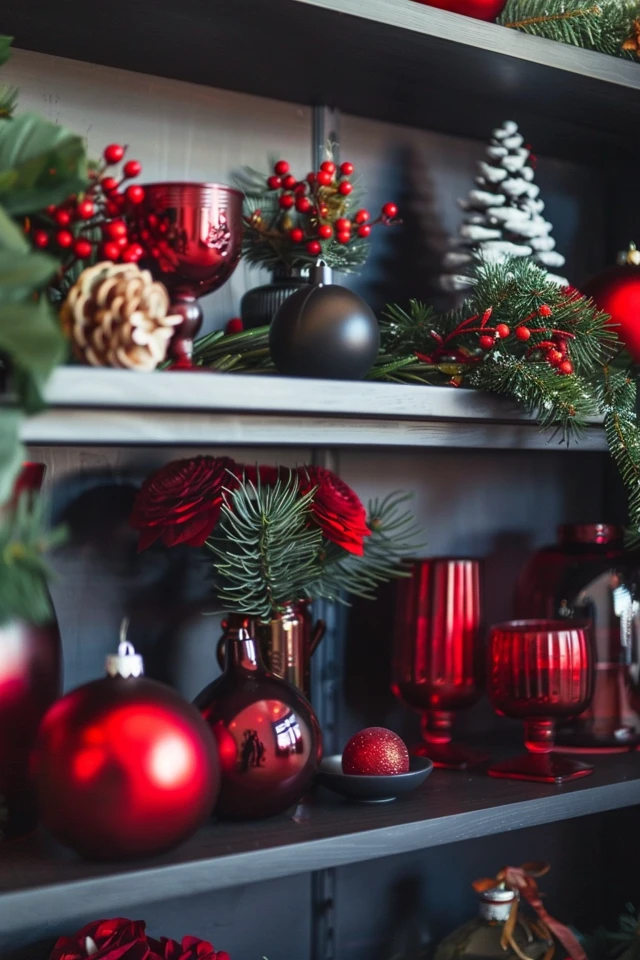
Picture Gallery


