
How To Decorate With Candlesticks: Timeless Elegance
Candlesticks are often the unsung heroes of interior styling. They act as the jewelry of a room, providing vertical interest, metallic or organic texture, and arguably the most flattering lighting source available. Whether you are styling a formal dining table or adding a touch of romance to a bedroom nightstand, the right vessel for your candle changes the entire mood of the space.
However, arranging them requires more than just placing a stick in a holder and lighting a match. It involves understanding scale, negative space, and material mixing to ensure the display looks curated rather than cluttered. I have seen many beautiful mantels ruined by undersized candlesticks that get lost in the visual noise, or dining tables made unusable by elaborate candelabras that block conversation.
For plenty of visual inspiration on how to arrange these pieces in your own home, be sure to check out the Picture Gallery at the end of this blog post. Let’s dive into the practical rules of decorating with candlesticks to bring timeless elegance to your home.
Understanding Scale, Height, and Proportion
The most common issue I see in DIY styling is a lack of height variation. When everything on a surface is the same height, the eye tends to glaze over it. Candlesticks are the perfect tool to break up the horizontal lines of a console table, mantel, or dining surface.
The Rule of Three and Triangles
In design school, we learn early on about the “rule of three.” Odd numbers are generally more pleasing to the human eye than even numbers because they force the eye to move around the composition. When arranging candlesticks, try to group them in clusters of three.
To make this work, you need significant height variation. I usually look for a “stairstep” effect where there is at least a 2 to 3-inch difference between each holder. This creates a visual triangle that feels dynamic and balanced.
Visual Weight and Balance
You must also consider the visual weight of the candlesticks compared to the furniture they sit on. A heavy, chunky farmhouse table can handle thick, turned-wood pillars or heavy ceramic holders.
Conversely, a delicate glass or acrylic coffee table pairs better with slender brass tapers or crystal holders. If you put tiny, thin candlesticks on a massive heavy sideboard, they will disappear. If you put massive stone pillars on a delicate glass shelf, it will look top-heavy and precarious.
Mixing Materials and Finishes
Gone are the days when all metals in a room had to match perfectly. In fact, matching everything too closely can make a room feel like a showroom rather than a lived-in home. Candlesticks are a low-risk way to introduce a new material into your palette.
Mixing Metals
If your room has mostly brushed nickel hardware, introducing brass candlesticks adds warmth and prevents the space from feeling too sterile. If you have a lot of warm wood tones, polished chrome or black iron holders can provide a necessary sharp contrast.
A good rule of thumb for mixing metals is the 70/30 rule. Let 70% of the finishes in the room be your dominant metal (e.g., oil-rubbed bronze door handles and light fixtures) and use candlesticks to introduce the 30% accent metal (e.g., antique brass).
Playing with Textures
Don’t limit yourself to metal. I love using marble or travertine candlesticks to add organic weight to a shelf. Glass and crystal are excellent for small spaces because they take up very little “visual space,” allowing light to pass through them.
For a more casual or coastal look, wrapped rattan or woven seagrass candle holders add texture without adding heavy color. The key is to look at what your room is missing. If the room feels “cold,” add wood or brass. If the room feels “heavy,” add glass or polished silver.
Room-by-Room Styling Strategies
Candlesticks are versatile, but safety and functionality must come first. The placement of a lit flame dictates where these items can actually live in a functional home. Here is how I approach specific rooms.
The Dining Room
The dining table is the classic home for candlesticks, but functionality is paramount here. The biggest mistake is blocking sightlines. If you are seated at the table, you should be able to see the person across from you without craning your neck.
I recommend using taper holders that are either very tall (so the flame is above eye level) or low clusters (below eye level). Avoid chunky pillar candles right at face height (approx. 15 to 20 inches off the table).
For a standard 6 to 8-person rectangular table, I often stagger five candlesticks down the center line. I mix heights and slightly offset them so they aren’t in a rigid straight line. This feels more organic and modern.
The Living Room Mantel
The fireplace mantel is a natural focal point. You generally have two options here: symmetry or asymmetry.
For a formal look, place two identical, substantial candlesticks or candelabras on either end of the mantel. This frames whatever art or mirror is hanging in the center.
For a more modern, relaxed vibe, cluster three to five candlesticks on just one side of the mantel. Balance this cluster with a different object on the other side, like a leaning piece of art or a sculptural vase. This asymmetry keeps the eye moving.
The Coffee Table
Styling a coffee table requires caution, especially in high-traffic zones. I rarely place loose candlesticks directly on the table surface because they are too easy to knock over with a stray knee or a remote control.
Instead, anchor them on a tray. A round or rectangular tray acts as a corral. Place your candlesticks inside the tray alongside a stack of books and a small plant. The tray provides a physical boundary that suggests “don’t touch.”
The Bathroom
Candlelight in a bathroom creates an immediate spa atmosphere. However, space is usually tight. I prefer using heavy, shorter pillar candles here rather than tall tapers, which can feel precarious near towels and robes.
A bathtub tray is a perfect spot for a chunky glass votive or a short pillar. If you have a double vanity, a small pillar candle on a tray between the sinks warms up the typically cold surfaces of tile and porcelain.
Candle Selection: Tapers vs. Pillars
The holder dictates the candle, but the candle dictates the vibe.
Tapers
Tapers are elegant, formal, and vertical. They draw the eye up. They are best for dining tables and mantels.
Standard tapers are usually 7/8 inch in diameter at the base. If your candle is too loose for the holder, a product called “Stick-Um” (a sticky wax adhesive) is a lifesaver. Alternatively, you can wrap a small strip of aluminum foil around the base of the candle to thicken it for a snug fit.
Pillars
Pillar candles are casual, substantial, and burn for a very long time. They are great for coffee tables, credenzas, and outdoor dining.
Always use a coaster or a holder with a wide plate for pillars. Even “dripless” candles can drip if there is a draft from an HVAC vent or open window. A pool of colored wax on a porous marble table is a nightmare to clean.
Color Coordination
White and ivory are timeless and work in 99% of interiors. However, colored candles are a major trend that shouldn’t be ignored.
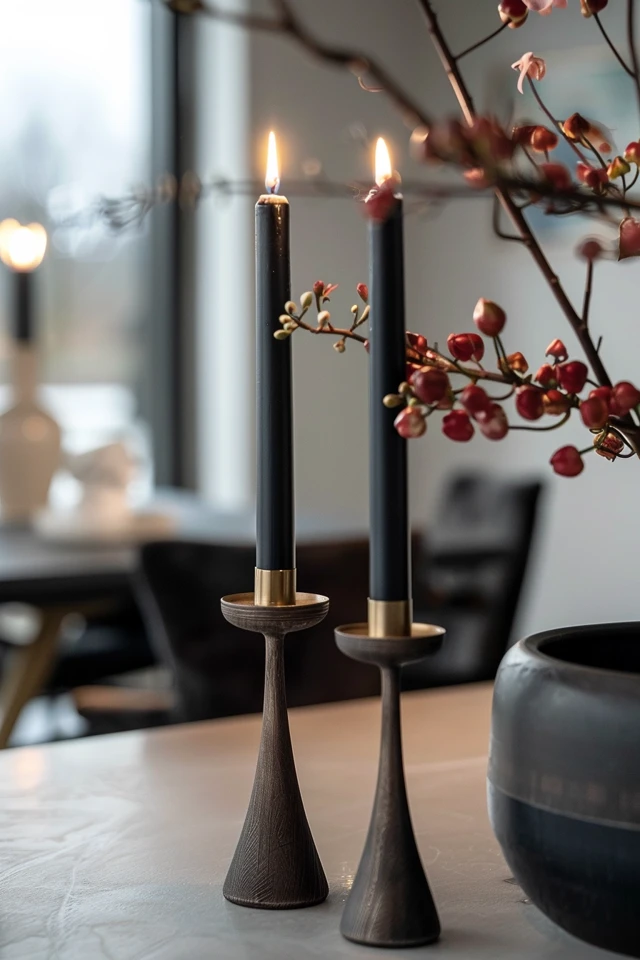
Black candles add instant drama and modernity to a room. They look incredible in brass holders. Sage green or terracotta candles can tie into your throw pillows or rug colors. It is a very cheap way to change the color palette of a room seasonally.
Designer’s Note: The “Landing Strip” Mistake
I once walked into a client’s dining room where they had lined up twelve identical tealight holders in a perfect straight row down the center of the table. They thought it looked organized. In reality, it looked like an airport runway.
It felt rigid and uninviting. We fixed it by grouping them into clusters of three and mixing in some taller tapers and some greenery.
The Lesson: Nature doesn’t grow in straight lines. When styling, think “clusters,” not “rows.” Even if you want a linear look, staggering the placement slightly left and right of the center line makes the arrangement feel curated and high-end rather than mass-produced.
Practical Safety and Real-Life Constraints
As a designer, I have to design for real life, which often involves cats, dogs, and toddlers.
Kid and Pet Safety
If you have cats that jump on counters or toddlers that reach for surfaces, real flames are a massive risk. I highly recommend investing in high-quality LED taper candles.
The technology has improved drastically. Look for “real wax” exteriors and “3D flame” technology. From five feet away, you cannot tell the difference. This allows you to style with the height and elegance of candlesticks without the anxiety of a fire hazard.
Drafts and Drips
Even if you don’t have pets, HVAC vents are the enemy of a clean burn. A draft causes the flame to flicker, which causes the wax to melt unevenly and drip down the side.
If you are placing candles near an entryway or under an AC vent, use hurricane glass cylinders. These glass tubes sit over the candlestick or pillar, shielding the flame from drafts while keeping the look open and airy.
Clearance Rules
Always measure the clearance above the flame. I adhere to a strict rule: there must be at least 3 feet of clearance between the top of the flame and any shelf, cabinet, or artwork above it. Heat rises, and over time, it can scorch wood finishes or discolor the matting on artwork even if it doesn’t catch fire.
Common Mistakes + Fixes
Mistake: The candle is too short for the holder.
Fix: This throws off the proportion. A general rule is that the candle should be at least two-thirds the height of the holder itself. If your candle has burned down to a nub, replace it or move it to a shorter votive holder.
Mistake: Ignoring the wick.
Fix: Black, mushroomed wicks look dirty and create black smoke. Always trim your wicks to 1/4 inch before lighting. Even unlit decorative candles look better with a neatly trimmed wick.
Mistake: Cluttered surfaces.
Fix: Too many small votives look messy. Swap five small votives for one substantial statement candelabra. Less is often more.
What I’d Do in a Real Project: The Styling Checklist
If I were styling a sideboard for a photoshoot or a client reveal, here is the exact mental checklist I go through:
1. Anchor the Ends: I start by placing my tallest items (lamps or tall vases) on the outer edges of the console.
2. Create the Triangle: I place a cluster of three brass candlesticks off-center (usually to the left). One is 12 inches high, one is 9 inches, one is 6 inches.
3. Add Life: I place a small organic element near the candlesticks, like a small potted fern or a bowl of moss, to soften the metal.
4. Balance the Weight: On the opposite side (the right), I place a horizontal stack of coffee table books to balance the vertical height of the candles.
5. Check the Background: I stand back to ensure the candlesticks aren’t blocking a key part of the artwork hanging behind the console.
Final Checklist
Before you consider your arrangement complete, run through this quick list:
- Variation: Do you have varying heights to create a visual triangle?
- Palette: Do the materials (brass, wood, glass) complement the room’s existing hardware?
- Safety: Is there 3 feet of overhead clearance? Is the base stable?
- Proportion: Are the candles the right size for the table? (Not too spindly for a heavy table, not too huge for a delicate one).
- Verticality: Are the candles straight? (Use Stick-Um or foil if they are leaning).
FAQs
How do I get old wax out of a candlestick?
The safest method is the freezer. Put the candlestick in the freezer for about an hour. The wax will shrink and usually pop right out with a gentle nudge from a butter knife. Avoid scraping with sharp metal objects, as you can scratch the finish of the holder.
Can I mix silver and gold candlesticks?
Absolutely. This is a very chic look. To make it intentional, try to have one metal be the “shiny” finish and the other be “matte” or “brushed.” Alternatively, use a third material, like black iron, to bridge the gap between the two metals.
How far apart should candlesticks be?
If clustering them, they should be close enough to feel like a group, but not touching. A good distance is about 1 to 2 inches between the bases. If spacing them down a dining table, 12 to 18 inches apart allows for place settings and serving bowls without crowding.
What is the best candle color for a formal dinner?
Ivory or off-white is the gold standard for formal dining. It casts a flattering, warm glow. Bright white can sometimes look a bit harsh or cheap depending on the wax quality.
Conclusion
Decorating with candlesticks is one of the most effective ways to elevate your home’s atmosphere. They offer a unique blend of architectural structure during the day and warm, kinetic energy at night. By paying attention to scale, grouping in odd numbers, and respecting the materials in your room, you can create vignettes that feel professionally styled.
Remember that these accessories are meant to be used. Don’t save your nice tapers for a holiday that happens once a year. Light them on a Tuesday night over pizza. Let the wax drip a little. Enjoy the ambiance they create.
Picture Gallery


