
Home Decor – How To Furnish A Short Term Rental
When you decide to turn a property into a short-term rental, you aren’t just decorating a home; you are designing a business asset. The goal is to stop the scroll on a listing site while ensuring the space can withstand heavy traffic, suitcases banging against walls, and the occasional red wine spill.
I recently worked on a rental property where the owner initially wanted to use a vintage velvet sofa they found at an estate sale. I had to gently explain that while it was beautiful, it would look tired within three bookings. We swapped it for a performance fabric sectional, and two years later, it still looks brand new despite weekly turnover.
Furnishing a rental requires a completely different mindset than furnishing your own home. You need to balance durability with design, and cost-efficiency with comfort. If you are looking for visual inspiration, scroll down to the Picture Gallery at the end of this blog post to see real-world examples of durable, stylish rentals.
1. Durability is Your Design Language
The number one rule in furnishing a short-term rental is assuming that everything will be tested to its limit. You are looking for materials that are “commercial grade” or “performance” rated. This doesn’t mean the space has to look clinical or cold; it just means you need to be strategic about your finishes.
Start with your upholstery. I never specify a sofa or armchair for a rental unless the fabric has a “double rub” count of at least 50,000. This is the industry standard for heavy residential or commercial use. Look for solution-dyed acrylics or crypton fabrics that repel liquids and resist staining.
Flooring is another major investment where you cannot afford to make a mistake. Avoid wall-to-wall carpet whenever possible, as it traps odors and holds stains that professional cleaners can’t always remove. Luxury Vinyl Plank (LVP) is my go-to for rentals because it is waterproof, scratch-resistant, and mimics the look of real white oak or walnut beautifully.
Designer’s Note:
A common issue I see is owners using light-colored grout in bathrooms or kitchen backsplashes. It looks pristine in photos on day one, but after six months, it will look dingy. I always specify a medium gray or charcoal grout. It adds contrast and hides the inevitable wear and tear much better than white.
Common Mistakes + Fixes:
- Mistake: Buying cheap particle board furniture (like basic IKEA lack tables).
- Fix: Invest in solid wood or metal for hard surfaces. If a guest sits on a coffee table, particle board will snap; solid wood might just dent.
- Mistake: Using matte paint on walls.
- Fix: Use an eggshell or satin finish for walls. It is much easier for your cleaning crew to wipe down scuff marks without taking the paint off.
2. The Bedroom: Where Reviews Are Earned
Your guests might forgive a slightly small kitchen, but they will never forgive a bad night’s sleep. The mattress is the single most important item in the house. Do not bring a used mattress from your own home; buy new, hybrid mattresses that offer a middle-ground firmness (usually a 6 or 7 on the firmness scale) to appeal to the widest range of sleepers.
Bedding must be white. This is a non-negotiable standard in the hospitality industry because white linens imply cleanliness and can be bleached heavily between stays. I recommend 100% cotton percale sheets rather than microfiber, which can sleep hot and pill over time.
For window treatments, you must provide true blackout capabilities. While light-filtering drapes look airy, a guest who wants to sleep in on their vacation will leave a 4-star review if the sun wakes them up at 6:00 AM. Install blackout roller shades inside the window frame and layer decorative drapes over them for a softer look.
Measurements to Know:
- Nightstand Height: Ensure your nightstand is level with or slightly higher than the top of the mattress (usually 24 to 30 inches).
- Clearance: You need at least 24 inches of walking space around the sides and foot of the bed. If you can’t fit that, size down from a King to a Queen.
- Rug Sizing: For a King bed, use a 9×12 rug. For a Queen, an 8×10 works best. The rug should start about 6 to 12 inches away from the nightstands.
What I’d Do in a Real Project:
If the bedroom is tight on space, I skip the floor lamps and bulky table lamps. Instead, I install plug-in wall sconces on either side of the bed. This frees up the entire surface of the nightstand for the guest’s phone, water, and book, and it prevents lamps from being knocked over.
3. Living Room Layout and Flow
The living room needs to accommodate the maximum number of guests your property claims to sleep. If your listing says “Sleeps 6,” but your living room only has a sofa and one chair, you have a problem. Guests want to hang out together comfortably.
Focus on flow and clearance. In a high-traffic rental, you want to make moving through the space effortless. Aim for a minimum of 30 to 36 inches of walkway space between furniture pieces. This prevents suitcases from banging into corners and makes the room feel larger.
When selecting coffee tables, avoid glass tops. They are a safety hazard for families with children and require constant Windex to look clean. A round, wood coffee table or a large upholstered ottoman with a tray is a much safer and more durable choice.
Designer’s Rules of Thumb:
- Rug Size: The rug defines the “zone.” At a minimum, the front legs of the sofa and all chairs should sit on the rug. An 8×10 is the standard minimum for a living room; a 5×8 often looks like a postage stamp and cheapens the design.
- Coffee Table Distance: Place the coffee table 18 inches from the edge of the sofa. This is close enough to set a drink down but far enough to walk through sideways if needed.
- TV Placement: Mount the TV to the wall whenever possible. This prevents tipping accidents. The center of the screen should be roughly 42 to 48 inches from the floor for comfortable viewing from a sofa.
The Sleeper Sofa Dilemma:
Many owners want sleeper sofas to increase occupancy. In my experience, most sleeper sofas are uncomfortable to sit on and terrible to sleep on. If you must have one, spend the money on a high-end mechanism (like American Leather or high-quality equivalents) where the mattress is separate from the seat cushions.
4. The Kitchen and Dining Equation
Your kitchen needs to be stocked, not cluttered. Guests usually cook breakfast and simple dinners, so you don’t need a sous-vide machine, but you do need excellent basics. I always use the “1.5x Rule” for dinnerware: if your house sleeps 4, you need 6 place settings. This ensures guests don’t have to run the dishwasher after every single meal.
Dining tables take a beating. I strongly advise against soft woods like pine or farm tables with deep grooves that trap crumbs. A quartz top dining table or a sealed hardwood table is ideal. If you have a tight space, a round table typically offers better flow than a rectangular one.
Lighting in the dining area is crucial for setting the mood. A pendant light or chandelier should hang 30 to 36 inches above the table surface. If you hang it too high, the light feels disconnected; too low, and it blocks conversation.
The “Must-Have” Checklist:
- Coffee Station: This is often the most important part of the kitchen. Provide a Keurig and a standard drip pot, or a Nespresso. Create a dedicated “station” with mugs and spoons.
- Knives: Provide a sharpener. Dull knives are dangerous and frustrating.
- Trash Cans: A small under-sink can is rarely enough. Provide a large, freestanding trash can, preferably stainless steel with a lid.
Common Mistakes + Fixes:
- Mistake: Open shelving in the kitchen.
- Fix: While trendy, open shelves collect dust and grease. In a rental, guests often wash dishes poorly. Closed cabinets hide the clutter and keep clean dishes actually clean.
- Mistake: Providing plastic cups for adults.
- Fix: Buy inexpensive but durable tempered glassware. It feels higher-end. Save the plastic only for designated “poolware” or kids’ cups.
5. Styling and Creating “The Moment”
To book your rental, you need “the shot.” This is the one photo that makes a potential guest stop scrolling and click your listing. This is rarely a picture of a toilet or a hallway; it is a styled vignette that evokes emotion.
I like to create an “Instagrammable moment.” This could be a neon sign against a fun wallpaper accent wall, a hanging egg chair in a corner with a view, or a beautifully styled reading nook. It gives guests a place to take photos, which ends up being free marketing for you on social media.
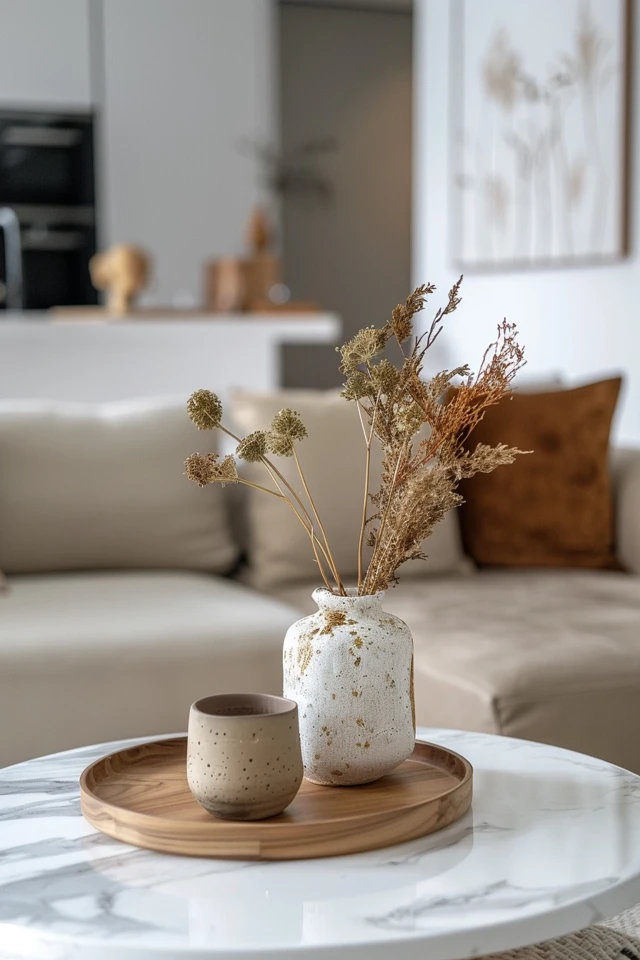
However, avoid “tchotchkes” (small, useless decorative items). Small items gather dust and are easily stolen or broken. Instead, rely on scale. Use one large piece of art rather than ten small frames. Use a large, heavy vase with high-quality faux greenery rather than small succulent pots.
Lighting Temperature:
Never mix light bulb temperatures. For a residential feel that looks good in photos and feels cozy in person, use 2700K (Warm White) or 3000K (Soft White) LED bulbs everywhere. Anything over 3500K will make your rental look like a dentist’s office or a hospital.
Designer’s Note on Art:
Secure your art. I use security hardware (often called T-screws) for expensive pieces or larger frames in high-traffic areas. This keeps the art perfectly level even when doors are slammed, and it prevents theft.
Final Checklist: Ready for Launch
Before your first guest arrives, walk through the property as if you were staying there.
- Entryway: Is there a place to hang a coat and drop keys immediately?
- WiFi: Is the password visible? Frame it and put it in the kitchen and living room.
- Luggage: Do bedrooms have luggage racks? (Guests will put suitcases on your clean bedspreads if you don’t provide a rack).
- Safety: Are the fire extinguisher and first aid kit easy to find?
- Plumbing: Have you plunged the toilets to ensure they flush quickly?
- Maintenance: Do you have spare lightbulbs and batteries in a locked owner’s closet?
FAQs
What is a realistic budget for furnishing a rental?
For a standard 1-bedroom apartment, a realistic budget for furniture and decor (excluding renovations) is typically between $10,000 and $15,000. This ensures you are buying quality items that won’t need replacing in six months. If you buy cheap, you buy twice.
Should I allow pets?
From a business standpoint, yes. Pet-friendly rentals often command higher rates and have higher occupancy. However, if you allow pets, you must use LVP flooring and washable sofa covers or leather. Never use sisal or jute rugs, as they absorb odors and are impossible to clean.
Can I use white sofas in a rental?
You can, but only if they are slipcovered. I use white slipcovered sofas often (like the IKEA Farlov or Pottery Barn PB Basic) because the covers can be taken off and bleached. If the upholstery is fixed and white, it will be ruined within weeks.
How do I protect my inventory?
Create a locked “Owner’s Closet.” This is where you keep extra linens, cleaning supplies, and replacement inventory (like extra wine glasses). Your cleaning crew should have the key, but guests should not.
Conclusion
Furnishing a short-term rental is a balancing act between hospitality and durability. You want your guests to feel pampered, but you need your investment to last. By sticking to performance materials, following proper layout measurements, and prioritizing the sleep experience, you create a space that garners five-star reviews.
Remember that a rental is a living thing; it will need maintenance and updates. But if you build a solid foundation with the right flooring, furniture, and flow, the upkeep will be manageable, and the bookings will follow.
Picture Gallery


