
How To Hang A Cowhide Rug On Wall: Unique Decor
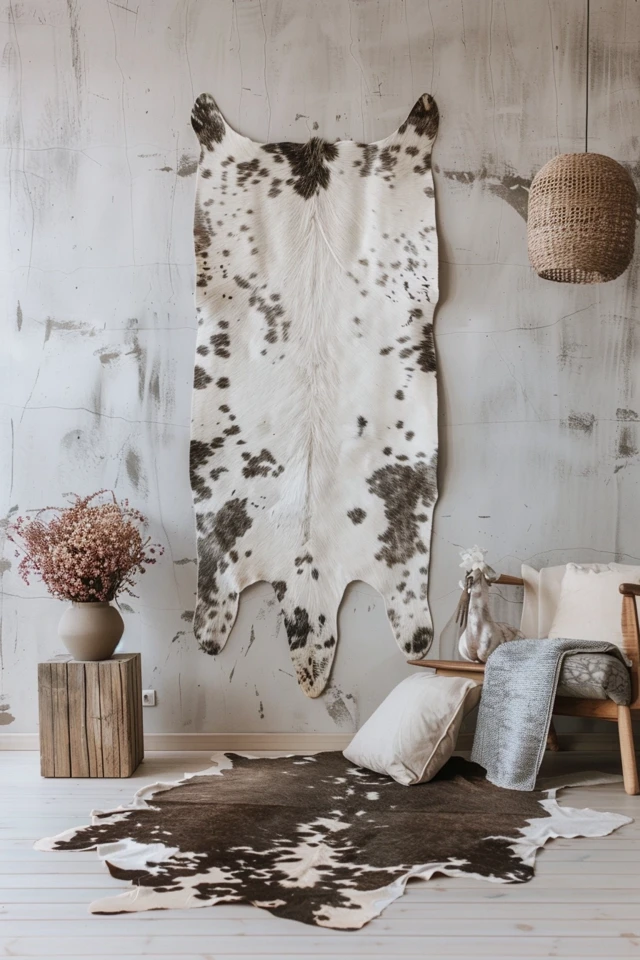
Cowhide rugs have migrated from the floor to the wall, and for good reason. As an interior designer, I often use them to solve specific architectural problems, such as dampening sound in a large, echoey room or adding organic curves to a boxy modern apartment. Unlike standard framed art, a cowhide offers texture, warmth, and an irregular shape that breaks up the monotony of straight lines.
However, getting them to stay on the wall without sagging or damaging the leather requires a specific approach. I have seen many DIY attempts end with a curled, dusty rug slipping off the plaster, taking paint chips with it. The key is understanding that leather is a skin—it reacts to humidity, weight, and gravity.
In this guide, I will walk you through three professional methods for mounting a hide, ranging from renter-friendly options to permanent installations. For visual inspiration on how these finished projects look in real living rooms, be sure to check out the Picture Gallery at the end of this blog post.
Preparing the Hide and the Wall
Before you even pick up a hammer or adhesive strip, you must prep the material. A cowhide rug is heavy, usually weighing between 8 and 15 pounds depending on the tanning process and size. It also has a distinct grain direction and natural oils that can interfere with adhesives.
If your rug has been rolled up for shipping or storage, it will have stubborn creases. You cannot hang a creased hide; the shadows will look messy, and the tension will cause the adhesive to fail. Lay the rug flat on the floor for at least 48 hours in a room with standard room temperature (around 70 degrees).
If gravity alone does not remove the creases, you can iron the hide. Place a heavy brown paper bag or a thick cotton towel over the hair side of the rug. Set your iron to a low synthetic setting—never use steam, as moisture can warp the leather—and gently press out the wrinkles.
Designer’s Note: Placement Strategy
One common mistake I see is undersizing the wall space. Because cowhides have irregular, organic edges, they need “breathing room” to look intentional.
- The Rule of Thumb: Leave at least 12 to 18 inches of negative space (empty wall) around the furthest tips of the hide. If the legs of the hide touch the ceiling or the sofa back, the room will feel cramped.
- Orientation: Most people hang hides vertically, but hanging one horizontally over a long sofa or headboard can widen the visual feel of the room. Determine your orientation before buying your hardware.
Method 1: The Heavy-Duty Velcro Method (Renter Friendly)
This is the method I use most often for clients who are renting or for those who like to change their decor seasonally. It involves no drilling and minimal wall repair later. However, standard Velcro will not work; you need industrial-strength hook-and-loop tape designed for heavy loads.
Tools Needed:
- 2-inch wide industrial strength Velcro tape (adhesive back).
- Rubbing alcohol and a clean cloth.
- A bristle brush or a stiff vacuum attachment.
- A staple gun (optional, but recommended for the rug side).
- Painter’s tape (for marking).
Step 1: Clean the Contact Points
The back of a cowhide is suede, which is essentially leather fuzz. Adhesive strips stick poorly to fuzz. You need to map out where your Velcro strips will go—usually along the top edge, the middle spine, and the tips of the legs. Clean these specific spots on the leather with a stiff brush to remove loose fibers.
Step 2: Apply Velcro to the Rug
Cut your Velcro into 4-inch strips. Peel the backing and stick the “hook” side (the scratchy side) to the back of the rug. I recommend placing a strip every 10 to 12 inches along the perimeter and a few in the center to prevent ballooning.
Pro Tip: The adhesive on the Velcro is strong, but over time, the weight of the hide can pull it away from the suede. For a foolproof hold, I use a staple gun to put two staples through the Velcro strip into the leather. Since the staples go through the back, they are invisible from the front.
Step 3: Map the Wall
Hold the rug up (you will need a friend for this) and mark the general position with painter’s tape. Remove the backing from the “loop” side (the soft side) of the Velcro strips. Attach the loop strips to the hook strips that are already on the rug.
Step 4: Press and Set
With the backing peeled off the wall-side strips, press the rug firmly against the wall. Rub your fist over the areas where the Velcro is located to bond the adhesive to the paint.
Common Mistakes + Fixes
Mistake: The rug starts peeling off the wall after a week.
Fix: This usually happens because the wall was dusty or the paint is “low-VOC” / scrubbable, which resists adhesives. Clean the wall with rubbing alcohol where the strips go. If it still fails, you may need to use small upholstery nails in the corners to bear the weight, using the Velcro just to keep the edges flat.
Method 2: The Upholstery Tack Method (The Rustic/Permanent Look)
If you own your home and do not mind putting small holes in the drywall, this is the most secure and authentic-looking method. It looks particularly good in rooms with a Western, Industrial, or Boho aesthetic. The head of the nail becomes part of the design.
Tools Needed:
- Decorative upholstery tacks (antique brass, matte black, or pewter).
- A rubber mallet or a small tack hammer.
- A stepladder.
- A stud finder (optional, but helpful for the top center).
Step 1: Locate the Center Point
Find the visual center of your wall space. Hold the hide up to find its center of gravity—this is rarely the exact geometric center because the neck is heavier than the tail.
Step 2: Secure the Top Center
Hammer your first tack through the top-most part of the hide (usually the neck area). Do not hammer it all the way in yet; leave a little space in case you need to adjust.
Step 3: Work Outward and Down
This is critical: Do not pull the hide tight. Leather expands and contracts with humidity. If you stretch it like a drum skin, it will eventually tear at the nail points or pull out of the drywall.
Smooth the hide downward with your hand and place tacks at the “shoulders” of the hide. Then, move to the middle, and finally the bottom legs.
Step 4: Check for Puckering
Step back and look for ripples. If the hide is puckering between two nails, you have spaced them too far apart or pulled the leather too taut. Remove the nail, push the leather slightly toward the center to create slack, and re-nail.
What I’d Do in a Real Project
If I am using this method, I coordinate the nail head finish with the other metals in the room. If the room has a brass chandelier, I use antique brass tacks. If the curtain rods are black, I use matte black tacks. It is a small detail that makes the installation look custom rather than DIY.
Method 3: The Clamp or Rod System (The Gallery Look)
For a more sophisticated, high-end appearance, you can treat the cowhide like a tapestry. This method avoids putting any holes in the rug itself, preserving its resale value. This is ideal for very expensive or rare hides.
Tools Needed:
- A sturdy curtain rod or a wooden quilt hanger.
- Wall anchors and screws.
- Drill.
- Heavy-duty rug clips (often used for kilim rugs).
Option A: The Compression Hanger
Wooden quilt hangers are two pieces of wood that clamp the top edge of the rug using magnets or screws. This creates a clean, straight line at the top. This works best if you are hanging the rug vertically and the neck area is relatively straight.
Option B: Rod and Clips
Install a curtain rod high on the wall, just as you would for a window. Use alligator clips with rings to hang the hide from the rod.
Designer’s Note: This method changes the vibe of the room significantly. It makes the hide look like a formal piece of art. It allows the hide to drape naturally, which highlights the quality of the leather. However, the bottom legs will hang loose. If you have high-traffic airflow (like an HVAC vent nearby), the bottom might flutter. You can use a small piece of double-sided tape at the bottom tips to secure them.
Styling and Lighting Your Wall Hide
Hanging the rug is only the mechanics; styling it is the art. Because a cowhide absorbs light rather than reflecting it (unlike a glass-framed picture), it can look like a dark void on the wall if not lit correctly.
Lighting Is Non-Negotiable
Texture needs grazing light to pop. I always recommend installing a directional track light or a picture light above the cowhide.
- Angle: Aim the light so it washes down across the hair. This highlights the sheen of the coat and the natural variations in the pattern.
- Temperature: Use a warm light bulb (2700K to 3000K). Cool daylight bulbs (4000K+) can make the hide look clinical and synthetic.
Layering Objects
In a maximalist or eclectic room, don’t be afraid to layer over the hide. I often place a console table in front of the hanging hide, allowing the bottom legs of the rug to serve as a backdrop for books or ceramics. This grounds the rug and integrates it into the furniture layout.
Color Coordination
If you have a dark brown or black hide, avoid hanging it on a dark navy or charcoal wall unless you are going for a very moody, monochromatic look. The silhouette will disappear. Dark hides look best on white, cream, or light greige walls. Conversely, a white or champagne-colored hide looks stunning against a dark accent wall.
Final Checklist: Before You Hang
Before you commit to the first nail or adhesive strip, run through this quick checklist to ensure professional results.
1. Check the Weight: Weigh your hide on a bathroom scale. If it is over 10 pounds, skip the Velcro and go straight to nails or a rod system.
2. Check the Wall Texture: Is your wall heavily textured (popcorn or heavy orange peel)? Adhesive will not work. You must use nails.
3. Acclimatize: Has the rug been in the room for 48 hours? If not, wait. Leather needs to adjust to the room’s humidity.
4. Layout Review: Tape the outline on the wall with painter’s tape first. Step back. Does it look too small? Too high? Adjust the tape before moving the rug.
5. Tool Prep: Have your ladder and tools within reach. Holding a heavy rug with one hand while searching for a hammer is a recipe for injury.
FAQs
Q: Will hanging a cowhide damage the wall?
A: Nails will leave small holes that are easily patched with spackle. Industrial Velcro can sometimes pull paint off if removed incorrectly. To remove Velcro safely, heat it with a hair dryer first to soften the adhesive, then peel slowly.
Q: Can I hang a cowhide in a bathroom?
A: I generally advise against it. The humidity fluctuations from showers can cause the leather to warp, stiffen, or even mold on the backside. Powder rooms (half baths without showers) are fine, but full bathrooms are risky for natural leather.
Q: How do I clean a cowhide once it is on the wall?
A: You do not need to take it down. Once a month, take the vacuum cleaner with the upholstery attachment and gently vacuum in the direction of the hair. Do not vacuum against the grain. If it looks dull, simply take the rug outside and shake it vigorously to dislodge deep dust.
Q: The edges of my rug are curling up. What do I do?
A: Curling happens due to dryness. You can hydrate the leather. Take the rug down and lightly mist the suede side (the back) with water—do not soak it. Lay it flat face down and place heavy books on the curled edges overnight. This usually re-sets the shape.
Conclusion
Hanging a cowhide rug is one of the most effective ways to elevate a room’s design without undergoing a major renovation. It brings an element of nature indoors, softens harsh architectural lines, and acts as a sophisticated focal point. Whether you choose the renter-friendly Velcro method or the permanence of upholstery tacks, the secret lies in the preparation—flattening the hide, measuring the negative space, and respecting the weight of the material.
Treat the installation with the same care you would give a heavy mirror or a canvas painting. When done correctly, a wall-mounted hide is not just a rug; it is a piece of sculptural art that will last for decades.
Picture Gallery


