
How To Hang A Rug On The Wall With Velcro: Wall Art Tips
Textiles have a unique ability to transform a sterile room into a warm, inviting sanctuary. While framed prints and canvas paintings are standard go-to options for wall decor, hanging a rug offers a level of texture and depth that flat paper simply cannot achieve. I often recommend this approach to clients who are struggling with echoey rooms or large, empty walls that feel intimidating to fill.
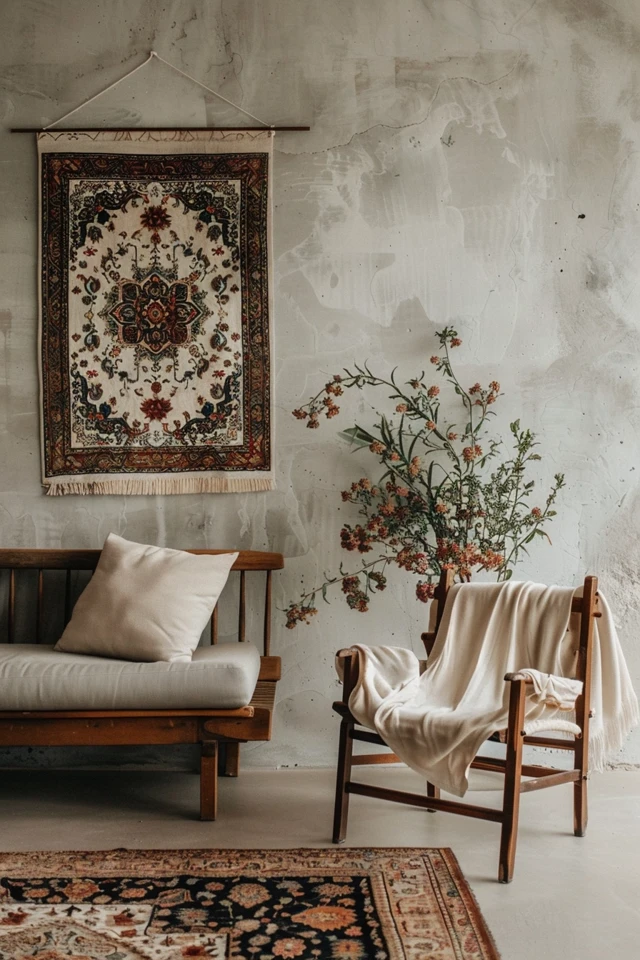
Using Velcro is one of the most streamlined methods to achieve this look because it creates a “floating” effect. Unlike curtain rods or heavy brackets, Velcro remains completely hidden, allowing the rug itself to be the sole focus. For plenty of visual inspiration on how to style these textile pieces, be sure to check out the Picture Gallery at the end of this blog post.
However, this method requires precision and the right materials to ensure your beautiful textile doesn’t end up in a crumpled heap on the floor. In this guide, I will walk you through the professional method of using Velcro to secure rugs to your walls safely and stylishly.
1. Why Choose Velcro Over Rods or Clips?
When I design a space, I look for clean lines and intentional details. Traditional rug hanging methods, like heavy decorative rods, can sometimes distract from the pattern of the rug itself. They add another layer of hardware that you then have to match to your light fixtures or door handles.
Velcro creates a flush, museum-quality mount. It distributes the weight of the rug evenly across the entire width of the textile. This is crucial for vintage pieces or loose weaves, as hanging them by clips can cause stretching or “scalloping” at the top edge over time.
This method is also surprisingly renter-friendly if managed correctly. While industrial adhesive is strong, mounting the Velcro to a thin wooden slat first—and then nailing that slat to the wall—results in just two small nail holes rather than a large bracket installation. For homeowners, the direct adhesive method offers a seamless profile that makes the rug appear as if it is part of the architecture.
2. Assessing Your Rug: Weight, Weave, and Scale
Before you even buy your Velcro, you must evaluate the rug you intend to hang. Not every rug is a candidate for wall mounting. In my projects, I generally cap the weight limit for Velcro mounting at 15 to 20 pounds.
If you are working with a heavy, thick-pile Moroccan rug or a large 8×10 wool piece, Velcro alone may not hold up against gravity and humidity changes. For these heavier pieces, a wooden cleat system is safer. Velcro works best for flatweaves, kilims, dhurries, and lightweight antique silk rugs.
Designer’s Note on Scale:
A common mistake I see is hanging a rug that is too small for the wall. Treat the rug just like a canvas painting. Ideally, the rug should cover about 50% to 75% of the wall width if it is the standalone focal point.
If you are hanging it above a piece of furniture, like a sofa or a console table, the rug should span roughly two-thirds to three-quarters of the width of the furniture below it. This creates a grounded, balanced triangle of visual weight.
3. The Materials and Preparation Phase
Preparation is where the success of this project is determined. You cannot simply stick adhesive Velcro to the back of a rug; the adhesive will ruin the fibers, and it likely won’t stick to the uneven texture anyway. You need to create a smooth surface for the Velcro to bond to.
Here is the professional supply list I use for these installations:
- 2-inch wide Industrial Strength Velcro tape: Do not buy standard crafting Velcro; get the heavy-duty variety.
- Heavyweight cotton webbing or twill tape: This should be slightly wider than your Velcro strip (about 2.25 to 2.5 inches wide).
- Upholstery thread and a curved needle: Normal thread is too weak for the weight of a rug.
- A level and a tape measure.
- A staple gun (optional): For mounting to a wooden strip.
- Isopropyl alcohol: For cleaning the wall surface.
Start by cleaning the wall area thoroughly. Even a thin layer of household dust will reduce the grip of the adhesive by half. Wipe the wall with isopropyl alcohol and let it dry completely before attempting to attach anything.
4. Step-by-Step Installation Process
Follow these steps carefully to ensure a secure hold that protects both your wall and your textile.
Step 1: Prepare the Rug Backing
Measure the width of your rug along the top edge. Cut your cotton webbing to be about one inch shorter than this width so it doesn’t peek out from the sides. Hand-sew this cotton webbing strip along the top back edge of the rug using your upholstery thread.
Stitch along the top and bottom of the webbing. The stitches should be tight but invisible from the front of the rug. This webbing acts as a sacrificial layer, protecting the rug’s actual knots and fibers from the Velcro adhesive.
Step 2: Attach the Loop Tape
Velcro has two sides: the rough “hook” side and the soft “loop” side. Adhere the soft loop side of the Velcro tape to the cotton webbing you just sewed onto the rug. Press it firmly. Since the webbing is smooth cotton, the adhesive will bond perfectly. For extra security, I often sew a few tack stitches through the Velcro and webbing.
Step 3: Prepare the Wall Mount
Measure exactly where you want the top of the rug to sit. In a standard room with 8-foot ceilings, the center of the rug should sit at eye level, roughly 57 to 60 inches from the floor. Use your level to draw a light pencil line where the top edge will go.
The Board Method (Highly Recommended):
Instead of sticking the hook tape directly to drywall (which can rip paint upon removal), cut a thin, flat strip of wood the same width as your rug. Screw or nail this wood strip into the wall studs at your marked height. Then, stick the rough hook side of the Velcro to this wood strip.
The Direct Method:
If you must go directly onto the wall, peel the backing off the hook tape and apply it along your leveled pencil line. Press firmly for at least 30 seconds along the entire length. Wait one hour for the adhesive to cure before hanging the weight of the rug.
Step 4: Hanging the Rug
This is a two-person job. Have one person hold each corner of the rug. Align the top edge of the rug (the side with the loop tape) with the wall strip (the hook tape).
Start from the center and press firmly, working your way out to the edges. Smooth the rug down with your hands to ensure the Velcro teeth interlock fully. Step back and check that the rug hangs straight.
5. Styling and Maintenance for Longevity
Once your rug is on the wall, it becomes a major design element. Lighting is critical to making it look like intentional art rather than a misplaced floor covering. Because rugs absorb light rather than reflect it, they can look dark in dim corners.
I always suggest installing a picture light above the rug or directing a recessed gimbal light toward it. Aim for a color temperature of 2700K to 3000K. This warm light highlights the texture of the weave and brings out the richness of the dyes.
Common Mistakes + Fixes
The Sagging Center:
If the rug sags in the middle, your Velcro strip wasn’t stiff enough or the rug is too heavy.
Fix: Use a rigid wooden slat for the wall mount rather than flexible tape directly on drywall.
The Curling Corners:
Sometimes the bottom corners of a rug will curl up away from the wall.
Fix: Sew small drapery weights into the bottom corners of the rug backing. This creates tension and keeps the rug hanging plumb.
The “Floating” Look:
If you hang a rug behind a sofa, ensure there is breathing room.
Fix: Keep at least 6 to 10 inches of clearance between the top of the sofa cushions and the bottom of the rug. This prevents the space from looking crowded.
Final Checklist: What I’d Do in a Real Project
Before you consider the project done, run through this quick professional checklist to ensure safety and style.
- Check the studs: If using the wood slat method, ensure at least two screws are in wall studs.
- Verify the level: Rugs are often handmade and imperfect. Prioritize making the pattern look straight to the eye, even if the actual hem is slightly crooked.
- Test the bond: Gently tug on the corners. If the Velcro separates easily, the rug is too heavy for the width of the tape used.
- Vacuum gently: Once hung, use a handheld vacuum with an upholstery attachment to remove dust. Do not pull down on the rug while cleaning.
- Inspect for fading: Ensure the rug isn’t in a direct beam of harsh sunlight, which will fade natural dyes unevenly over time.
FAQs
Can I use Velcro for heavy wool rugs?
I advise against using Velcro for very heavy, thick-pile wool rugs that weigh over 20 pounds. The adhesive eventually fails under sustained shear force. For heavy rugs, use a compression clamp (rug hanger) or a sturdy rod system instead.
Will the adhesive ruin my wall paint?
Industrial strength Velcro adhesive is very aggressive. If applied directly to drywall, it will almost certainly peel the paint and paper layer when removed. Using the wooden slat method mentioned in Step 3 prevents this damage.
How do I clean a rug hanging on the wall?
You should dust the rug weekly. Every few months, take the rug down (carefully peeling the Velcro apart) to vacuum the back and the wall behind it. This prevents dust mites and moths from nesting in the dark space between the textile and the wall.
What if my rug is vintage and fragile?
If the rug is an antique, do not sew directly into the foundation if it is brittle. Consult a textile conservator. For moderately sturdy vintage pieces, ensure your stitches go around the warps and wefts rather than piercing through them to avoid breaking the fibers.
Conclusion
Hanging a rug on the wall is a sophisticated way to introduce culture, softness, and acoustic dampening to your home. It creates a focal point that feels curated and personal. While the process requires a bit more effort than hammering in a nail for a picture frame, the result is a custom, high-end look that elevates the entire room.
By using the Velcro method properly—specifically by sewing a protective webbing strip and mounting to a wooden cleat—you ensure the safety of your textile and the integrity of your walls. Take your time with the measurements and preparation, and you will have a stunning piece of wall art that lasts for years.
Picture Gallery


