
How To Mix And Match Drawer Knobs And Pulls: Coordinating Hardware
Introduction
Choosing hardware for your cabinetry often feels like the final mile of a marathon. You have spent months selecting paint colors, countertop materials, and flooring, only to realize you still need to make dozens of small decisions about knobs and pulls. It is easy to suffer from decision fatigue at this stage, but hardware is essentially the jewelry of the room. It has the power to elevate a basic IKEA cabinet into something custom or make a vintage piece feel modern.
The old-school rule of picking one specific knob and using it everywhere is long gone. Today, the most curated and professional-looking spaces utilize a mix of hardware styles. Mixing knobs and pulls adds visual interest, delineates function, and creates a layered aesthetic that feels collected rather than purchased in a bulk pack. However, there is a fine line between “eclectic mix” and “accidental mess.”
To get this right, you need a strategy rooted in scale, finish, and function. If you are looking for visual inspiration, check out the Picture Gallery at the end of this blog post. Let’s break down the practical rules designers use to coordinate hardware without chaos.
1. Defining the Roles: Knobs, Pulls, and Latches
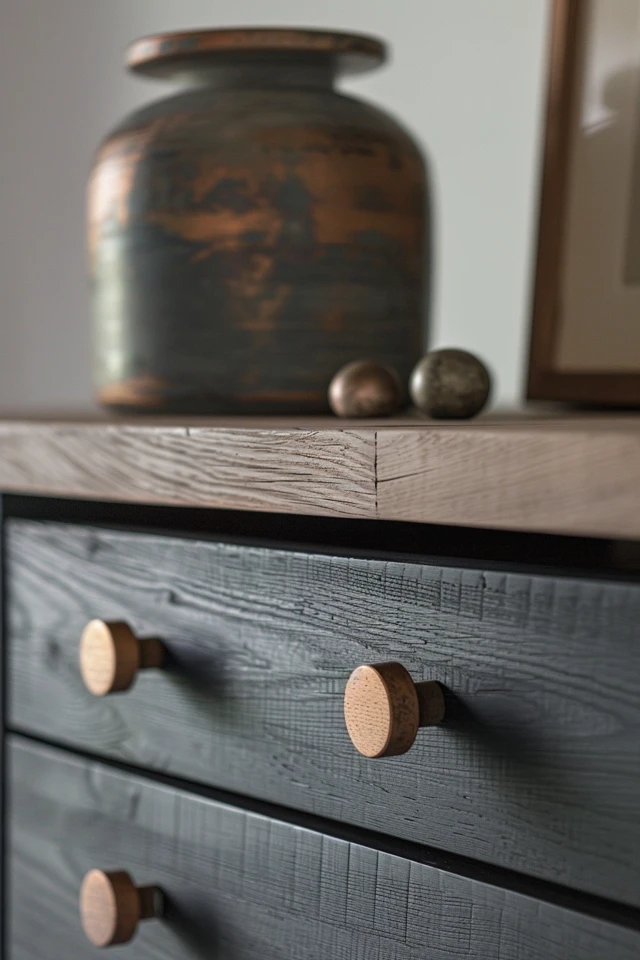
The first step in mixing hardware is determining which hardware type goes on which cabinet. While there are no hardware police, sticking to a functional logic helps the room feel cohesive. The most standard approach is using knobs for doors and pulls for drawers.
This logic works because opening a door usually requires a lighter touch and a swinging motion, which a knob accommodates perfectly. Drawers, particularly heavy ones filled with pots or dishware, require more force to slide open. A pull allows you to use your whole hand, providing better leverage.
However, you can deviate from this. In modern kitchens, it is common to use long bar pulls on both doors and drawers for a streamlined, linear look. Conversely, in a traditional cottage kitchen, you might use knobs on everything for a modest, utilitarian vibe.
A Note on Latches and Cups
Cup pulls (bin pulls) and cabinet latches add a third dimension to the mix. Cup pulls are strictly for drawers and offer a vintage, farmhouse, or industrial aesthetic. They cover more surface area than a standard pull.
Cabinet latches are strictly for doors. They are fantastic for inset cabinetry and add a high level of historical detail. If you use latches on uppers, pair them with simple knobs or bin pulls on the lowers to avoid visual clutter.
Designer’s Note: Accessibility Matters
When I am designing a “forever home” or a space for clients with dexterity issues (like arthritis), I almost always prioritize pulls over knobs. Pulls are significantly easier to grasp. If you are mixing, place pulls on the lower cabinets where the heaviest items are stored, and save the knobs for upper cabinets that hold lighter items like glasses.
2. Mastering the Finish: To Match or To Mix?
For a long time, the rule was to match your cabinet hardware exactly to your faucet and light fixtures. If the faucet was brushed nickel, the knobs had to be brushed nickel. Today, designers encourage mixing metals, but it requires a disciplined palette.
If you want to play it safe, keep all cabinet hardware (knobs and pulls) in the same finish, even if the shapes are different. This unifies the look. For example, a matte black knob and a matte black cup pull will always look like they belong together, even if their styles vary slightly.
If you are ready to mix finishes, limit yourself to two distinctive finishes in one room. A classic combination is matte black and unlacquered brass. You might use black knobs on the island cabinetry and brass pulls on the perimeter cabinetry. This creates a zone-specific look that defines different areas of the kitchen.
Understanding Undertones
The biggest mistake homeowners make when mixing metals is ignoring undertones. Metals generally fall into warm or cool categories.
- Warm Metals: Brass, Gold, Copper, Bronze, Polished Nickel (which has a gold undertone).
- Cool Metals: Chrome, Stainless Steel, Brushed Nickel (which has a blue/white undertone), Pewter.
- Neutral: Matte Black and Oil Rubbed Bronze (depending on how dark it is).
Common Mistakes + Fixes
Mistake: Mixing Chrome and Brushed Nickel.
Why it fails: They are too similar but not identical. It looks like you tried to match them and failed.
The Fix: Mix a cool metal with a warm metal, or use black as a bridge. Chrome looks stunning with warm brass. Brushed nickel pairs beautifully with matte black. Contrast is better than a near-match.
3. Scale, Proportion, and Placement Guidelines
Scale is where DIY projects often go wrong. A tiny 1-inch knob on a massive 36-inch pantry drawer looks comical and functions poorly. Conversely, a heavy industrial pull on a delicate nightstand drawer can overwhelm the piece.
The Rule of Thirds for Drawers
A standard design guideline for drawer pulls is the “Rule of Thirds.” Ideally, the pull should be approximately one-third the length of the drawer front.
- Small Drawers (under 18 inches): Use a single knob or a 3-inch to 5-inch pull centered.
- Standard Drawers (18 to 30 inches): Look for pulls that are between 6 and 9 inches long.
- Large Drawers (30 inches and up): You have two options. You can use one extra-long appliance pull (10 to 12 inches+), or you can install two smaller knobs or pulls spaced apart.
Placement for Two Knobs
If you choose to use two knobs on a wide drawer, how do you space them? Divide the drawer face into thirds. Place the center of each knob at the one-third and two-thirds marks. This ensures balanced leverage so the drawer doesn’t rack (twist) when you pull it.
Door Placement Standards
For upper cabinets, knobs are typically placed 2 to 3 inches from the bottom corner of the door frame. For lower cabinets, they are placed 2 to 3 inches from the top corner.
However, in modern design, we are seeing placement shift. Some designers place knobs significantly higher on base cabinets—sometimes centered on the stile (the vertical frame piece). This is a bold look. Before drilling, use poster putty to stick the hardware up and step back to assess.
What I’d Do in a Real Project: The Template Trick
Never eyeball your hardware installation. Even professionals use jigs and templates.
- Buy a plastic cabinet hardware template from a hardware store.
- Mark your drill holes with a pencil.
- Measure twice, drill once.
- If you are renting or unsure, stick a piece of masking tape on the cabinet face and mark the hole on the tape. This protects the finish if you slip.
4. Coordinating Styles by Room
The approach to mixing hardware changes depending on the room. A kitchen has different functional requirements than a powder room or a master bedroom.
The Kitchen: The Workhorse
In the kitchen, durability and grip are paramount. You will be opening these cabinets with wet or greasy hands.
- Main Perimeter: Stick to robust pulls for drawers and knobs for uppers. Avoid hardware with sharp corners that can catch on pockets or belt loops.
- The Island: Treat the island as a separate piece of furniture. You can switch the hardware style here. If the perimeter has nickel knobs, the island could have nickel bin pulls or even brass hardware if you are mixing metals.
- Appliance Pulls: For paneled refrigerators and dishwashers, you must use designated “appliance pulls.” Standard cabinet pulls cannot handle the suction weight of a fridge door. Match the finish of your appliance pulls to your cabinet hardware for continuity.
The Bathroom: The Spa Vibe
In bathrooms, the hardware often needs to coordinate with towel bars, faucets, and shower trim.
- Vanity: If you have a double vanity, keep the hardware consistent. If it is a small furniture-style vanity, you can afford to use more decorative, delicate drops or ring pulls that might be too annoying for a kitchen.
- Coordination: If your faucet is chrome, your light fixtures are black, and your mirror is brass, your cabinet hardware should likely tie back to the faucet (chrome) or the mirror (brass) rather than introducing a fourth element.
Living Room and Built-ins
Built-in media units or bookshelves offer a chance to be decorative. Because these cabinets are opened less frequently, you can use smaller, more ornate knobs. T-bar pulls are a popular choice here for a minimal, architectural look.
5. Common Mistakes and Designer Fixes
Even with the best intentions, hardware selection can go sideways. Here are the specific pitfalls I see most often and how to correct them.
Mistake 1: Ignoring the “Hand” of the Hardware
Some knobs look beautiful but feel terrible. Square knobs with sharp corners are uncomfortable to grip tightly. Cup pulls that are too shallow can be difficult for people with large hands or long fingernails to use.
The Fix: Always order a single sample of each knob and pull before buying the whole batch. Hold them. Pretend to open a heavy drawer. If it digs into your palm, skip it.
Mistake 2: Clothes Catchers
Pulls that have “open ends” (where the bar extends past the posts that attach to the cabinet) are notorious for catching headphone wires, apron strings, and pockets.
The Fix: In high-traffic zones like the cooking area or narrow galley kitchens, choose pulls with closed ends or smooth returns that curve back into the cabinet face.
Mistake 3: The “Drill Center” Confusion
This is critical if you are swapping out old hardware for new hardware without repainting. You must measure the “center-to-center” distance between the screw holes.
The Fix: If your current holes are 3 inches apart, you must buy pulls with 3-inch centers. If you fall in love with a pull that has 4-inch centers, you will have to fill the old holes, sand, and repaint the cabinets. If you want to avoid repainting, look for pulls with “backplates.” A backplate is a decorative piece of metal that sits behind the pull and can hide old holes.
Final Checklist: The Selection Process
When I am finalizing a hardware schedule for a client, I run through this specific checklist to ensure nothing has been missed.
- Quantity Audit: Count every single door and drawer. Then add 2 extra knobs and 1 extra pull to your order. Screws strip, finishes get scratched during install, or items arrive defective. Having spares on hand saves headaches later.
- Screw Length Check: Standard screws provided with hardware are often too short for drawer boxes that have a separate face attached (double thickness). Check the thickness of your drawer fronts. You may need to buy longer “truss head” screws separately.
- Projection Check: Check how far the knob sticks out. If a drawer is in a corner, will the hardware hit the adjacent cabinet door when opened? If so, you need low-profile hardware for that specific spot to avoid dents.
- Finish Sample: Did you compare the “Satin Brass” from Brand A with the “Satin Brass” light fixture from Brand B? They are rarely the same. Brand A might be yellow, while Brand B is brown. Always view them together in natural daylight.
FAQs
Can I use knobs on drawers?
Yes, absolutely. This is a very traditional, “cottage” look. Ideally, use two knobs on drawers wider than 24 inches to maintain visual balance. Just be aware that heavy drawers are harder to open with knobs than with pulls.
Is it okay to leave off hardware entirely?
Yes, specifically for modern, slab-front cabinetry. You can use “push-to-open” latches (magnetic touch latches). This creates an ultra-clean, minimalist aesthetic. However, be prepared to wipe fingerprints off your cabinet fronts frequently, as you will be touching the finish every time you open them.
How high should I place knobs on tall pantry doors?
Do not place the knob in the center of a tall door; it is awkward to reach. Place the knob or pull at elbow height—roughly 36 to 40 inches from the floor. This is ergonomically the most comfortable position for opening a large, heavy door.
Does the finish of the hinges matter?
If you have exposed hinges (common on inset cabinetry), yes, they should match your knobs and pulls. If you have standard European concealed hinges (where you can’t see them when the door is closed), the finish does not matter. Standard nickel or zinc is fine.
Conclusion
Mixing and matching drawer knobs and pulls is one of the highest-impact upgrades you can make to your home. It allows you to inject personality into a space that is often dominated by hard surfaces and appliances. By following the rules of scale, respecting the undertones of your finishes, and prioritizing function for high-traffic areas, you can create a look that feels professionally designed.
Don’t be afraid to experiment. Use a bold latch on a featured cabinet or mix a matte black pull with a brass faucet. Hardware is removable. Unlike a stone countertop or a tile floor, if you decide you hate it in five years, you can swap it out with nothing more than a screwdriver. So take the risk, order some samples, and start styling.
Picture Gallery


