
How To Organize A Toy Closet: Playroom Storage Solutions
There is a specific kind of panic that sets in when you open a playroom closet and a mountain of stuffed animals threatens to bury you. As an interior designer, I often see playrooms that look beautiful on installation day but fall apart a week later because the storage systems weren’t realistic for the family using them. The secret isn’t just buying cute baskets; it is creating a system children can actually manage themselves.
A well-organized toy closet does more than just hide the mess. It actually changes the way children play by making their options visible and accessible, encouraging independent play rather than chaotic rummaging. It also preserves your sanity by making clean-up time a five-minute task rather than a forty-minute negotiation.
In this guide, I will walk you through the exact process I use to overhaul toy closets for my clients. We will cover shelving dimensions, bin selection, and the maintenance routines that keep the space functional. If you are looking for visual inspiration to kickstart your project, you can find a curated Picture Gallery at the end of this blog post.
1. Assess, Purge, and Categorize (The Prep Work)
Before you buy a single bin or install a shelf, you must reduce the volume of what you are storing. You cannot organize clutter; you can only store it, and that is not a solution.
Start by pulling absolutely everything out of the closet. This is messy, but seeing the total volume is necessary to make decisions about spacing and layout.
The Sort Strategy
Group items into broad categories on the floor. Common groupings include:
- Building sets (LEGOs, Magna-Tiles, blocks).
- Pretend play (dolls, kitchen food, dress-up).
- Vehicles (Hot Wheels, trucks, planes).
- Arts and crafts.
- Games and puzzles.
Once sorted, apply the “broken/outgrown/duplicate” filter. Be ruthless here. If a puzzle is missing pieces, toss it. If your child hasn’t touched the toddler sorting cube in two years, donate it.
Designer’s Note: The “Hold” Bin
I always recommend creating a “Hold” bin during this process. If you aren’t sure if your child is ready to part with something, put it in an opaque bin in the garage or attic. If they don’t ask for it in three months, donate it. This prevents the emotional meltdowns that happen if you purge too aggressively in front of them.
2. The Architecture: Zoning and Shelf Layout
The physical structure of the closet is where most people fail. A standard closet usually comes with one high shelf and a hanging rod, which is useless for toys. To maximize storage, you need adjustable vertical shelving.
If you are renovating or installing custom millwork, you have full control. If you are a renter or working with an existing closet, I highly recommend installing an adjustable track system (like Elfa or Rubbermaid). This allows you to change shelf heights as your children—and their toys—grow.
Critical Measurements and Rules of Thumb
- Shelf Depth: For toy storage, 12 to 14 inches is the “Goldilocks” depth. Standard closet shelves are often 16 to 20 inches deep, which results in toys getting lost in the back. If you have deep shelves, use long bins that act like drawers.
- Vertical Spacing: Do not space shelves evenly. You want tighter spacing (8–10 inches) for puzzles and board games, and taller spacing (14–16 inches) for large bins holding trucks or dolls.
- Floor Clearance: Leave at least 18 inches at the bottom for rolling carts or oversized items like dollhouses or bulky vehicle stations.
Lighting Matters
Closets are notoriously dark caves. If you cannot hardwire a light, install battery-operated, motion-sensor LED strips under each shelf. When a child opens the door and the shelves light up, it makes the contents look inviting and valuable, which subconsciously encourages them to treat the items better.
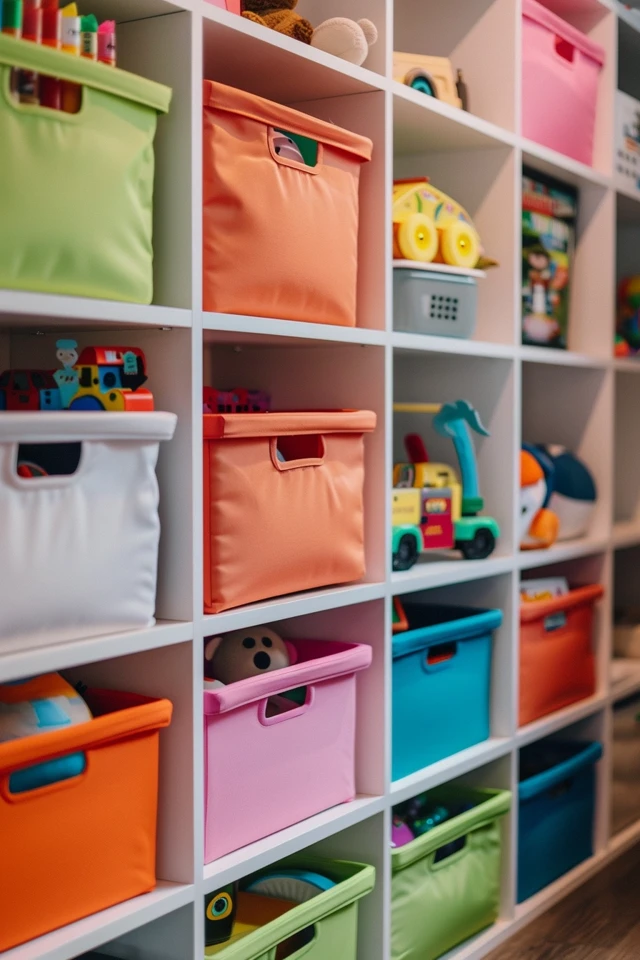
3. Selecting the Right Containers and Hardware
The containers you choose dictate how easy the system is to maintain. In my design projects, I mix materials to create visual interest while keeping function in mind.
Clear vs. Opaque
- Clear Acrylic Bins: Use these for “micro” items where visibility is key to finding the right piece. This works best for art supplies, LEGOs, and small figurines.
- Opaque Bins (Woven or Canvas): Use these to hide “ugly” toys or categories that look messy even when organized (like a collection of mismatched action figures). This reduces visual noise when you open the closet door.
- Open Front Bins: These are excellent for active play items. A child can reach in and grab a ball or a car without having to pull the entire bin off the shelf.
Safety and Weight Distribution
Never place heavy wooden crates or wire baskets on shelves above a child’s shoulder height. If they try to pull it down, it could result in injury.
Keep heavy items (books, wooden blocks) on the bottom two shelves. Lighter items (stuffed animals, empty layout space) go higher.
Common Mistakes + Fixes
- Mistake: Buying bins before measuring the shelves.
Fix: Measure the clear space between shelf supports (width) and the actual depth. Buy bins that utilize at least 80% of the shelf depth to maximize volume.
- Mistake: Using wire baskets for small toys.
Fix: Wire baskets look great but allow doll shoes and LEGOs to fall through. Line them with linen or opt for solid felt baskets instead.
4. Tackling Specific “Problem” Categories
Every playroom has those awkward items that refuse to fit into standard square cubes. Here is how I handle the trickiest categories in real projects.
Board Games and Puzzles
Board game boxes are often 50% air and take up massive amounts of space. The current design trend—which is incredibly practical—is “decanting” games.
Remove the game board and pieces. Place the pieces in a zipper mesh pouch. Label the pouch. Store the boards vertically in a magazine file or a lid organizer. You can fit 20 games in the space of 5 boxes using this method.
LEGOs
There are two ways to organize LEGOs: by color or by set.
- By Color: Looks beautiful (the rainbow effect) but is very hard for kids to maintain.
- By Set: Almost impossible once the set is broken down.
- The Solution: Broad categorization. I usually do “People/Minifigs,” “Wheels/Special Parts,” and “Bricks.” Shallow drawer units are superior to deep bins here, as digging through a deep bucket of sharp bricks is painful and frustrating.
Dress-Up Clothes
Do not fold costumes; they will end up in a heap. Install a row of hooks at kid-height (36 to 40 inches off the floor) inside the closet door or on a side wall. Use a soft basket below for accessories like crowns, swords, and shoes.
Art Supplies
If the closet stores art materials, use a lazy Susan (turntable) for markers, crayons, and glue sticks. It makes everything accessible without needing to rummage.
5. Labeling and Maintenance Systems
You can build the perfect closet, but if the kids don’t know where things go, it will fail. Labeling is the bridge between your design and their compliance.
Labeling Logic
- Non-Readers (Ages 1-4): Use picture labels. Take a photo of the toy category, print it, and stick it to the bin. Or buy pre-made icon vinyl decals.
- Readers (Ages 5+): Use simple text labels. Keep categories broad (“Cars” is better than “Hot Wheels” vs “Matchbox”).
The Toy Rotation System
If you have a top shelf that is out of reach, use it for toy rotation. Keep 20-30% of the toys in opaque bins on this high shelf. Every month, swap a bin from the bottom with a bin from the top.
This makes “old” toys feel new again and reduces the clutter available for daily play. It is one of the most effective ways to keep a playroom engaging.
Designer’s Note: The “One-Touch” Rule
When setting up the layout, test the “one-touch” friction. To put a toy away, how many steps does it take?
Good: Open bin -> Drop toy.
Bad: Remove lid -> Unstack bin -> Drop toy -> Restack -> Replace lid.
Remove lids from daily-use bins. Lids are the enemy of quick clean-ups for children.
What I’d Do: The Real Project Checklist
If I were standing in your playroom today, here is the exact sequence I would follow to get this done in one weekend.
Phase 1: Planning
- Measure the closet interior (width, height, depth).
- Measure the door swing clearance.
- Determine if shelves are fixed or adjustable.
- Purchase trash bags (for purge) and clear zipper bags (for small loose parts).
Phase 2: Execution
- Remove everything. Wipe down shelves and baseboards.
- Sort items: Keep, Donate, Trash, Rotate.
- Group “Keep” items by size to determine bin sizes needed.
- Purchase bins after you know what you are storing.
- Adjust shelf heights to minimize wasted vertical air gap.
Phase 3: Installation
- Place rarely used or rotation items on the highest shelf.
- Place heavy items and rolling bins on the floor.
- Place prime play items at eye level for the child.
- Affix labels to every single container.
- Walk your child through the new system. Show them where things “live.”
Frequently Asked Questions
How do I handle a very deep closet?
Deep closets are tricky because items get pushed to the dark abyss in the back. The best solution is to use pull-out drawers or rolling carts on the floor level. For shelves, use bins that are as deep as the shelf (e.g., 20 inches) so that when you pull the bin out, you are utilizing that back space. Avoid stacking things directly on a deep shelf; you will never see the back row again.
What if my shelves aren’t adjustable?
If you have standard wire shelving that you cannot remove, you can use “shelf doublers” or under-shelf hanging baskets to utilize the vertical space between widely spaced shelves. Alternatively, stackable acrylic drawers work well to create vertical division on a fixed shelf.
Should I organize by rainbow color?
Visually, rainbow organization (ROYGBIV) looks stunning on Instagram. Practically, it is very difficult for children to maintain unless they are naturally Type-A. I recommend organizing by category (function) first. If you want to color-code within a category (like books or LEGOs), that is a secondary layer of detail, but don’t make it the primary rule.
How do I stop the closet from becoming a “shove-it” zone?
The “shove-it” phenomenon happens when bins are too full. If a bin is filled to the brim, a child cannot easily put the toy away, so they shove it on top or on the floor. Follow the 80% rule: never fill a bin more than 80%. If it’s overflowing, you need to purge, rotate, or get a bigger bin.
Conclusion
Organizing a toy closet is about more than just aesthetics; it is about respecting the play that happens in your home. When you clear the physical clutter, you clear mental clutter for both you and your children. By implementing flexible shelving, smart categorization, and a labeling system that meets your child at their developmental level, you turn a chaotic storage locker into a functional extension of the playroom.
Remember that this system is living and breathing. As your children grow, the oversized duplo blocks will be replaced by tiny beads and intricate models. If you build the foundation with adjustable components and quality containers now, the closet will easily adapt to those changes over time.
Picture Gallery


