
Rugs – How To Place A Rug Under A Queen Bed – Positioning For Aesthetic
The bedroom is the sanctuary of the home, and the bed is its centerpiece. A rug does more than just comfort your feet when you wake up; it acts as an anchor that pulls the entire room’s design together. Without one, a queen bed can feel like it is floating aimlessly in the space, regardless of how beautiful your headboard or bedding might be.
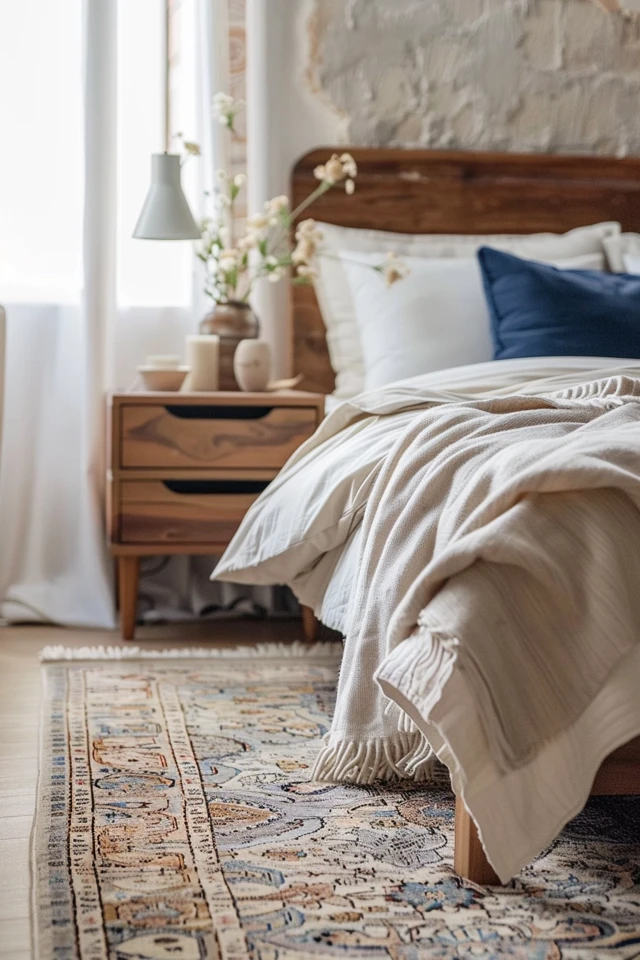
However, placing a rug correctly under a queen-sized bed is deceptively difficult. The measurements need to be precise to avoid the “postage stamp” effect, where the rug looks comically small compared to the furniture. To see visual examples of these layouts, scroll down to the Picture Gallery at the end of the blog post.
I have designed countless bedrooms where the client initially thought a standard 5×8 rug would suffice, only to realize it disappears completely under the bed frame. In this guide, we will cover the specific mathematics of scale, the three best layout options, and how to select materials that look expensive but handle real life.
The Mathematics of Scale: Why Size is Everything
Before we discuss positioning, we must discuss dimensions. A standard queen mattress measures 60 inches wide by 80 inches long. When you add a bed frame, you are typically looking at a footprint of roughly 63 inches by 83 inches.
The most common mistake homeowners make is buying a rug based on the empty floor space rather than the furniture that will sit on top of it. If you buy a rug that fits the room but not the bed, the proportions will feel off.
For a queen bed, you generally have two viable size options for a main area rug. The first and most popular is the 8’ x 10’. This size provides ample coverage on all sides, allowing the rug to extend out from under the bed to create a visible border.
The second option is a 9’ x 12’. This is the ideal choice for larger primary suites where you want to create a grander, more luxurious feel. It allows for more furniture, such as a bench at the foot of the bed or wider nightstands, to sit comfortably on the textile.
Why a 5’ x 8’ Rarely Works
I generally advise against using a 5’ x 8’ rug under a queen bed. The math simply does not support it.
If you place a 5’ x 8’ horizontally, you only have 96 inches of width. Subtract the 60-inch mattress, and you are left with 18 inches on each side. Once you account for the comforter draping down, you might only see 6 inches of rug. It looks unintentional and skimpy.
Designer’s Note: The “Postage Stamp” Lesson
Early in my career, I let a client talk me into keeping their existing 6’ x 9’ rug for a new queen bed setup to save money. We installed it, and the room instantly looked smaller. The rug ended exactly where the nightstands began, creating a visual “stutter” in the floor plan. We ended up moving that rug to the guest room and bringing in an 8’ x 10’. The room immediately felt twice as expensive. The lesson? Never skimp on the surface area.
Layout 1: The “Two-Thirds” Approach (Industry Standard)
This is the configuration you will see most often in editorial photos and catalogs. It offers the best balance of aesthetics and budget, as it typically works perfectly with an 8’ x 10’ rug.
In this layout, the rug does not go all the way to the wall behind the headboard. Instead, the rug starts roughly 12 to 18 inches away from the front of your nightstands.
This means the nightstands sit fully on the hard floor, and the head of the bed sits on the hard floor. The rug begins just after the nightstands end, running underneath the lower two-thirds of the bed and extending past the footboard.
Why This Works
This layout allows you to put your feet down on something soft immediately upon exiting the bed. It also prevents the rug from looking like wall-to-wall carpeting, as it leaves some floor exposed near the walls.
Visually, this separates the sleeping zone (the nightstands and headboard) from the comfort zone (the rest of the bed). It creates a very clean, intentional line.
Measurements to Know
- Side overhang: With an 8’ x 10’ rug turned perpendicular to the bed, you will have roughly 30 inches of rug on each side of the bed.
- Foot overhang: Depending on how far down you pull the rug, you should aim for 18 to 24 inches of rug extending past the footboard.
- Nightstand gap: Leave 2 to 5 inches of bare floor between the front legs of the nightstand and the start of the rug.
Layout 2: The “All Legs On” Approach (Luxury Look)
If you have a larger budget and a larger room, placing the rug completely underneath the bed and the nightstands is the ultimate luxury move. This usually requires a 9’ x 12’ rug for a queen bed.
In this scenario, the headboard, the nightstands, and the bench at the foot of the bed all sit entirely on the rug. The rug extends almost to the wall behind the bed.
When to Use This
- Large Master Suites: If your room is 12×14 feet or larger, an 8×10 might look like a floating island. The 9×12 anchors the whole room.
- Slippery Floors: If you have very slick hardwood or polished concrete, having the nightstands anchored on the rug prevents them from shifting when you open drawers.
- Uneven Flooring: This is a great way to hide scratched floors or imperfect tiling because it covers maximum surface area.
Common Mistakes + Fixes
Mistake: Pushing the rug flush against the back wall.
Fix: Even in this layout, leave 2 to 4 inches of hard floor visible between the rug edge and the baseboard. This “breathing room” prevents the rug from looking like poorly installed carpeting.
Layout 3: The Runner Solution (Budget & Small Spaces)
Sometimes, an 8’ x 10’ rug just isn’t feasible. Perhaps you are renting a small apartment where the door swing won’t clear a large rug, or maybe the budget is tight.
In this case, using two runners is a valid and stylish alternative. You place one runner on each side of the bed.
How to Execute This Properly
Do not use rinky-dink 2’ x 3’ mats. You need runners that span the length of the bed. Look for runners that are at least 2.5 feet wide and 6 to 8 feet long.
Place them parallel to the bed frame. They should not be tucked under the bed legs; they should float freely alongside the bed. This creates a symmetrical look and ensures you step onto softness without the cost of a large area rug.
Material Selection: Aesthetics vs. Reality
Choosing the right material is just as important as choosing the right size. In a bedroom, comfort is usually the priority, but durability still matters.
Wool
Wool is the gold standard for bedroom rugs. It is naturally stain-resistant due to the lanolin in the fibers, it is incredibly soft underfoot, and it has a “memory” that helps it bounce back from furniture indentations.
While wool is more expensive upfront, it lasts for decades. It provides a matte, sophisticated finish that elevates a queen bed instantly.
Natural Fibers (Jute & Sisal)
I love the look of a chunky jute rug for adding texture and an earthy, organic vibe. However, be warned: they are not soft. If you like the look but hate the scratchiness, look for a jute/wool blend.
Also, avoid sisal if you have pets that are prone to accidents. Natural plant fibers are very absorbent and nearly impossible to clean if liquid soaks into them.
Synthetics (Polypropylene & Polyester)
These are the heroes for parents of young children and pet owners. Technology has come a long way, and many synthetics now mimic the look of wool.
They are easy to clean and often stain-proof. The downside is they can flatten faster under the weight of a queen bed. If you choose synthetic, ensure you use a dense, high-quality rug pad to extend its life.
What I’d Do in a Real Project: A Designer’s Checklist
If I were styling a queen bed in a client’s home tomorrow, this is the exact mental process I would follow to ensure success:
1. Tape it out: I would use blue painter’s tape to mark the corners of an 8’ x 10’ rug on the floor. I need to verify that the rug won’t cover any heating vents or stop the closet door from opening.
2. Check the nightstand clearance: I would measure the width of the nightstands. If they are very wide (over 30 inches), I might lean toward a 9’ x 12’ rug to keep proportions balanced.
3. Buy the rug pad immediately: I never skip this. I would order a felt-and-rubber combo pad cut 2 inches smaller than the rug size on all sides.
4. Lift, don’t drag: To install, I would lift the foot of the bed and slide the rolled-up rug underneath. Then I would go to the top, lift the frame, and unroll the rest. Dragging the rug with the bed on it ruins the floor.
5. Final adjustment: I would use a tape measure to ensure the rug extends an equal distance on the left and right sides of the bed. Eyes can be deceiving; the tape measure never lies.
Final Checklist: Before You Buy
- Measure the Room: Ensure there is at least 12 inches of bare floor between the rug edges and the walls.
- Measure the Bed: Confirm your bed is a standard queen (60″ x 80″).
- Check Door Clearance: Open all doors (entry, closet, ensuite) to ensure they will clear the rug’s pile height.
- Select Orientation: The rug should almost always run perpendicular to the bed (longest side left-to-right).
- Plan for Nightstands: Decide if you want the “Two-Thirds” look (nightstands off) or the “All Legs On” look (nightstands on).
FAQs
Can I put a rug over carpet?
Yes, absolutely. This is a great way to define a space in a rental or add color to a bland beige room. The key is to use a specific “rug-on-carpet” pad. These pads have a sticky texture on both sides to lock the area rug to the carpet fibers so it doesn’t ripple or creep.
How far should the rug extend past the foot of the bed?
Ideally, you want 18 to 24 inches of rug visible at the foot of the bed. If you have a bench at the end of the bed, the rug should extend far enough that the bench legs sit fully on the rug with a few inches to spare.
My room is small. Can I push the rug against the wall?
It is best to avoid this if possible. Pushing a rug flush against one wall usually makes the room feel lopsided. Even 2 or 3 inches of gap between the rug and the baseboard creates a sense of intentionality and makes the room feel airier.
What about a round rug under a queen bed?
This is a risky design choice that is hard to pull off. A round rug usually looks best under a round table or in a large entry foyer. Under a rectangular queen bed, a round rug often highlights the mismatched shapes. Stick to rectangular rugs for the most cohesive aesthetic.
Conclusion
Placing a rug under a queen bed is about more than just buying a textile and throwing it down. It requires a thoughtful approach to scale, a clear decision on layout, and an understanding of your lifestyle needs.
By following the rules of thumb regarding the 8’ x 10’ standard and respecting the spacing around your nightstands, you can elevate your bedroom from a simple sleeping area to a designed retreat. Measure twice, buy the right size once, and enjoy the comfort of a well-grounded space.
Picture Gallery


