
How To Reupholster A Barrel Chair: Furniture Makeover
Finding a vintage barrel chair with a solid frame is like striking gold in the interior design world. These chairs offer a classic silhouette that hugs the sitter, providing a level of comfort that modern, mass-produced accent chairs often lack. However, they almost always come with dated fabric, flattened foam, or a smell that has been lingering since the 1970s.
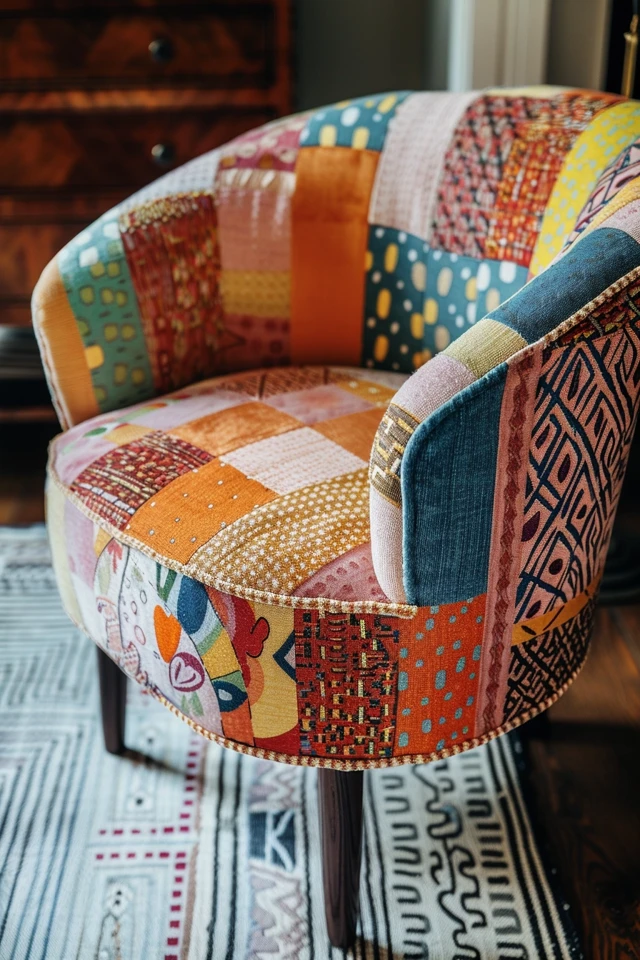
Reupholstering a barrel chair is a step up from a simple dining seat recovery. The curves require patience, and the construction demands a specific order of operations to look professional. Check out the Picture Gallery at the end of this post to see the incredible before-and-after transformation.
I have saved countless barrel chairs from the landfill because their scale is perfect for difficult corners in a living room or a cozy reading nook in a bedroom. While the process is labor-intensive, the result is a custom piece of furniture that would cost upwards of $1,200 to buy new. Let’s walk through the exact process I use in my workshop to give these rounded beauties a second life.
1. Assessing the Frame and Building Your Toolkit
Before you buy a single yard of fabric, you must audit the “bones” of the chair. Flip it over and wiggle the legs. If the frame sways or creaks significantly, you will need to reinforce the joinery with wood glue and corner blocks before you start upholstery.
You also need to check the springs. Most barrel chairs use coil springs or zigzag (sinuous) springs in the seat deck. If they are broken or detached from the frame clips, you will need to repair them. Re-tying coil springs is a master-level skill, so for a DIY project, look for a chair where the springs are rusty but intact.
To achieve a tight, professional finish, you cannot rely on a handheld manual stapler. Your hand will fatigue before you finish the first layer.
Here is the essential toolkit for this project:
- Pneumatic stapler or electric stapler: This ensures staples go flush into the hardwood frame.
- Staple remover and needle-nose pliers: You will pull hundreds of old staples.
- Webbing stretcher: Crucial for tightening the foundation.
- Curved upholstery needle: For hand-sewing the final closure seams.
- Sewing machine: You will need this for the seat cushion and welting.
- Sharp fabric shears and single-edge razor blades.
Designer’s Note: The most common mistake I see is people attempting this project with standard scissors. Upholstery fabric is thick and often backed with glue or coating. Invest in high-leverage shears (like Kai or Wiss) to prevent jagged cuts that fray.
2. Selecting Fabric and Calculating Yardage
Barrel chairs are deceptive; they eat up more fabric than you think because of the bias cuts needed for the curves. A standard barrel chair usually requires 5 to 7 yards of 54-inch wide fabric. This accounts for the inside back, the seat deck, the outside back, the cushion, and the bias piping.
When choosing fabric, you must look at the “double rub” count. This measures abrasion resistance. For a chair that will get daily use, look for 15,000 to 30,000 double rubs. Anything less is decorative and will wear out at the piping within a year.
Because barrel chairs are curved, avoid horizontal stripes or large-scale geometric plaids. Matching these patterns across a curved vertical surface is mathematically difficult and often results in a visual distortion that looks cheap.
Pro-Level Rule of Thumb:
- Solids and Textures: Best for beginners. Velvets, chenilles, and tweeds hide stapling imperfections well.
- Railroading: Check if your fabric is “railroaded.” This means the pattern runs across the roll rather than up it. This allows you to wrap the entire outside back in one continuous piece without seams, which is the hallmark of high-end design.
3. The Deconstruction Phase
This is not just about tearing the chair apart; it is about creating a roadmap. As you remove the old fabric, you are creating your pattern templates. Do not rip or cut the old fabric aggressively.
Take photos of every layer you peel back. Pay special attention to how the fabric was folded around the arms and how the “ply-grip” or metal tack strips were applied on the outside back. These hidden mechanics are the secret to a clean finish.
Label every piece of old fabric with a permanent marker as you remove it:
- Inside Back
- Outside Back
- Deck (the part under the cushion)
- Left Arm / Right Arm
- Cushion Top / Cushion Bottom
Once the fabric is off, remove the old padding. Vintage foam usually disintegrates into a sticky powder. Remove it all down to the wood and springs. If the burlap covering the springs is torn, remove and replace that as well.
Common Mistakes + Fixes:
Mistake: Throwing away the old welting (piping) cord.
Fix: While you shouldn’t reuse the fabric covering it, you can often measure the length of the old piping to know exactly how much new piping to sew. However, I always recommend buying fresh cotton piping cord, as old cord can hold odors.
4. Restoring the Foundation and Foam
Comfort comes from the inside out. You cannot put expensive fabric on collapsed foam and expect a luxury feel. For the seat cushion, you need High Resilience (HR) foam.
For a barrel chair, I generally specify a 2.5 lb density foam with an ILD (Indentation Load Deflection) of 35 for the seat. This provides a firm but yielding support. For the backrest, you want softer foam, usually around a 20 ILD, so you can sink back slightly.
Step-by-Step Foam Application:
- The Deck: Cover the springs with a layer of heavy-duty burlap or polypropylene decking material. Add a thin layer of cotton batting to protect the fabric from friction against the springs.
- The Back: Glue 1-inch to 2-inch foam to the inside back of the chair frame using spray adhesive.
- The Dacron Wrap: This is the step amateurs skip. Wrap all foam in Dacron batting. This softens the hard edges of the foam and fills out the fabric, preventing wrinkles.
When cutting your new foam, cut it 1/2 inch larger than the actual measurements of the frame. This compression creates the “crowned” look that professional furniture has. If you cut it to the exact size, the fabric will look loose and saggy after a month of use.
5. Patterning and Cutting New Fabric
Iron your old fabric pieces flat to use as templates. Lay your new fabric out on a large table, face down. Place the old pieces on top, paying attention to the “grain” of the fabric. The weave should run straight up and down the chair, not at an angle (unless you are intentionally cutting on the bias).
Trace around the old pieces, adding an extra 2 to 3 inches of margin on all sides. It is much better to waste a strip of fabric than to come up short when you are pulling around a corner.
If you are making your own piping (which I highly recommend for a custom match), cut diagonal strips of fabric 1.5 inches wide. Cutting on the bias allows the piping to stretch and bend smoothly around the tight curves of the barrel arms.
Designer’s Note: If you are working with velvet, be aware of the “nap.” Brush your hand over the fabric. It will feel smooth one way and rough the other. Always cut your pattern so the “smooth” direction runs down the chair. If you cut it upside down, the chair will look a different color depending on where you stand in the room.
6. The Installation Process
The order of attachment is critical. If you do this out of order, you will not be able to hide your staples.
Step 1: The Deck
Install the fabric on the seat deck first. Pull it through the back and side slats and staple it to the frame underneath. It needs to be drum-tight.
Step 2: The Inside Back
This is the hardest part. Center your fabric on the inside back. Staple the center top first to anchor it. Then, pull the fabric down through the seat gap and staple the bottom center.
Work your way out toward the arms, smoothing the fabric with your hand. The curve of the barrel will naturally create excess fabric. You must slash the fabric (relief cuts) around the upright posts to get it to lay flat. Be conservative; make small snips until the fabric relaxes.
Step 3: The Inside Arms
Pull the fabric over the arms. You will likely need to create small, deliberate pleats if the curve is tight. Try to make these pleats identical on both the left and right sides.
Step 4: The Outside Back
Before attaching the final layer, you need to apply the outside padding (usually a thin layer of cotton or Dacron) and the cardboard tack strip along the top edge to give a crisp line.
You have three options for closing the outside back:
- Ply-grip: A metal track with teeth that grips the fabric.
- Blind-tacking: Stapling the fabric inside out along the top, applying a cardboard strip, and flipping the fabric down.
- Decorative tacks: Nailhead trim can hide the staples if you want a rustic or traditional look.
7. Final Polish and Dust Cover
Once the main upholstery is done, inspect the legs. Now is the time to touch up scratches with a wood stain marker or apply a fresh coat of oil.
Flip the chair over. You will see the raw edges of your fabric stapled to the bottom frame. Trim the excess bulk. Staple a piece of black cambric (dust cover) to the bottom to hide the internal workings. This prevents dust from falling out of the chair and gives it a showroom finish.
Finally, place your newly sewn cushion into the chair. Steam the fabric lightly to remove any handling wrinkles and fluff the pile.
Final Checklist: What I’d Do in a Real Project
If I were managing this restoration for a client, here is the mental checklist I run through to ensure quality:
- Check the sit test: Does the seat cushion sink too much? If so, I add a layer of Dacron to the bottom of the cushion.
- Pattern match check: If there is a pattern, is it perfectly centered on the inside back?
- Piping inspection: Is the piping wavy? If so, I will hand-stitch it tighter to the frame using a curved needle.
- Leg protection: Add felt pads to the bottom of the legs immediately to protect the client’s flooring.
- Scotchgard: Apply a fabric protector spray immediately after finishing, especially if the fabric is light-colored.
FAQs
Is it cheaper to reupholster a barrel chair or buy new?
If you do the labor yourself, it is significantly cheaper. You might spend $200-$400 on materials. A high-quality new barrel chair costs $800-$2,000. However, if you hire a professional upholsterer, labor costs can exceed the price of a mid-range new chair.
How do I handle the tufting on the back of a barrel chair?
If your chair has button tufting, you must do this during the “Inside Back” step. mark your diamond pattern on the foam and the fabric. You will need a long tufting needle and heavy-duty twine. You must set the buttons before you staple the edges of the fabric.
Can I paint the wood legs?
Yes. If the wood is damaged beyond repair, painting is a great option. Sand the legs lightly, apply a high-adhesion primer, and use a semi-gloss enamel paint for durability against vacuum cleaners and shoes.
My fabric is bunching at the curves. What did I do wrong?
You likely didn’t pull it tight enough, or you didn’t make enough relief cuts in the seam allowance. Fabric on a curve needs to be stretched significantly to look smooth. You may also need to remove some of the batting underneath if it is too thick.
Conclusion
Reupholstering a barrel chair is a significant undertaking that pushes the skills of even experienced DIYers. However, the payoff is massive. You get a piece of furniture that fits your body and your home perfectly, with a quality of construction that is rare in today’s “fast furniture” market.
Take your time with the teardown and the pattern cutting. Those two steps determine 80% of the final look. Don’t be afraid to pull staples and try again if a curve doesn’t look right. Upholstery is a forgiving art if you have patience.
Picture Gallery


