
How To Store Belts In A Closet: Organizational Tips
Introduction
Belts are often the most neglected accessory in a wardrobe, ending up in a tangled “spaghetti” pile on a shelf or strangled over a hanger. As an interior designer, I frequently see beautiful custom closets ruined by the visual clutter of disorganized accessories. Proper belt storage isn’t just about tidiness; it is about preserving the leather and hardware of your investment pieces.
When we design a master suite, we treat accessories like jewelry for the room. The goal is to create a system where every item has a dedicated “home” that is visible and accessible. If you are looking for visual inspiration, make sure to check out the Picture Gallery at the end of the blog post for real-life examples.
Whether you are working with a sprawling walk-in closet or a compact reach-in, the principles of organization remain the same. We need to balance accessibility with protection, ensuring your belts maintain their shape and finish over time. Let’s look at how to turn this awkward accessory into a streamlined part of your daily routine.
1. Assessing Your Collection and Space Constraints
Before buying bins or installing racks, you must audit what you actually own. Interior design relies heavily on inventory analysis; we cannot build a house without knowing who lives in it, and we cannot organize a closet without knowing what is inside.
Start by separating your belts into categories: formal leather, casual canvas, and statement pieces with large buckles. This distinction dictates your storage method. Heavy leather belts often do best rolled, while lighter canvas belts or those with delicate buckles may need to hang to prevent creasing.
Next, measure your available “dead space.” In closet design, dead space refers to areas that are hard to reach or too narrow for standard clothing. This might be the back of a door, the side wall of a cabinet (return wall), or a shallow drawer.
Pro Tip on Measurements:
A standard leather belt is roughly 1.5 inches wide. When rolled, it creates a coil approximately 3 to 4 inches in diameter. If you plan to use a drawer, you need a minimum internal depth of 4 inches to prevent the drawer from jamming. If hanging, you need at least 3 inches of clearance from the wall to accommodate bulky buckles.
2. The Hanging Method: Leveraging Vertical Space
Hanging is the most common and space-efficient way to store belts, especially in reach-in closets. It utilizes vertical linear footage that would otherwise go unused. However, simply draping them over a standard hanger usually results in them sliding off or becoming unbalanced.
Sliding Belt Racks
For a professional finish, I always recommend installing a sliding belt rack. These are mounted into the side panels of your closet system (typically the “partition” walls). They slide out for selection and retract to hide the clutter.
Installation Height: Mount these at waist level or slightly higher (around 36 to 40 inches from the floor) for ergonomic access.
Hardware Matching: Ensure the metal finish of the rack matches your closet rods and drawer pulls (e.g., matte black, oil-rubbed bronze, or brushed nickel).
Wall-Mounted Rails and Hooks
If you lack a partition wall, use the empty wall space behind your clothes or on the side returns. Install a rail system with movable hooks.
Spacing Rule: Allow 2 to 3 inches between hooks. If hooks are too close, large buckles will overlap, causing them to scratch each other.
Visual Weight: Place darker, heavier belts on the left or bottom, and lighter, colorful belts on the right or top. This creates a balanced visual flow.
3. The Drawer Method: Creating a Boutique Display
If you have drawer space to spare, rolling belts is the most luxurious way to store them. This method mimics high-end retail displays and allows you to see every option at a glance without digging. It is particularly good for protecting expensive leather from stretching near the buckle.
Grid Organizers and Dividers
Never throw rolled belts into an open drawer; they will unravel immediately. You must use dividers.
Acrylic vs. Wood: Use clear acrylic dividers for a modern, airy look that lets the belt color show through. Use wood or fabric-wrapped dividers for a warmer, traditional closet.
Sizing: Look for compartment sizes that are 4×4 inches or 5×5 inches. This accommodates the coil of a standard men’s belt or a thick women’s fashion belt.
Rolling Technique
How you roll matters. Start from the buckle and roll inward loosely. Do not pull the leather tight, as this can cause cracking over time. Place the belt in the compartment with the buckle facing up or to the side so you can identify the style immediately.
Designer’s Note:
I often line accessory drawers with velvet or felt. This high-friction material prevents the rolls from sliding around when you open and close the drawer. It also adds a layer of protection for polished buckles, preventing micro-scratches.
4. Utilizing Nooks and Custom Built-Ins
In custom renovations, we often design specific millwork for accessories. If you are handy or planning a remodel, consider “sliver” storage. This is a narrow pull-out cabinet, similar to a spice rack in a kitchen, but designed for ties and belts.
The “Sliver” Pull-Out
These units typically require only 6 to 8 inches of width. They pull out vertically, revealing two sides of hanging storage. It is an excellent use of space between two larger wardrobe cabinets.
Lighting Considerations
Belts are often dark colors—black, navy, charcoal, and espresso. In a dim closet, these look identical.
LED Strips: Install vertical LED ribbon lighting inside the cabinet or above the belt rack.
Color Temperature: Aim for 3000K to 3500K. This creates a clean, neutral light that renders colors accurately, so you don’t accidentally wear a navy belt with black shoes.
5. Renter-Friendly and Small Space Solutions
Not everyone can drill into walls or commission custom millwork. If you are renting or working with a tiny footprint, you need non-permanent solutions that still look intentional.
Over-the-Door Solutions
The back of the closet door is prime real estate. Avoid the cheap plastic organizers that sag. Look for rigid metal racks that hook over the top of the door.
Stability: Use small adhesive putty or double-sided tape at the bottom of the rack to secure it to the door. This prevents it from banging against the wood every time you open the closet.
Tension Rods and S-Hooks
If you have an awkward nook or recess, install a small tension rod. Hang metal S-hooks from the rod.
Weight Capacity: Ensure the tension rod is rated for at least 10-15 lbs. A collection of 10 leather belts is heavier than you think.
* The “Hanger” Hack: If you must use a hanger, buy a specialty “tier” hanger designed for accessories. These have multiple hooks on a vertical spine. Avoid flocked velvet for belts, as the friction makes it hard to slide leather off; chrome or smooth wood is better here.
Designer’s Note: Real-World Lessons
Here is a lesson I learned the hard way early in my career: Leather has a memory.
I once organized a client’s closet by tightly rolling all his vintage belts and securing them with rubber bands to keep them neat. Six months later, the belts had permanent waves and the rubber bands had degraded and stuck to the leather finish.
The Lesson: Never bind leather belts with elastic or plastic. Leather needs to breathe and relax. If you roll them, let the clear divider hold the shape, not a rubber band. If you hang them, ensure the hook is wide enough that it doesn’t create a sharp crease in the leather loop.
Common Mistakes + Fixes
Mistake 1: Ignoring Buckle Width
Many people install hooks based on the width of the strap, forgetting the buckle is wider.
The Fix: Always measure your widest buckle (usually 2 to 3 inches) and add 1 inch for clearance when spacing your hooks.
Mistake 2: Storing in Humidity
Storing leather belts in a closet attached to a steamy bathroom without ventilation can cause mold or mildew.
The Fix: Use moisture-absorbing silica packets in your drawer organizers or install a small dehumidifier in the closet. Cedar blocks also help absorb moisture and repel moths.
Mistake 3: The “Stack” Method
Stacking belts flat on a shelf is a recipe for disaster. You will always need the one at the bottom, and the stack will topple.
The Fix: Switch to a file-fold system in a basket or use the rolling method. Vertical storage beats horizontal stacking every time.
Final Checklist: What I’d Do In A Real Project
If I were stepping into your home today to organize your belts, this is the exact workflow I would follow:
1. Cull the collection: Throw away any belts with peeling faux leather or broken hardware.
2. Separate by frequency: Keep daily belts at eye level; store occasion belts (tuxedo/formal) higher up or in less accessible drawers.
3. Choose the hardware: Select a sliding rack for the primary closet wall. Match the finish to the existing rods.
4. Prep the drawers: If drawers are available, insert acrylic grid dividers (4×4 inch).
5. Roll and place: Roll leather belts loosely from the buckle. Place them buckle-up in the dividers.
6. Hang the rest: Hang casual or canvas belts on the sliding rack.
7. Check lighting: ensure the area is lit well enough to distinguish dark brown from black.
FAQs
Should I condition my belts before storing them?
Yes, for genuine leather. Once a year, apply a light leather conditioner. Allow it to dry completely for 24 hours before rolling or hanging to prevent oil transfer to your clothes.
Is it better to roll or hang belts?
It depends on the material. Heavy, thick leather often benefits from hanging to straighten out the curve from wearing it. Canvas and woven belts do better rolled. If the leather is thin or delicate, rolling prevents the weight of the buckle from stretching the strap.
How do I clean a dusty belt collection?
If belts sit on an open rack, they gather dust. Wipe leather with a dry microfiber cloth. For canvas, you can spot clean with mild soap and water. To prevent dust, store seldom-worn belts in cotton dust bags, not plastic.
Can I use a tie rack for belts?
Generally, no. Tie racks usually have small, slippery pegs designed for silk. Belt buckles are heavy and will slide right off. Look for racks specifically designed with an upward lip or hook to secure the buckle.
Conclusion
Organizing belts is about more than just clearing clutter; it is about extending the life of your wardrobe and smoothing out your morning routine. By respecting the material constraints of leather and utilizing the hidden potential of your closet’s vertical space or drawer depth, you can create a system that looks as good as it functions.
Start by measuring your space, auditing your collection, and choosing the one method—hanging or rolling—that fits your lifestyle. A well-organized closet brings a sense of calm to the start of your day, and even small details like belt storage contribute to that overall feeling of order.
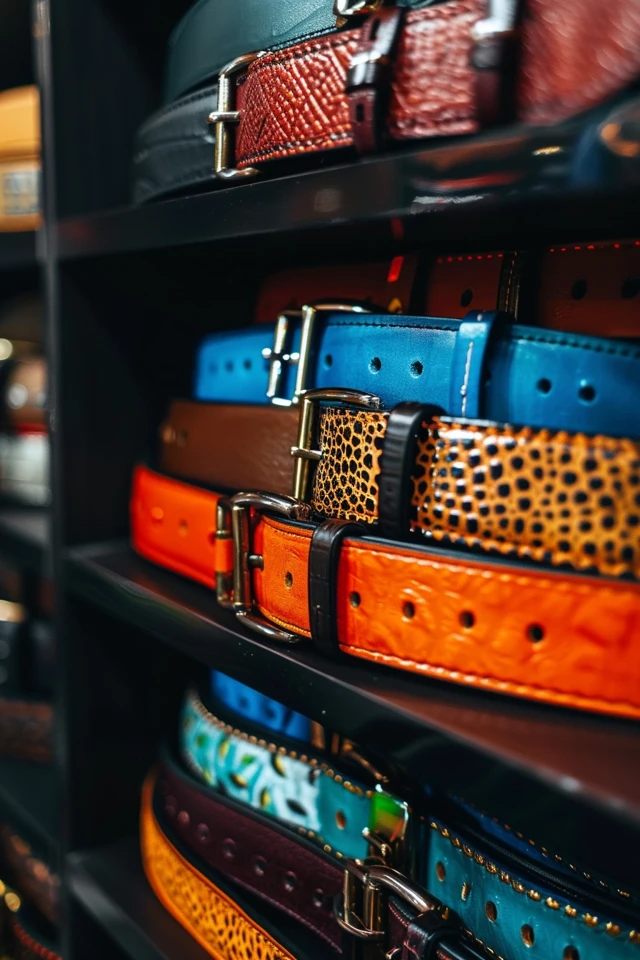
Picture Gallery


