
How To Store Toys Outside: Outdoor Toy Storage Solutions
Every parent knows the specific struggle of gazing out at a beautifully landscaped backyard, only to see it completely overrun by neon plastic. While we want our children to enjoy the outdoors, balancing a stylish exterior with the reality of ride-on trucks, bubble wands, and soccer balls is a major design challenge. It is entirely possible to reclaim your patio without sacrificing your kids’ fun.
I have worked with countless families who feel they have to wait until the kids leave for college to have a grown-up outdoor space. That simply isn’t true. With the right zoning, durable materials, and clever concealment tactics, you can create a backyard that functions for playtime and relaxation simultaneously. For a visual dose of inspiration, don’t miss the Picture Gallery included at the end of this blog post.
In this guide, we will break down professional strategies for outdoor organization. We will move beyond basic plastic bins and look at architectural solutions, weatherproofing logic, and how to blend storage seamlessly into your landscape design. Let’s turn that chaos into a curated outdoor oasis.
Step 1: Zoning and Inventory Assessment
Before you buy a single bin or build a shed, you need to audit the inventory. Outdoor toys vary wildly in scale, from tiny chalk pieces to massive electric cars. Grouping these items by category is the only way to determine the square footage required for storage.
I recommend dividing your outdoor toys into three distinct categories: “Grab-and-Go” (balls, chalk, bubbles), “Heavy Machinery” (bikes, scooters, ride-ons), and “Seasonal” (inflatable pools, slip-and-slides). This dictates where the storage should live.
The Proximity Rule
As a rule of thumb, “Grab-and-Go” storage needs to be within 10 feet of the primary play area. If a child has to walk to the side of the house to put a ball away, they won’t do it.
“Heavy Machinery” requires a flat surface and a wide turning radius. I typically allocate a 4-foot by 6-foot paved area or deck section specifically for parking these items. If you try to store bikes on grass, they will rust, and the area will become a mud pit.
Designer’s Note: The “Wet” Zone
One lesson I learned the hard way involved storing pool toys in a sealed wooden chest. The trapped moisture created a mold nightmare within weeks.
Always separate water toys from dry toys. Anything that gets wet needs ventilation—think mesh bottoms or open slats. Never store damp items in an airtight resin box unless you want to clean mildew all summer.
Step 2: Choosing Weatherproof Materials
The biggest difference between indoor and outdoor storage is the battle against the elements. UV rays, rain, freeze-thaw cycles, and insects are constantly trying to destroy your storage furniture.
When selecting storage vessels, you must look for specific material ratings. Ignoring this step is why many homeowners find their storage bins cracked and faded after one season.
Resin and Wicker
High-quality resin is often the most practical choice for families. It is waterproof, generally UV-resistant, and lightweight. However, you must look for “double-wall construction.” Single-wall plastic is flimsy and will warp in direct sunlight.
Synthetic wicker (resin wicker) helps blend storage with your lounge furniture. Ensure the wicker is woven over a powder-coated aluminum frame. If the frame is steel and the coating scratches, rust will bleed through the wicker onto your patio pavers.
Wood Options
Wood offers the most sophisticated look but requires maintenance. Teak, Eucalyptus, and Acacia are the gold standards for outdoor durability due to their natural oils.
If you choose wood, you must be prepared to apply a sealant or oil at least once a year. Without this, even the best teak will turn gray and eventually splinter. For a client looking for low maintenance, I usually steer them away from wood unless it is under a covered porch.
Metal
Metal storage is incredibly durable and rodent-proof, which is a major consideration if you live near fields or wooded areas. However, metal conducts heat.
Do not place metal storage bins in direct sunlight if they contain plastic toys or pressurized cans (like silly string). The internal temperature can melt plastics and cause safety hazards. Metal bins should always be placed in the shade.
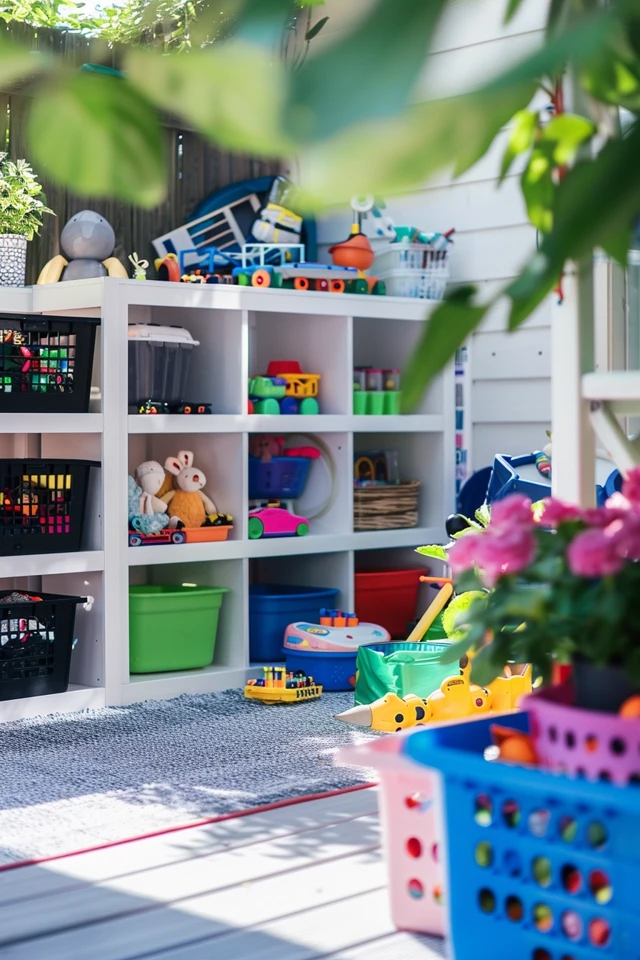
Step 3: Storage Solutions by Toy Scale
You cannot use a one-size-fits-all approach for outdoor toys. A bucket works for shovels, but it does nothing for a tricycle. Here is how I tackle storage based on the size of the object.
Small Items: The Console Table Strategy
For small items like sidewalk chalk, garden tools, and action figures, I love using an outdoor potting bench or a console table with drawers.
This keeps small pieces at waist height for adults but accessible for kids. Look for a potting bench with a galvanized metal top, which is easy to hose down when chalk dust or mud accumulates.
- Hooks: Install S-hooks on the side of the bench for hanging mesh bags of wet toys.
- Bins: Place galvanized metal buckets on the bottom shelf for medium-sized items like baseball gloves.
- Visibility: Open shelving prevents “out of sight, out of mind” syndrome, but requires tidiness.
Medium Items: The Dual-Purpose Bench
The deck box is a classic for a reason, but standard plastic boxes are unsightly. Instead, opt for a bench with internal storage.
In a small footprint, a bench serves two functions. It provides seating for adults during a barbecue and hides the soccer balls.
Standard Sizing: Look for a bench that is at least 48 inches wide and 18 inches deep. The interior depth should be at least 15 inches to accommodate standard sports balls without preventing the lid from closing.
Safety Feature: Ensure the bench has hydraulic pistons or soft-close hinges. Heavy lids are a finger-crushing hazard for small children. If a client falls in love with a vintage chest, I always install aftermarket safety hinges before installation.
Large Items: The Mini-Garage
Bicycles and ride-on cars are the hardest items to hide. They are visually bulky and awkward to maneuver.
For these, I recommend a “lean-to” shed or a horizontal storage shed. These are shorter than walk-in sheds (usually about 4 to 5 feet high) and have doors that open outward, allowing kids to ride their bikes right in.
Placement: Place this unit against a fence line or the side of the house. It should not block sightlines from the kitchen window to the play area.
Step 4: Design Integration and Camouflage
Now that we have the vessels, we need to make them look intentional. The goal is for the storage to disappear into the landscape or look like a piece of furniture.
Color Coordination
Treat your outdoor storage like indoor cabinetry. If your home has black window trim, look for storage hardware or finishes that mimic that.
If you have a wooden deck, do not try to match the wood tone exactly with a wooden box; you will likely fail, and the clash will look cheap. Instead, go for a high contrast. If the deck is a warm cedar, choose a charcoal grey or navy blue storage unit.
Landscape Screening
If you have a large plastic shed that holds the ride-on toys, you don’t want that to be the focal point of the yard. Use landscaping to soften it.
I often place tall, potted grasses or a trellis with climbing vines on either side of a storage unit. This breaks up the solid block of plastic or wood and integrates the structure into the garden.
The “Rug Rule” for Definition
Just like indoors, a rug can define a zone. If you have a storage bench, place an outdoor rug in front of it.
This signals that the area is a “living space,” encouraging kids to keep it tidy. It also provides a soft surface for barefoot kids to stand on while they dig for their favorite toy. Ensure the rug is polypropylene, which resists mold and can be bleached.
Common Mistakes + Fixes
Even with the best intentions, outdoor storage can go wrong. Here are the most frequent issues I see in client homes and how to fix them.
Mistake 1: Ignoring Drainage
The Problem: You bought a waterproof bin, but water got in when the kids opened it, and now there is a puddle at the bottom that smells like a swamp.
The Fix: If your bin doesn’t have drainage holes, drill them. Use a standard drill bit to create 4-6 small holes in the bottom corners of the bin. This allows incidental water to escape.
Mistake 2: The Deep Abyss
The Problem: A storage box is so deep that small toys fall to the bottom, never to be seen again.
The Fix: Use internal organizers. Insert smaller plastic crates or mesh baskets inside the large deck box. Categorize them so small items stay at the top.
Mistake 3: Inaccessibility
The Problem: The latch is too high or stiff for the child to operate.
The Fix: Test the mechanism before buying. If the child cannot open it, they will not put their toys away. Look for magnetic closures or simple gravity latches rather than complex padlocks or heavy snaps.
What I’d Do in a Real Project: A Checklist
If I were designing your patio today, this is the exact workflow I would follow to solve your storage crisis.
- Measure the Largest Toy: I never buy a bin until I measure the widest and tallest item (usually a truck or bike). The storage solution must fit this item with 2 inches of clearance on all sides.
- Select the Location: I identify a spot that has a solid footing (pavers, concrete, or packed gravel). I never place storage directly on soil or mulch, as moisture will wick up from the ground.
- Choose the Material based on Exposure: If the spot is fully exposed to the sun, I choose high-density polyethylene (HDPE) or powder-coated aluminum. If it is covered, I choose teak or acacia wood.
- Install Vertical Hooks: I utilize the exterior walls of the house or fence. I mount heavy-duty utility hooks for hanging helmets, hula hoops, and mesh bags of balls.
- Style the Top: If the storage is a cabinet or low shed, I style the top with heavy planters (to prevent wind from knocking them over). This prevents the flat surface from becoming a dumping ground for clutter.
Frequently Asked Questions
How do I keep spiders and bugs out of outdoor toy bins?
While it is nearly impossible to make an outdoor bin 100% bug-proof, you can deter them. Place cedar blocks inside the bins, as cedar is a natural insect repellent. Additionally, wipe the interiors down with a mixture of water and peppermint oil periodically. Avoid storing cardboard boxes inside outdoor bins, as they attract nesting insects.
Can I use indoor plastic totes for outside storage?
I strongly advise against this. Indoor plastic totes become brittle and crack when exposed to UV rays and freezing temperatures. They usually lack the proper seals to keep driving rain out. Invest in storage specifically rated for “all-weather” or “marine” use.
How do I prevent outdoor fabric toys from getting moldy?
Fabric items like tents, tunnels, or plush balls must be completely dry before storage. If they are stored in a bin, ensure the bin has ventilation. Ideally, bring fabric items indoors during the rainy season or winter months, as humidity alone can cause mold even inside a waterproof box.
What is the best way to store bikes without a shed?
If a shed isn’t an option, use a waterproof vinyl bike cover. You can also install a simple wall mount on a fence or exterior wall to keep the bikes off the wet ground, then drape the cover over them. Getting them off the ground preserves the tires and chains.
Conclusion
Storing toys outside does not mean you have to turn your backyard into a plastic wasteland. By treating outdoor storage with the same design principles as your indoor cabinetry—focusing on scale, material durability, and zoning—you can maintain a sophisticated exterior.
Remember that the goal is a system that is easy enough for your children to use. If the bin is too hard to open or too far away, the toys will remain on the grass. Start with a solid audit of what you have, invest in materials that can withstand your local climate, and don’t be afraid to drill a few drainage holes. Your patio can be both a playground and a sanctuary.
Picture Gallery


