
How To Whitewash A Wall For A Rustic Finish
Whitewashing is more than just a painting technique; it is an art form that bridges the gap between raw, natural materials and a polished, intentional design. As an interior designer, I often recommend this finish to clients who want the warmth of wood or the texture of brick without the heavy, dark visual weight that those materials can sometimes impose on a room.
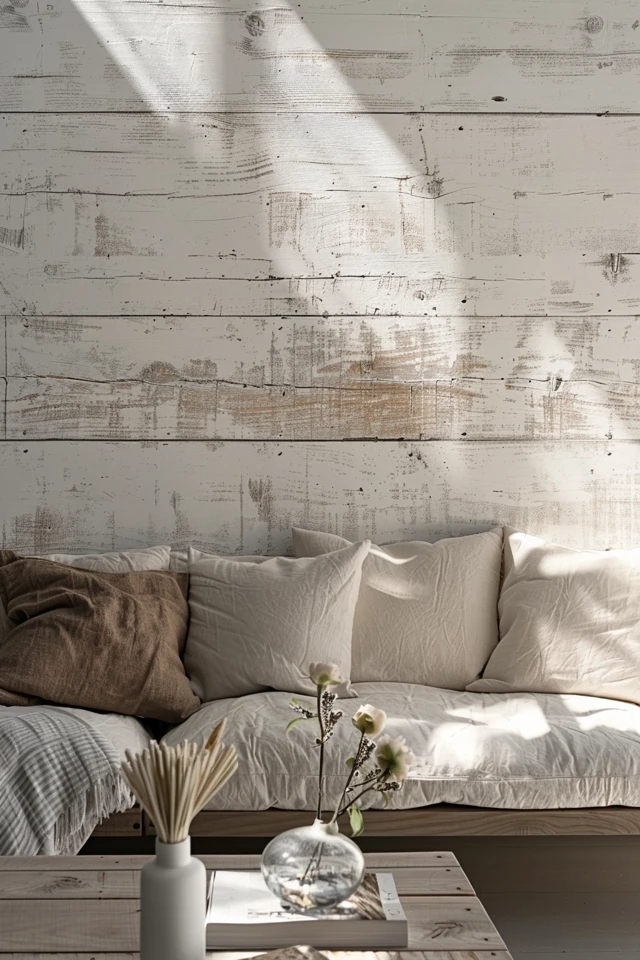
You will find a complete visual guide for these techniques in the Picture Gallery at the end of the blog post. Whether you are dealing with a dark-paneled basement that feels like a cave or a brand-new shiplap installation that looks a bit too clinical, whitewashing provides that lived-in, soulful aesthetic that defines the modern rustic home.
At-a-Glance: Key Takeaways
- Preparation is Paramount: You cannot whitewash over finished or sealed surfaces without proper sanding or stripping.
- Control the Ratio: A standard 1:1 ratio of paint to water is the gold standard, but you must adjust based on the porosity of your wall.
- Work Small: Never apply whitewash to more than 10 or 15 square feet at a time to prevent the mixture from drying before you can wipe it back.
- Check Your Lighting: Whitewash looks vastly different under 2700K (warm) lighting versus 4000K (cool) lighting; always test your mixture in the room’s actual light.
- Seal for Longevity: If the wall is in a high-traffic area or a kitchen, a matte water-based sealer is essential to prevent staining.
What This Style Means (and Who It’s For)
The rustic whitewash finish is the hallmark of “Organic Modern” and “Modern Farmhouse” aesthetics. It is designed to look intentional yet aged, providing a sense of history to a space. Unlike solid paint, which covers a surface entirely, whitewash is translucent. It allows the grain of the wood or the variations in brick to peek through, creating depth that flat paint simply cannot replicate.
This technique is ideal for homeowners who find solid white walls too “sterile” but find natural wood too “heavy.” It is a compromise that honors the material while brightening the environment. It is also a fantastic solution for budget-conscious renovators. If you have inherited a room with dated orange-toned oak or dark pine planks, whitewashing is a cost-effective way to modernize the space without the massive expense of a full tear-out and replacement.
The Signature Look: Ingredients That Make It Work
To achieve a professional-grade rustic finish, you need to understand the interaction between your materials. A successful whitewash is defined by three key elements:
- Texture: The underlying material—be it rough-hewn cedar, smooth pine, or reclaimed brick—provides the “soul” of the finish.
- Translucency: The “rustic” feel comes from the variation. In some areas, the paint should be thicker; in others, the wood grain should be almost entirely visible.
- Matte Finish: Rustic styles rarely involve high gloss. You are looking for a flat or velvet sheen that absorbs light rather than reflecting it harshly.
In my practice, I find that the most successful projects use a “warm white” rather than a “stark white.” Look for paint colors with a slight cream or grey undertone. This prevents the wall from looking like it was coated in correction fluid and instead makes it look like it has naturally weathered over decades of exposure to the elements.
Layout & Proportions (Designer Rules of Thumb)
Before you pick up a brush, you need to consider the “Visual Load” of the room. A common mistake is to whitewash every single surface, which can leave a room feeling washed out and lacking a focal point.
The 60-30-10 Rule
In a rustic room, I recommend using the whitewashed wall as your 60% (the main backdrop). Balance this with 30% of a contrasting texture, such as leather furniture or dark metal accents, and 10% of a pop color or a natural greenery element.
Vertical vs. Horizontal
If you are whitewashing wooden planks, the direction matters. Horizontal planks will make a small room feel wider and more expansive. Vertical planks draw the eye upward, which is a designer trick I use to make ceilings feel 10 to 12 inches higher than they actually are.
The Two-Foot Test
When you are testing your whitewash mixture, step back at least two feet. What looks like a “mess” from six inches away often looks like beautiful, natural variation from a standard viewing distance. If the grain is completely obscured from two feet away, your mixture is too thick. If the wall looks virtually unchanged, your mixture is too thin.
Step-by-Step: How to Recreate This Look
Whitewashing is a “wet-on-wet” process. You need to be organized because once you start a wall, you shouldn’t stop until you reach a natural corner or break point.
1. Prepare the Surface
If you are working with raw wood, a light sanding with 120-grit sandpaper is usually sufficient to open the pores. If the wood is already stained or sealed, you must sand it down to the raw grain. Paint will not “grip” a sealed surface when it is thinned out with water; it will simply bead up and slide off. For brick, a thorough scrubbing with a wire brush and a vacuuming of the mortar joints is necessary.
2. The Mixing Phase
In a large bucket, combine your white latex paint and water.
- For a Heavy Look: Use 2 parts paint to 1 part water. This is best for hides imperfections in the wood.
- For a Standard Rustic Look: Use a 1:1 ratio. This provides a milky consistency that is easy to control.
- For a “Ghosted” Look: Use 1 part paint to 2 parts water. This is beautiful on high-end woods like oak where the grain pattern is the star of the show.
Stir slowly to avoid creating air bubbles, which can leave small “craters” on your wall as they pop.
3. Application Technique
Dip a 4-inch nylon/polyester blend brush into the mixture. Start at the top of the wall and work in sections that are roughly 3 feet wide. Apply the mixture in the direction of the wood grain. Do not worry about perfection here; the goal is to get the liquid onto the surface quickly.
4. The Wipe-Back (The Critical Step)
Wait about 2 to 5 minutes (depending on the humidity in your room). Take a lint-free cotton rag—old T-shirts are perfect for this—and lightly wipe the wall. You are not trying to scrub the paint off; you are simply removing the excess and “pushing” the pigment into the recessed areas of the wood or brick. Use a circular motion for brick and a long, linear stroke for wood.
5. Review and Repeat
Once the first coat is dry (usually 2 to 4 hours), assess the color. The beauty of whitewashing is that it is buildable. If you want it whiter, add a second thin coat. It is much easier to add more paint than it is to remove it once it has dried.
One of the most common issues I see is “tannin bleed.” This happens most often with cedar, redwood, or certain pines. As the water in the whitewash hits the wood, it pulls the natural oils (tannins) to the surface, creating yellowish or brownish stains. To prevent this on a real project, I always use a clear, water-based “stain-blocking” sealer as a primer if I suspect the wood is high in tannins.
Budget Breakdown: Low / Mid / Splurge
Low Budget ($50 – $150)
If you already have the wood or brick wall, this is purely a “supplies” budget. You will need one gallon of white latex paint, a few brushes, a bucket, and a pack of rags. This is a high-labor, low-cost DIY project.
Mid-Range ($500 – $1,500)
This budget usually includes the cost of installing DIY-friendly materials like thin “peel and stick” wood planks or plywood strips (the “faux shiplap” method) before whitewashing. It also accounts for higher-quality, low-VOC paints and specialized matte sealers.
Splurge ($2,000 – $5,000+)
A splurge project involves hiring a professional decorative finisher to apply the whitewash to a large space, such as a vaulted Great Room. This budget also covers premium materials like reclaimed barn wood or authentic thin-brick veneers, which provide the most realistic “rustic” texture possible.
Common Mistakes (and How to Fix Them)
Mistake: The “Striping” Effect
This happens when you overlap wet paint onto a section that has already started to dry. You end up with a double-dark line where the sections meet.
The Fix: Always work to a natural edge (like a plank seam) and keep a “wet edge.” If you see a line forming, lightly mist it with water from a spray bottle and buff it with a clean rag immediately.
Mistake: Using Oil-Based Paint
Oil-based paint does not mix with water. If you try to thin it with mineral spirits, the smell will be overwhelming indoors, and it won’t provide the same “washed” look as water-thinned latex.
The Fix: Stick to water-based latex or acrylic paints. They are easier to clean up and significantly better for indoor air quality.
Mistake: Skipping the Sealer in Kitchens
Whitewash is essentially thinned-out paint. It is porous. If you splash tomato sauce or red wine on an unsealed whitewashed wall, it will soak in and stay there forever.
The Fix: Apply two coats of a water-based, matte polyurethane. Ensure it is “non-yellowing” so your crisp white finish doesn’t turn amber over time.
Room-by-Room Variations
The Living Room
In a living room, I like to use a heavier whitewash on a fireplace surround to make it the focal point. If the room has low light, go for a 70/30 paint-to-water ratio to bounce as much light as possible. Pair this with chunky knit throws and light oak flooring.
The Bedroom
For a bedroom, the goal is “softness.” Use a very thin “ghost” wash (30% paint) on a wood headboard wall. This creates a serene, spa-like environment. Avoid high-contrast furniture here; instead, use tonal whites and creams to keep the atmosphere calm.
The Kitchen
In kitchens, whitewashed brick is a classic “bistro” look. However, because kitchens are grease-heavy environments, you must use a more durable paint. I recommend a “scuff-resistant” latex paint mixed with water. Ensure your sealer is “food safe” if it is near prep surfaces.
Finish & Styling Checklist
Once the wall is dry, you need to “ground” the look so it doesn’t feel like a construction site. Use this checklist for a professional finish:
- Hardware Update: Replace outlet covers with matte black or “antique brass” plates. Plastic white covers look cheap against the rich texture of whitewash.
- Lighting: Install “warm dim” LED bulbs. As you dim the lights in the evening, the warmth will bring out the golden tones of the wood grain beneath the white.
- Greenery: Add a large-scale plant, like a Fiddle Leaf Fig or an Olive Tree. The organic green against the rustic white is the quintessential “designer” pairing.
- Texture Layering: Bring in a jute or sisal rug. The rough, natural fiber of the rug mimics the “rough” look of the whitewash, creating a cohesive tactile experience.
- Scale Check: If your whitewashed wall is large, don’t hang small, dinky pictures on it. Use one large-scale piece of art or a gallery wall with substantial frames to match the “weight” of the wall.
What I’d Do in a Real Project: Mini Checklist
If I were standing in your home today, here is the exact workflow I would follow:
- Vacuum the wall from top to bottom with a brush attachment. Dust is the enemy of a clean wash.
- Tape off the ceiling and baseboards with “delicate surface” painter’s tape to ensure the water doesn’t seep behind the tape.
- Mix a small “test batch” in a 1-quart container and apply it to a hidden spot (like behind where the sofa will sit).
- Observe the test spot at 10:00 AM, 2:00 PM, and 8:00 PM to see how the light changes the color.
- Once the color is approved, mix the full gallon to ensure color consistency across the entire wall.
- Always have two people: one to “apply” and one to “wipe.” It makes the job 3x faster and ensures a more even finish.
FAQs
Can I whitewash over dark-stained wood?
Yes, but you must sand off the glossy topcoat (polyurethane) first. If you don’t, the whitewash will sit on top and eventually peel or flake off. If the stain is very dark, you may need two coats of wash to reach your desired brightness.
How long does it take to dry?
Because the mixture is heavily diluted with water, it actually dries faster than standard paint. It will be “dry to the touch” in 30 to 60 minutes, but you should wait at least 24 hours before hanging heavy mirrors or artwork.
Is whitewashing the same as “limewashing”?
No. Whitewashing uses thinned-out latex paint. Limewashing uses crushed limestone and water. Limewash has a more “chalky” and “mottled” appearance and is chemically different. Whitewashing is much easier for a DIYer to control.
Can I do this on drywall?
You can, but the effect is different. On drywall, it looks like a “color wash” or a watercolor painting. It lacks the texture of wood or brick, so it works best if you use a sea sponge to apply it rather than a brush to create an intentional “cloud” effect.
Conclusion
Whitewashing a wall is one of those rare home improvement projects where the “imperfections” are actually the goal. It allows you to celebrate the natural flaws in your home’s architecture while giving the space a fresh, modern breath of air. By controlling your ratios, working in small sections, and paying close attention to your lighting, you can transform a dated or dull room into a rustic sanctuary.
Remember that design is a process of subtraction as much as addition. By “washing out” the heavy colors of wood or brick, you are creating a canvas that allows your furniture, your art, and your life to stand out more clearly. Take your time, trust the “wipe-back” process, and enjoy the transformation.
Picture Gallery


