
Illuminate Your Oasis: Top Landscape Pool Lighting Ideas
Lighting a pool area is about so much more than just visibility. When I first started in design, I viewed lighting as a utility—something you added at the end so people wouldn’t trip. That perspective changed entirely during a project in Southern California where the client wanted a “resort vibe” but had a very modest kidney-shaped pool. By layering light correctly—illuminating the steam rising off the water and grazing the texture of the retaining wall—we transformed a standard backyard into a visual masterpiece.
Lighting creates the mood, defines the space, and extends the usability of your outdoor living area well past sunset. It turns a dark, forbidding body of water into a glowing jewel that anchors your landscape design. Whether you are building new or retrofitting an existing oasis, the principles of layering and color temperature remain the same.
If you are looking for visual inspiration, don’t miss the curated Picture Gallery at the end of this blog post.
1. The Art of Underwater Illumination
The most obvious place to start is inside the pool itself. However, simply slapping a single high-wattage bulb at the deep end is a design relic of the past. Modern pool design relies on even light distribution to avoid dark corners that can look murky or unsafe.
Positioning is Everything
As a rule of thumb, I always specify that pool lights should face away from the primary seating area or the house. You want to see the glow of the water, not the blinding glare of the bulb filament. If your patio is on the north side of the pool, your lights should be installed on the north wall, shining south.
Depth and Maintenance
For standard niche lights, I recommend installing them 18 to 24 inches below the water surface. This depth provides excellent light spread throughout the water column. Practically speaking, it also allows a service technician to pull the fixture up onto the pool deck for bulb changes without draining the water.
Designer’s Note: The “Black Hole” Effect
One lesson I learned the hard way involves contrast. If you light the inside of the pool brightly but leave the surrounding landscape pitch black, the pool looks great, but the yard looks terrifying. The high contrast creates a “black hole” effect beyond the water’s edge. You must balance internal pool lights with landscape lighting to soften the transition.
2. Highlighting Hardscapes and Coping
Once the water is glowing, you need to define the edges. This is crucial for safety, but it also highlights the architectural lines of your pool. Lighting the hardscape adds a sculptural element to the design.
Strip Lighting Under Coping
Linear LED strip lighting installed under the lip of the pool coping is a favorite trick of mine. It casts a soft, downward wash of light against the tile line and the water surface. This creates a floating effect that feels incredibly high-end.
Grazing Stone Walls
If your pool features a raised bond beam or a retaining wall, use “grazing” fixtures. These are small lights placed right at the base of the wall, shining upward. This technique emphasizes the texture of stacked stone or tile.
Placement: Install grazing lights 6 to 12 inches away from the wall.
Spacing: Space them roughly 3 to 4 feet apart to create overlapping pools of light.
Fixture Type: Use a fixture with a narrow beam spread (15 to 30 degrees) to keep the light focused on the stone, not the sky.
Deck and Step Lighting
Flush-mount in-ground well lights are excellent for marking the perimeter of the pool deck without creating trip hazards. However, be wary of “runway lighting.” You don’t want the deck to look like an airport landing strip.
Common Mistakes + Fixes
Mistake: Using path lights that stick up out of the ground right next to the pool edge.
Fix: This is a tripping hazard and visual clutter. Use recessed well lights or flat “puck” lights drilled into the concrete or pavers.
3. Softscape and Surrounding Greenery
To create a true oasis, you must integrate the organic elements of your landscape. The plants surrounding your pool are just as important as the pool itself. Lighting them correctly creates depth and reflection.
The Power of Moonlighting
If you have mature trees near the pool, “moonlighting” is the most naturalistic effect you can achieve. This involves mounting a fixture high in the tree canopy (20+ feet up) and aiming it downward through the branches. It creates dappled shadows on the pool deck that mimic a full moon.
Uplighting Specimen Plants
Palms, Japanese Maples, or architectural grasses look stunning when lit from below. When uplighting near a pool, pay attention to the reflection. A lit tree positioned behind the pool will reflect in the still water at night, effectively doubling your visual impact.
Design Rules for Plant Lighting:
Scale: For small shrubs (under 3 feet), use a 2-watt LED. For large canopy trees, you may need 7 to 12 watts.
Color Rendering: Look for a high CRI (Color Rendering Index) of 85 or higher. This ensures your greens look green, rather than a sickly gray or yellow.
Glaring Errors: Never aim an uplight where it will shine directly into the eyes of a swimmer. Use glare shields or “eyebrows” on all fixtures.
4. Mastering Color Temperature and Control
The “color” of white light is measured in Kelvin (K), and getting this wrong is the quickest way to ruin a design. In residential landscapes, you generally want to stay in the “warm white” range.
The Kelvin Scale Guide
2700K (Warm White): This is the standard for landscape lighting. It mimics the color of incandescent bulbs and feels cozy and inviting. I use this for 90% of deck and plant lighting.
3000K (Crisp White): Slightly cooler and brighter. This is often better for underwater pool lights because the water tends to absorb red wavelengths. 3000K ensures the water looks sparkling blue, not murky green.
4000K+ (Cool/Blue White): Avoid this for landscapes. It looks like a commercial parking lot or a hospital operating room. It creates a sterile, uninviting atmosphere.
Smart Control and Zoning
In a real project, I never put all lights on a single switch. You need “zones” to control the mood.
Zone 1: Internal Pool Lights (for swimming).
Zone 2: Safety/Path Lights (always on for navigation).
Zone 3: Feature/Tree Lights (for drama).
I highly recommend smart transformers that allow you to dim these zones from your phone. Being able to dim the patio lights to 50% while keeping the pool bright creates an incredible ambiance for dinner parties.
5. Safety, Durability, and Materials
Pool environments are harsh. Between the UV rays, water splashing, and pool chemicals (chlorine or salt), your fixtures need to be robust.
Material Selection
I strictly specify brass, copper, or stainless steel fixtures for pool areas.
Brass/Copper: These will patina over time, turning a dark bronze or verdigris color that blends beautifully into the garden. They do not corrode or pit like aluminum.
Aluminum: Even powder-coated aluminum will eventually bubble and peel in a salt-air or salt-pool environment. Avoid it if your budget allows.
Voltage Safety
For landscape lighting around a pool, low voltage (12V) is the industry standard and the safest option. It eliminates the risk of dangerous shock if a cable is accidentally cut.
Transformer Placement: Hide your transformer behind a shrub or air conditioning unit, but ensure it remains accessible.
Wire Runs: Leave 2-3 feet of extra wire coiled at each fixture. Plants grow, and you will eventually need to move a light a few feet to accommodate a wider trunk or new foliage.
What I’d Do in a Real Project: Mini Checklist
1. Audit the View: Stand inside the house (living room and kitchen). Where do your eyes naturally go? Light those focal points first.
2. Layer the Heights: Ensure I have light at the ground level (path), eye level (walls/features), and overhead (trees/moonlighting).
3. Check the Glare: Do a walkthrough at night before burying the wires to adjust the aim of every single fixture.
Final Checklist for Your Lighting Plan
Before you purchase fixtures or hire an electrician, run through this summary to ensure you have covered all bases.
- Defined Goals: Have you decided if this is for security, entertaining, or swimming laps?
- Kelvin Consistency: Are all your landscape lights 2700K and pool lights 3000K?
- Beam Spread: Do you have wide floods for walls and narrow spots for trees?
- Glare Control: Are all fixtures aimed away from the primary seating areas?
- Material Durability: Have you chosen brass or composite over cheap aluminum?
- Dimming Capacity: Does your transformer support dimming for mood control?
- Safety Compliance: Are all lights 12V low voltage for safety near water?
- Dark Sky Friendly: Are you using shields to prevent light pollution upwards?
Frequently Asked Questions
How many lights do I need inside my pool?
For a standard residential pool (roughly 15×30 feet), two lights are usually sufficient. If the pool is long or L-shaped, you may need three or more to avoid dark spots. The goal is even illumination, not extreme brightness.
Can I retrofit LED lights into my old pool?
Yes, and you should. Replacing old halogen bulbs with LED lamps is one of the easiest upgrades. You can often keep the existing niche (the housing in the wall) and simply replace the “engine” or bulb. This saves energy and allows you to choose color-changing options if desired.
Do bugs get attracted to pool lights?
Yes, insects are attracted to UV and blue light spectrums. This is another reason why I prefer warm white (2700K) for the surrounding landscape, as it attracts fewer insects than cooler white light. Keeping the lights underwater brighter than the deck lights can also draw bugs to the water surface rather than your margarita glass.
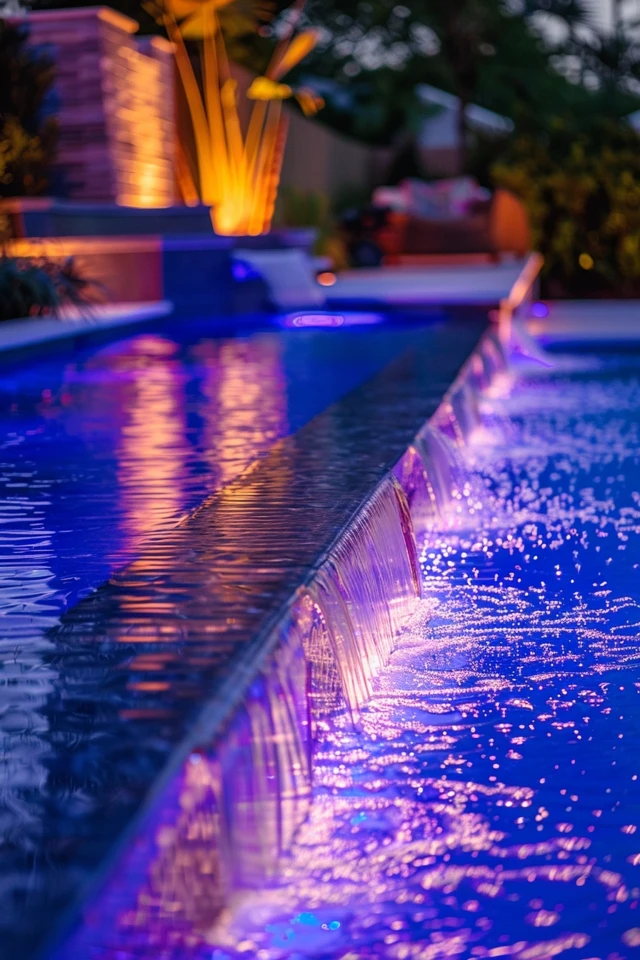
What is the best way to light a water feature or waterfall?
Light it from underneath where the water crashes down. The agitation of the water catches the light and makes the waterfall sparkle. If you light it from above, it often looks flat.
Conclusion
Lighting your landscape and pool is the final layer of design that brings the entire project to life. It transforms a dark backyard into an extended living room that you can enjoy year-round. By focusing on the quality of light—warm temperatures, shielded glare, and distinct zoning—you create a space that feels sophisticated and serene.
Remember that lighting is subjective. Start with the safety essentials, then layer in the drama with uplights and moonlighting. Use high-quality materials like brass that will withstand the elements, and always opt for low-voltage systems for safety. With thoughtful planning, your pool area will be just as inviting at midnight as it is at high noon.
Picture Gallery


