
Title: Innovative Attic Door Ideas for Home Upgrades
Introduction
Attic spaces are often the forgotten stepchildren of home design. We tend to treat them as dusty storage lockers or strictly utilitarian zones, ignoring the transition point that leads us there. However, the door to your attic—whether it is a knee wall access panel, a ceiling hatch, or a full-sized entry to a finished loft—plays a massive role in your home’s thermal envelope and interior aesthetic.
In my years designing renovations for older homes and new builds alike, I have found that upgrading the attic door is one of the highest-impact changes you can make. It solves draft issues, reduces visual clutter, and can even add a secret “wow” factor to a hallway or bedroom. For those seeking immediate visual inspiration, a curated Picture Gallery is waiting at the very end of this post.
Moving beyond the standard plywood square or the builder-grade hollow door requires a bit of planning and creativity. This guide will walk you through the structural considerations, hidden design tricks, and practical hardware choices that turn an awkward opening into a seamless part of your home’s architecture.
1. Assessing Your Access Type and Structural Constraints
Before we get to the fun aesthetic upgrades, we have to look at the bones of the house. The type of attic access you have dictates what design solutions are actually possible. In my projects, I categorize attic entries into three distinct buckets: ceiling hatches, knee wall doors, and full-height walk-ins.
Ceiling Hatches and Pull-Downs
This is the most common access point, usually located in a hallway or a closet ceiling. The constraint here is gravity and clearance. You are limited by the joist spacing (often 22.5 inches wide) and the swing radius of the ladder. If you are upgrading this, you aren’t just picking a door; you are picking a mechanism.
Knee Wall Access
If you have a finished attic or a “story-and-a-half” home (like a Cape Cod), you likely have short doors cut into the short vertical walls. These are notoriously difficult to style. Standard doors don’t fit here. You are almost always looking at a custom height, usually between 30 and 48 inches tall.
Full-Height Walk-Ins
These are standard doors leading to a staircase. While they seem simple, the challenge here is usually space. Attic stairs are often steep and narrow. A standard 32-inch door might feel too large for the landing, or the swing might interfere with bedroom traffic.
Designer’s Note: The Slope Trap
A specific lesson I learned the hard way involved a knee wall door in a finished attic renovation. We ordered a beautiful custom oak slab door. We measured the height and width perfectly. However, we forgot to account for the roof pitch on the inside of the closet. When the door swung inward, the top corner hit the rafters immediately, allowing it to open only 6 inches.
The Fix: Always measure the depth and ceiling slope inside the attic space before deciding on the swing direction. If the slope is steep, the door must swing out into the room.
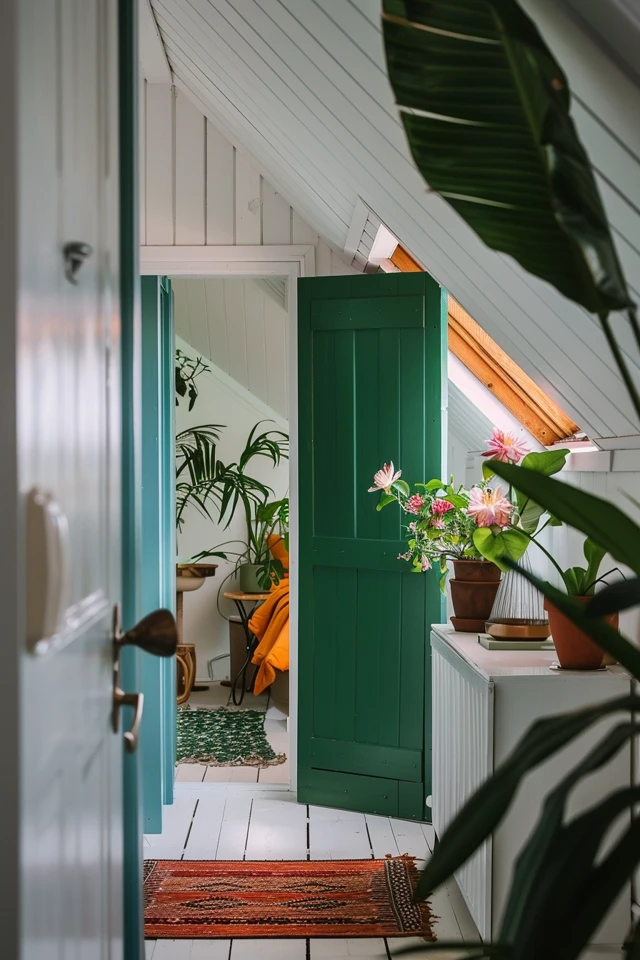
2. The “Invisible” Look: Hidden and Flush Doors
One of the most requested features in modern and transitional homes is the “hidden” door. Because attic doors are rarely the focal point of a room, camouflaging them allows the eye to travel uninterrupted across the wall. This is particularly useful for knee wall doors that cut into a bedroom wall.
Jib Doors and Millwork Integration
A jib door is a door that is flush with the wall, has no casing (trim) around it, and is often painted or wallpapered to match the surrounding surface. To pull this off, you need specific hardware, typically concealed hinges like SOSS or Tectus hinges.
When I design these, I often continue the baseboard molding right across the bottom of the door. This creates a seamless visual line. When the door is closed, the only give-away is a very thin reveal line. This requires precision carpentry; the gap around the door needs to be tight, usually around 1/8th of an inch.
The Wallpaper Trick
If you are dealing with a small access panel in a bedroom, wallpaper is your best friend. A busy pattern creates visual noise that makes the outline of a small door disappear.
- Apply the wallpaper over the door and the wall simultaneously if possible to ensure pattern matching.
- Wrap the paper around the edges of the door slab to prevent peeling.
- Use a touch-latch (push-to-open) mechanism so you don’t need a visible handle disrupting the pattern.
Bookcase Doors (The Murphy Door)
This is the ultimate secret passage vibe. If you have a full-height opening to an attic stairwell, replacing the standard door with a bookshelf door adds storage and whimsy.
- Depth matters: You need a minimum depth of 8 to 10 inches for the shelving to be functional.
- Weight load: A loaded bookshelf can weigh 300+ pounds. You cannot use standard hinges. You need a heavy-duty pivot hinge system anchored to the floor and the header.
- Swing clearance: These doors are thick. Ensure you have room in the hallway for the unit to swing open without hitting a console table or opposing wall.
3. Styling the Knee Wall: Custom Solutions for Small Spaces
Knee wall doors are often ugly squares of plywood held shut with a plastic latch. We can do much better. Since these are usually in finished rooms like bedrooms or playrooms, they need to be treated like furniture, not utility panels.
The “Cabinet” Approach
Instead of thinking of it as a door, think of it as a cabinet front. I often order custom cabinet doors from a kitchen manufacturer to match the built-ins in the room. You can get a shaker-style panel or a beadboard front that looks intentional.
Sliding Panels
If you have a long knee wall with multiple access points (common for accessing plumbing or electrical runs), consider a low sliding track system.
- Install a single rail along the top of the knee wall.
- Hang short “barn door” style panels.
- This eliminates the issue of doors swinging into furniture. This is perfect for small bedrooms where a bed might be placed close to the wall.
Insulation is Non-Negotiable
The biggest mistake with knee wall doors is air leakage. Behind that door is unconditioned space (freezing in winter, boiling in summer).
- Weatherstripping: Use Q-lon or compression foam weatherstripping on all four sides of the frame.
- Rigid Foam: Glue a 2-inch layer of rigid foam insulation (XPS or Polyiso) to the back of the door panel.
- Latch Tension: Use a sash lock or a tight latch that pulls the door snugly against the weatherstripping. A magnetic catch is rarely strong enough to stop a draft.
4. Statement Pieces: Barn Doors and Industrial Hatches
Sometimes you don’t want to hide the door; you want to highlight it. If you have a converted loft or a modern farmhouse aesthetic, the attic entry can be a design feature.
Barn Doors for Attic Stairs
Sliding barn doors are incredibly practical for the bottom of attic stairs. Stairwells often dump out into narrow hallways where a swing door is a nuisance.
- Wall Space: The rule of thumb is that you need wall space equal to the door width alone. If your opening is 32 inches, you need 34 inches of blank wall next to it.
- Privacy gaps: Standard barn doors have a gap between the door and the wall. If the attic is used as a bedroom, this lets sound and light through. To fix this, I specify an “overlap” of at least 2 inches on each side and install a brush sweep on the back edge.
Industrial Metal Hatches
For ceiling access points in modern homes, I have started using fabricated metal hatches instead of wood trim. A matte black steel frame with a drop-down ladder creates a loft-style industrial look. It turns the “ugly ceiling square” into a deliberate architectural choice.
Common Mistakes + Fixes
Mistake: Using a hollow core door for an attic entry.
Fix: Attics have different temperatures and humidity levels than the living space. Hollow core doors will warp, bow, and delaminate quickly. Always use a solid core door or an exterior-grade fiberglass door if the attic is unconditioned.
Mistake: Ignoring the threshold.
Fix: You need a seal at the bottom of the door. Install a door shoe or an automatic door bottom (a mechanism that drops a seal when the door closes) to prevent dust and drafts from creeping under the door.
5. Lighting and Hardware Selection
The hardware you choose dictates the functionality and the safety of your attic access. This is an area where I never recommend cutting the budget.
Handles and Latches
For knee wall doors, avoid standard doorknobs; they look out of scale on a short door.
- Flush Pulls: Use recessed ring pulls or flush cups. These are low profile and prevent snagging on clothes.
- Cabinet Knobs: If using the “cabinet” look, place the knob centered on the stile, proportionate to the height.
Lighting the Entry
Attics are dark. Fumbling for a light switch while standing on a ladder is dangerous.
- Jamb Switches: I install automatic jamb switches (like you have in your refrigerator) on attic doors. When you open the door, the attic light turns on instantly.
- Motion Sensors: Alternatively, a battery-operated motion sensor light just inside the threshold is a great retrofit solution if you don’t want to do electrical work.
Ladder Hardware
If you are upgrading a pull-down ladder, look for aluminum or steel telescoping models rather than the folding wood sections. They are lighter, easier to operate, and generally have safer handrails. Ensure the “swing clearance” (the distance the ladder needs to unfold) fits your hallway. I usually look for a clearance range of 60 to 75 inches.
What I’d Do: A Real-World Project Checklist
If I were consulting on your home renovation today, this is the exact checklist I would use to execute an attic door upgrade. You can use this to manage your contractor or your DIY efforts.
Step 1: Define the Thermal Boundary
Is the attic conditioned (heated/cooled) or unconditioned?
- If unconditioned, the door must be treated like an exterior door (weatherstripped, insulated, solid core).
- If conditioned, you can use any interior door style.
Step 2: Measure the Rough Opening (RO)
Do not just measure the current door. Remove the trim and measure the distance between the studs (width) and the floor to the header (height).
- Designer Tip: Check for squareness by measuring diagonally from corner to corner. If the numbers differ by more than 1/4 inch, the opening is out of square, and you will need to shim the new door frame carefully.
Step 3: Select the Mechanism
Based on your clearance:
- Tight hallway? Go with a sliding barn door or pocket door.
- Hidden room? Go with a millwork jib door or bookcase.
- Utility access? Go with a sealed, insulated hatch.
Step 4: Plan the Finish
Decide early if the door is paint-grade or stain-grade.
- If painting to match the wall (hidden look), choose a flat panel door.
- If staining, ensure the wood species matches your floors or nearby furniture.
Frequently Asked Questions
Can I cut down a regular door to fit a knee wall opening?
Generally, no. If it is a hollow core door, cutting it will remove the internal frame and the door will fall apart. If it is a solid wood panel door, cutting it might disrupt the proportions of the panels. Your best bet is to order a custom-sized slab or use a solid core flush door that can be trimmed, though you will need to seal the cut edge perfectly.
How much R-value do I need for an attic door?
You should aim to match the R-value of your walls or ceiling as closely as possible, though this is hard with a door. A standard uninsulated wood door has an R-value of roughly R-2. Adding 2 inches of XPS rigid foam brings that up to roughly R-12. For ceiling hatches, I recommend stacking rigid foam to achieve at least R-30 to prevent heat loss.
Are magnetic latches enough for small attic doors?
In my experience, no. Air pressure changes in the house (stack effect) can push lightweight doors open if held only by magnets. I prefer mechanical latches, sash locks, or ball catches that require physical force to open and close.
What is the best way to hide an attic ceiling hatch?
The cleanest look is to replace the trim with a “mud-in” bead. This allows the drywall to roll right up to the edge of the opening, eliminating the casing. Then, paint the hatch panel the exact same flat white as the ceiling.
Conclusion
Upgrading your attic door is a project that sits at the intersection of thermal efficiency and interior design. It is easy to overlook, but a thoughtful solution here cleans up your sightlines and lowers your energy bills.
Whether you choose to hide the access completely with a seamless jib door, celebrate it with industrial hardware, or simply insulate it properly for comfort, the key is to respect the constraints of the space. Measure twice, account for the swing, and never underestimate the value of a good weather seal. By treating this access point with the same design rigor as your front entry or bedroom door, you elevate the fit and finish of your entire home.
Picture Gallery


