
Innovative Container Pool Ideas for Your Backyard
Shipping container pools have rapidly transformed from a novelty concept into a legitimate architectural feature in modern landscape design. They offer an industrial-chic aesthetic that pairs beautifully with contemporary homes, yet they are robust enough to stand alone as a backyard centerpiece. Unlike traditional concrete pools, these vessels arrive largely pre-assembled, cutting on-site construction time from months to mere days.
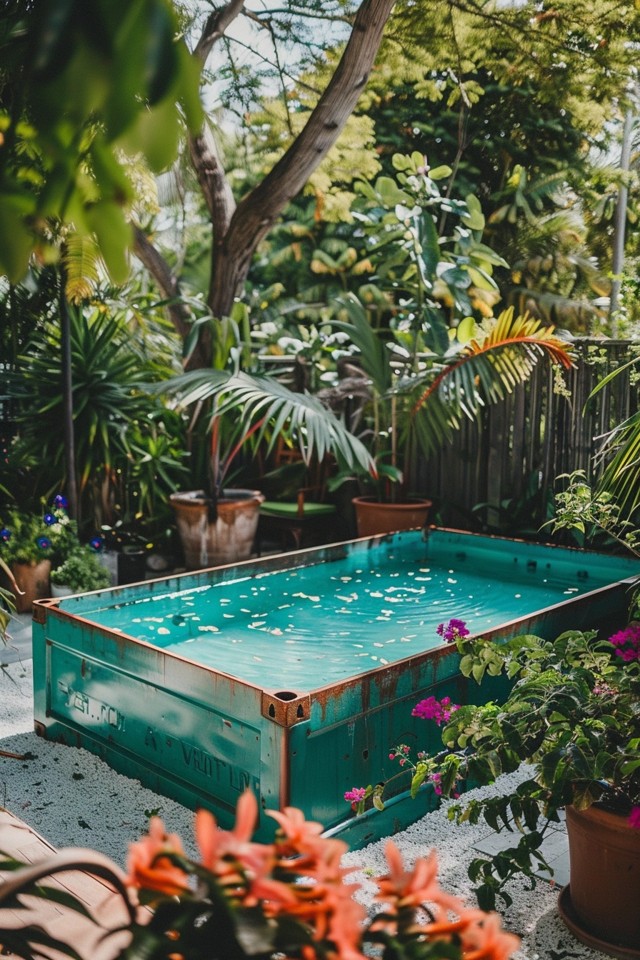
However, installing a container pool requires more design foresight than simply dropping a metal box onto your lawn. You must consider sightlines, decking integration, and how the industrial texture of the container interacts with your existing hardscaping. If you are looking for visual inspiration, make sure to scroll down to our curated Picture Gallery at the end of this post.
In this guide, I will walk you through the structural and aesthetic possibilities of container pools. We will cover everything from utilizing sloped yards to creating seamless indoor-outdoor flows with strategic decking. Whether you have a sprawling estate or a compact urban lot, these design strategies will help you execute the project with a high-end finish.
1. Utilizing Slope: The Cantilever Strategy
One of the most challenging aspects of landscape design is dealing with a significantly sloped yard. Traditional pools require massive retaining walls and extensive excavation to create a flat surface, which eats up the budget. Container pools, however, are structural vessels designed to carry heavy loads at their corners.
This structural integrity allows us to “float” or cantilever the pool off a hillside. By building a steel or concrete pier foundation, the pool can extend out over a slope. This creates a dramatic, gravity-defying look that mimics high-end infinity pools at a fraction of the engineering cost.
From a design perspective, this maximizes usable square footage. If your yard drops off steeply, placing the pool on piers reclaims that “dead air” space. It brings the water level up to your main living floor, creating a direct connection between your back door and the swim area.
Designer’s Note:
When cantilevering a pool, the underside becomes visible from the lower yard. Do not leave the corrugated metal and plumbing exposed unless you want a very raw industrial look. I recommend cladding the underside with cedar slats or composite paneling to keep the view from the bottom of the hill just as polished as the view from the top.
2. Integrated Decking and “Built-In” Aesthetics
While the industrial look is popular, not every homeowner wants a giant metal box sitting visibly in their garden. A common design approach is to treat the container as an insert, surrounding it entirely with raised decking. This gives the illusion of an in-ground pool without the excavation risks.
To achieve a high-end look, match your decking material to the pool coping. I often use Ipe or high-quality capped composite decking like Trex or TimberTech. The key is to run the decking boards perpendicular to the pool edge for a clean, modern visual line.
Common Mistake: Ignoring Access Panels
Many DIYers build a beautiful deck tight against the pool walls, effectively sealing off the plumbing and filtration systems.
The Fix: Always frame a removable section of the deck or install a trap door above the pump room. I recommend a minimum 30-inch by 30-inch clearance opening to allow a technician to service the pump and heater comfortably.
For a true “resort” feel, consider a split-level design. Keep one side of the pool exposed to show off the container color, while building a deck flush with the top coping on the other side. This provides a natural seating area (the deck) and a bar area (the exposed wall), creating distinct zones for swimming and socializing.
3. The “Window” Feature: Lighting and Orientation
The most distinct feature of modern container pools is the ability to cut in heavy-duty acrylic windows. This isn’t just a novelty; it is a tool for bringing light into the yard. A side window breaks up the monotony of the corrugated steel and creates a visual connection between the water and the patio.
When positioning a pool with a window, orientation is critical. You want the window facing the main social hub of the yard, such as the fire pit or the outdoor kitchen. Avoid facing the window West if it looks directly into your living room, as the glare from the sunset hitting the water can be blinding.
Lighting is what makes the window feature truly pop at night. I recommend installing color-changing LED niche lights inside the pool on the wall opposite the window. This projects light outward through the glass, turning the pool into a glowing lantern that illuminates the surrounding landscape.
What I’d do in a real project:
- Scale: If the pool is 20 feet long, I prefer a window that is at least 6 to 8 feet wide. Small portholes can look cheap and disconnected.
- Safety: Ensure the glazing is engineered acrylic, typically 1.5 to 2 inches thick depending on water depth. Never compromise on the spec here.
- Privacy: If the window faces a neighbor, I utilize landscaping like clumping bamboo or tall grasses 4 feet away from the glass to create a layered view without blocking the light.
4. Small Space Solutions: The Plunge Pool Configuration
In urban environments or townhomes, a standard 40-foot container is often too large. The 20-foot container, or even a cut-down 10-foot version, serves perfectly as a “plunge pool.” These are designed for cooling off and lounging rather than swimming laps.
For small spaces, verticality is your friend. Because the pool walls are 8 to 9 feet tall (if using a High Cube container cut down), you can use the pool wall as a privacy screen. Placing the pool along the property line blocks the view from neighbors while providing a functional water feature.
In tight footprints, I often recommend integrating the mechanical equipment under the stairs leading up to the pool. This saves precious square footage. Using spiral staircases instead of linear runs can also save about 15 to 20 square feet of yard space.
Pro-Level Rule of Thumb:
In a small yard, maintain a minimum of 36 inches of hardscape walking path around at least two sides of the pool. Anything less feels cramped and makes cleaning the exterior of the container difficult. If you are tight on space, push one side of the pool flush against a fence or wall (leaving a 6-inch gap for drainage/ventilation).
5. Year-Round Functionality: The “Spool” Conversion
Container pools are uniquely suited to be used as hot tubs or “spools” (spa/pool hybrids) because they have a smaller water volume than traditional pools. This makes heating them much faster and more energy-efficient.
To make this work for year-round use, you need to spec the insulation correctly. Unlike an in-ground pool insulated by the earth, a container is exposed to the air. In my projects, I insist on closed-cell spray foam insulation on the underside and between the interior shell and the steel walls.
I also recommend dividing the container. You can weld a steel partition inside a 20-foot container to separate a 5-foot hot tub section from a 15-foot plunge pool section. This allows you to heat the spa to 102°F while keeping the pool at a refreshing 80°F, without the energy cost of heating the whole vessel.
Key Measurement:
For a comfortable spa section, allow for at least 6 feet of length. This provides enough legroom for 4 adults to sit facing each other without knees knocking together.
Final Checklist: Before You Order
Before you put down a deposit on a container pool, run through this designer’s checklist to ensure your property is actually ready for one.
- Crane Access: This is the dealbreaker. Can a crane park within 50-80 feet of the spot? Look for overhead power lines or large tree branches that might block the boom.
- Foundation: You cannot place these directly on grass. You need a concrete slab (usually 6 inches thick with rebar) or concrete piers at the four corners.
- Setbacks: Check your local zoning. Even though it is “portable,” most municipalities treat it like a permanent structure regarding property line setbacks (usually 5 to 10 feet).
- Electrical Load: An electric heat pump and filtration system usually requires a dedicated 50-60 amp sub-panel. Check if your main home panel has room.
- Fencing: Most codes require a 48-inch to 54-inch safety barrier. If the pool is above ground, the walls themselves may count, but you will need a self-closing gate for the stairs.
Frequently Asked Questions
Do container pools rust?
Yes, they can if not treated properly. However, reputable manufacturers use Corten steel (weathering steel) and apply heavy-duty marine-grade epoxy paint. Inside, the water is held by a fiberglass insert or a heavy vinyl liner, so water rarely touches the metal. The main risk is exterior scratches; touch these up immediately with rust-inhibiting paint.
Can I bury a shipping container pool?
Generally, no. Shipping containers are designed to stack weight on their corners, not to take pressure from the sides. The weight of the earth will crush the long walls inward. If you must bury it, you need to build a concrete retaining wall around the hole first, which defeats the cost-saving purpose. Some manufacturers offer reinforced models for partial burial (usually up to 24 inches).
Is it cheaper than a concrete pool?
Typically, yes. A fully finished container pool usually costs between $30,000 and $50,000 delivered. A comparable concrete pool often starts at $60,000 to $80,000 before landscaping. However, remember to budget an extra $5,000 to $10,000 for the crane, foundation, and electrical hookup.
How long do they last?
With proper maintenance, a container pool should last 20 to 25 years. The fiberglass shell or liner may need attention after 15 years, but the steel structure is incredibly durable.
Conclusion
Container pools offer a versatility that traditional pools simply cannot match. They solve complex site problems like slopes and small footprints while providing an immediate architectural statement. The key to a successful project lies in the “integration”—treating the container not as a standalone object, but as a component of your overall landscape architecture.
By paying attention to sightlines, decking levels, and lighting, you can create a backyard oasis that feels custom and intentional. Whether you leave the steel exposed for a raw look or wrap it in warm timber, a container pool is a robust, stylish investment in your home’s livability.
Picture Gallery


