
Title: Kitchen Island End Panel Ideas to Transform Your Space
Introduction
The kitchen island is undeniably the workhorse of the modern home. We obsess over the countertop material, debate the layout of the sink, and spend hours selecting the perfect pendant lighting. However, the sides of the island—specifically the end panels—are often an afterthought, left as plain, flat surfaces that contribute nothing to the room’s design.
Treating the end of your island as a blank canvas is a missed opportunity to add architectural interest and custom character to your kitchen. Whether you are dealing with a builder-grade box or planning a full renovation, upgrading this vertical space can make your kitchen look significantly more expensive. Be sure to browse our curated Picture Gallery at the end of this post for visual inspiration.
In this guide, we will explore practical and stylish ways to treat your kitchen island end panels. From functional storage solutions to high-end millwork, these ideas range from simple DIY updates to professional carpentry projects. We will also cover the critical measurements and durability concerns you need to know before making a change.
1. Understanding Construction: Skins vs. Applied Panels
Before diving into aesthetics, it is crucial to understand the structural starting point of your island. In the cabinetry world, the side of a cabinet box is usually unfinished or covered with a thin veneer known as a “skin.” A skin is roughly 1/4-inch thick and is designed merely to cover the raw particle board of the cabinet box.
While a skin matches the color of your cabinet doors, it lacks depth and visual weight. This is why standard kitchen islands can feel flimsy or “builder-grade.” To achieve a custom look, professional designers almost always specify “applied doors” or 3/4-inch finished panels.
An applied door is exactly what it sounds like: a cabinet door face that is permanently mounted to the side of the island. This mimics the look of the working cabinets, creating a seamless, furniture-style appearance. If your kitchen has shaker cabinets, applying a shaker panel to the end of the island instantly unifies the space.
Designer’s Note: The Toe Kick Dilemma
One of the most common mistakes I see in DIY island upgrades is ignoring the toe kick. Standard cabinets have a recessed area at the bottom (usually 4 to 4.5 inches high) to allow room for your feet.
- The Mistake: Installing a decorative panel that stops at the top of the toe kick, leaving a jagged visual line.
- The Fix: For a high-end “furniture look,” bring the end panel all the way down to the floor. You then wrap the baseboard molding around the island to finish it off. This sacrifices the toe kick on the side, but since you rarely stand at the short end of an island to work, it is a worthwhile trade-off for the elevated aesthetic.
If you choose to extend the panel to the floor, ensure your flooring runs underneath the cabinetry or is finished flush against it. Gaps here will catch crumbs and pet hair, becoming a maintenance nightmare.
2. The Waterfall Edge: Modern Luxury
If you are aiming for a contemporary or transitional aesthetic, the waterfall edge is the gold standard. This design technique involves extending the countertop material vertically down the side of the island to the floor. It creates a continuous, flowing line of stone that serves as a dramatic focal point.
While marble and quartz are the most common materials for this, butcher block and concrete are also gaining popularity for rustic or industrial spaces. The key to a successful waterfall edge is the fabrication of the joint where the horizontal and vertical pieces meet.
Mitered vs. Butt Joints
- Mitered Edge: This is the professional choice. The stone is cut at a 45-degree angle so the veining wraps seamlessly over the edge. It requires a skilled fabricator and precise laser templating.
- Butt Joint: One piece sits on top of the other. This creates a visible seam and breaks the visual flow of the stone patterns. I rarely recommend this unless you are using a solid color material like white Corian or solid wood.
Cost and Constraints
Be aware that a waterfall edge significantly increases your countertop budget. You are essentially paying for an extra slab of stone and complex fabrication labor. Additionally, you must account for electrical codes.
In the US, the National Electrical Code (NEC) has specific requirements for outlets on kitchen islands. If you wrap both ends in stone, you must plan for a “pop-up” outlet in the countertop or a recessed outlet cut into the stone side. Cutting stone for outlets is risky and expensive; always discuss this with your electrician and stone fabricator before purchasing slabs.
3. Millwork and Texture: Shiplap, Fluting, and Beadboard
Adding texture to your island end panel is a fantastic way to introduce warmth without the high cost of stone. Woodworking treatments can be painted to match the island or stained for contrast. This approach is particularly effective in farmhouse, coastal, and traditional homes.
Shiplap and Tongue-and-Groove
Horizontal shiplap remains a favorite for adding a casual, coastal vibe. However, vertical tongue-and-groove paneling is currently trending for a more modern, height-enhancing look. Vertical lines draw the eye upward, which can make standard 36-inch high counters feel more substantial.
Fluted and Reeded Details
For a more tactile, sophisticated look, consider fluted wood details. These are rounded, convex ridges (or concave grooves for reeding) that create a play of light and shadow.
- Scale matters: For a large island, use wider fluting (1 inch or more) so the texture reads clearly from a distance.
- Maintenance reality: Fluted panels are dust magnets. If you have pets that shed or young children with sticky hands, be prepared to clean these grooves with a toothbrush or vacuum attachment regularly.
Common Mistakes + Fixes
- Mistake: Using thin, cheap beadboard sheets that look like plastic.
- Fix: Use individual boards or high-quality MDF sheets with deep architectural grooves. Paint them with a high-quality cabinet enamel (satin or semi-gloss) rather than wall paint. Cabinet paint hardens to a shell that resists scuffs from shoes, which is inevitable in a high-traffic zone like the kitchen.
4. Functional End Panels: Storage and Utility
In smaller kitchens, every square inch counts. Treating the end panel purely as decoration can be a waste of valuable real estate. By increasing the depth of the end panel structure, you can add significant functionality.
Open Bookshelves
Adding shallow shelves (roughly 10 to 12 inches deep) to the end of the island is perfect for cookbooks and decorative bowls. This breaks up the solid block of cabinetry and adds personality.
- Styling Rule: Do not overcrowd these shelves. Use a mix of vertical books, a small plant, and perhaps a ceramic pitcher. Leave about 30% of the shelf space empty to avoid a cluttered look.
- Railings: If you are concerned about items being knocked off by passing traffic, install a simple brass or black metal gallery rail. This adds a jewelry-like detail while keeping items secure.
Wine and Beverage Storage
An X-grid wine rack is a classic addition to an island end. However, modern design is moving toward individual cubbies or vertical slots. This is a great way to utilize narrow spaces (as little as 6 inches wide) that might otherwise be filler.
Hidden Charging Stations
We all congregate around the island, and inevitably, phones and tablets need charging. Instead of cutting into a beautiful stone waterfall, build a shallow cabinet on the end panel with a flip-down door. Inside, you can hide a power strip and USB ports. This keeps cords off the countertop and out of sight.
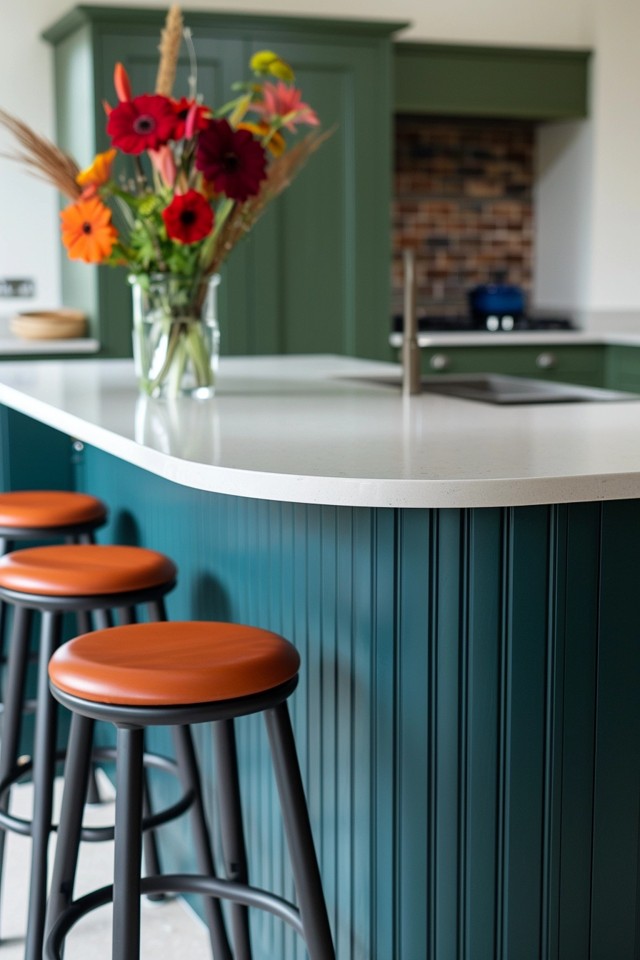
5. Color Blocking and Material Contrast
Sometimes the best way to transform an end panel is through color and material contrast rather than structural changes. The “tuxedo kitchen” trend, where the island is a different color than the perimeter cabinets, is here to stay. Your end panel is the primary place where this color creates impact.
Dark vs. Light
If your perimeter cabinets are white, a deep charcoal, navy, or forest green island anchors the room. The end panel becomes a large block of color that grounds the space.
- Durability Note: Dark paint shows dust and scratches more than light paint. Ensure you use a durable finish. If you are retrofitting an existing island, scuff sand the old end panel thoroughly before priming to ensure the new dark color adheres properly.
Wood Tones
Mixing painted cabinets with a wood-stained island end panel adds instant warmth. White oak is the current favorite for its neutral, organic tone. If you cannot replace the whole island, you can “wrap” the existing sides and back with thin 1/4-inch wood veneers and trim them out with solid wood molding.
Metal Accents
For an industrial or glam look, consider cladding the end panel in metal. Sheets of brushed brass, copper, or stainless steel can be adhered to the plywood base. This is incredibly durable against shoe scuffs and adds a reflective quality that brightens dark floors.
Final Checklist: What I’d Do in a Real Project
If I were consulting on your kitchen renovation today, here is the mental checklist I would run through to determine the best solution for your island ends. Use this to guide your decision-making.
1. Traffic Flow Analysis
- Measure the walkway. If the clearance between the island end and the wall or fridge is less than 36 inches, do not add bulky bookshelves or overhangs. Stick to flush panels or paint.
- If you have 42 to 48 inches of clearance, you have the luxury of adding shelving or deep molding.
2. Electrical Compliance
- Check your local codes regarding outlets. You generally need at least one receptacle for the island.
- Decide now where it goes. Side panel? Pop-up? Under the overhang? Do not leave this for the electrician to decide on the fly.
3. The “Shoe Test”
- Look at your current island. Are there scuff marks at the bottom?
- If yes, avoid delicate wallpapers or flat matte paints on the end panel. Choose a material like hardwood, tile, or stone that can take a beating, or ensure you have a dedicated 4-inch toe kick.
4. Countertop Integration
- Check your countertop overhang. The standard overhang on a working side is 1.5 inches.
- If you add 3/4-inch wainscoting to the side, your overhang will effectively shrink to 0.75 inches, which looks stingy. You may need to replace the countertop or build out the support structure to look proportional.
Frequently Asked Questions
Can I add wainscoting to my island without removing the countertop?
Yes, but you must be careful with the overhang. If your countertop overhang is shallow, adding thick wainscoting might end up flush with the counter edge, which looks odd. Ideally, you want at least a 0.5-inch to 1-inch overhang extending past your new paneling.
What is the best paint finish for island end panels?
Satin or semi-gloss is best. Matte or eggshell finishes absorb grease and are difficult to scrub without burnishing the paint. Since islands are high-traffic zones prone to spills and kicks, you need a hard, cleanable surface.
How much does a waterfall edge cost?
It varies wildly by material, but expect to pay for at least one additional slab of stone plus an extra $1,000 to $2,500 in fabrication labor for the mitered cuts and installation. It is a premium feature.
Can I tile the side of my kitchen island?
Absolutely. Tiling the end panel is a durable and creative option. Large-format porcelain tiles can mimic the look of stone for a fraction of the price. Just ensure you use proper edge trim (like Schluter strips) or bullnose tiles so you don’t have raw tile edges exposed at the corners.
Conclusion
Your kitchen island end panels are more than just the sides of a box; they are an integral part of your kitchen’s architecture. Whether you opt for the sleek luxury of a stone waterfall, the cozy charm of shiplap, or the utility of open shelving, the goal is intentionality.
Stop treating these surfaces as invisible. By applying the rules of scale, durability, and material contrast outlined above, you can turn a basic structural necessity into a stunning design feature. Remember to measure your walkways, plan for outlets early, and choose finishes that can withstand the reality of daily life.
Picture Gallery


