
L Shaped Desk Setup Ideas for Optimal Workspaces
Designing a home office is often a battle between maximizing surface area and maintaining floor space. The L-shaped desk is usually the hero in this scenario, offering double the workspace of a standard desk without necessarily doubling the footprint. However, styling and configuring these desks requires a specific strategy to avoid creating a cluttered corner that feels dark and cramped.
I have seen many clients buy the largest L-desk that fits in the room, only to realize they have blocked traffic flow or created a cable management nightmare. The goal is to create zones for different tasks—computer work on one side, writing or sketching on the other—while keeping the room feeling open. You can find a curated collection of visual inspiration in the Picture Gallery at the end of this post to help you visualize these layouts.
In this guide, I will walk you through the professional approach to setting up an L-shaped desk. We will cover ergonomic layouts, lighting plans that cover both wings of the desk, and the specific measurements you need to know to make the space function perfectly.
Strategic Placement and Room Flow
The most common mistake I see is instinctively shoving an L-shaped desk into a corner. While this saves space, it is not always the best choice for productivity or aesthetics.
The Command Position
In design, we often refer to the “command position.” This means positioning the desk so you face the door or the center of the room, rather than staring at a wall. With an L-shaped desk, you can “float” one wing into the room while keeping the other wing against a wall or window.
This setup separates the workspace from the rest of the room, effectively creating a dedicated office zone within a larger living area or bedroom. It allows you to see who is entering the space, which subconsciously reduces stress.
Clearance Rules of Thumb
If you choose to float the desk, you must respect traffic lanes. You need a minimum of 36 inches of clearance between the edge of the desk and any other furniture or wall to walk comfortably. If it is a main thoroughfare, aim for 42 to 48 inches.
For the chair area inside the “L,” ensure you have at least 42 inches of depth. You need enough room to roll back, swivel, and stand up without banging your knees on the desk return or hitting a bookshelf behind you.
Window Considerations
Placing one wing of the L-desk under a window is a fantastic way to introduce natural light. However, be mindful of the compass direction.
- North-facing windows: Provide consistent, soft light. Great for screen placement.
- South or West-facing windows: Can cause intense glare in the afternoon. If you face the window, you will be squinting. If the window is behind you, it will create glare on your monitor.
The best approach for bright windows is to have the window to your side (perpendicular to the monitor). This gives you a view and light without the contrast issues.
Zoning Your Workflow and Ergonomics
The primary benefit of an L-shaped desk is the ability to create distinct work zones. You should not treat the entire surface as one catch-all pile.
The Primary Zone
Identify your dominant activity. For most, this is computer work. Place your monitor and keyboard on the wing that allows you the best view of the room or the window.
Your monitor should be roughly an arm’s length away (20 to 30 inches). The top of the screen should be at or slightly below eye level.
The Secondary Zone (The Return)
The other wing of the desk, often called the “return,” is for analog tasks. This is where you place your notebook, review physical documents, or sketch.
By physically swiveling your chair to switch tasks, you create a mental break. It helps separate “screen time” from “thinking time.” This separation is difficult to achieve on a standard straight desk.
Monitor Arms vs. Stands
On an L-shaped desk, especially in the corner where the two wings meet, space can get awkward. Standard monitor stands eat up valuable depth.
I always recommend articulating monitor arms for L-desks. They clamp to the back edge, floating the screens. This allows you to utilize the deep corner for items like a desk lamp, a plant, or a speaker, rather than losing it to a plastic stand base.
Lighting Layers for Dual Surfaces
Lighting an L-shaped desk is trickier than a standard desk because you have two distinct focal points. A single table lamp in the corner is rarely sufficient.
Task Lighting Strategy
You generally need a light source that can pivot or reach both zones. An architectural swing-arm lamp clamped to the corner is often the best solution. It allows you to pull the light over your paperwork when writing, and push it back for ambient light during video calls.
Ambient and Bias Lighting
To reduce eye strain, avoid working in a dark room with a bright screen. You want balanced illumination.
- LED Strip Lights: Run a high-quality LED strip along the back edge of the desk. This creates a soft glow against the wall (bias lighting) that reduces the contrast between your screen and the room.
- Kelvin Temperature: Stick to 3000K to 4000K for office task lighting. Anything lower (2700K) is too yellow and sleepy; anything higher (5000K+) can feel like a hospital.
The Video Call Check
If your desk faces a wall, overhead lighting can cast shadows on your face, making you look tired on Zoom. Place a small, diffused light source behind your monitor or use a ring light bounced off the wall to fill in those shadows.
Taming the Cable Beast
L-shaped desks, particularly those that float in a room, expose cabling more than any other setup. Nothing ruins a high-end look faster than a nest of black wires hanging beneath the desk.
The “Invisible Wire” Protocol
Do not rely on the floor for your power strip. Mount a surge protector directly to the underside of the desktop using strong double-sided mounting tape or screws.
Route all cables from your devices immediately to the underside of the desk. Use J-channel raceways adhered to the back or underside of the desktop to carry wires horizontally.
The Leg Route
To get the power cord from the underside of the desk to the wall outlet, run it down the inside of one desk leg. Use velcro ties or a dedicated cable sleeve that matches the leg color. If the desk has a panel leg, hide the cord behind it.
Grommets and Pass-throughs
If you are ordering a custom desk or buying a modular system, ensure there are grommet holes in the corner and at the ends of both wings. If you are handy, drilling a 2-inch hole in the desktop for a grommet can save you from draping wires over the edge.
Material Selection and Rug Sizing
The materials you choose dictate the longevity and feel of the workspace. Since L-shaped desks have a large surface area, the finish dominates the room’s aesthetic.
Wood vs. Laminate
Solid wood is beautiful but requires care. It can dent if you write directly on it with a ballpoint pen. If you choose solid walnut or oak, invest in a high-quality leather desk pad.
High-pressure laminate (HPL) is often a better choice for heavy daily use. It resists scratches, heat from laptops, and coffee rings. Matte finishes are preferable to glossy ones, as they hide fingerprints and reduce overhead light glare.
Rug Sizing Logic
Ideally, your chair should stay on the rug even when you slide back or swivel from one wing to the other.
For an L-shaped desk, a standard 5×8 rug is usually too small. You will likely roll off the edge, which is annoying and damages the rug binding.
Look for a 6×9 or 8×10 rug. Place the rug so the desk legs sit partially or fully on it. Alternatively, position the rug diagonally to follow the flow of the L-shape, though this is a more advanced styling move.
Chair Mat Considerations
If you have carpet and don’t want an area rug, get a glass chair mat or a rigid polycarbonate mat. Avoid the cheap plastic mats with spikes; they crack eventually and ruin the carpet underneath. Look for a mat specifically shaped for L-desks, which has a “lip” that fits into the knee space.
Designer’s Note: The “Return” Confusion
Here is a lesson I learned the hard way early in my career: “Left Return” and “Right Return” are not universal terms.
Some manufacturers define a “Right Return” as the return wing being on your right side when you sit at the desk. Others define it as the return being on the right side when you look at the desk from the front.
The Fix:
Never assume. Always look at the technical diagram or floor plan provided by the manufacturer. Before ordering, tape out the footprint on your floor using painter’s tape. This confirms exactly which side the short wing needs to be on to fit your room’s constraints.
Common Mistakes + Fixes
Mistake: Blocking Air Vents and Radiators
L-shaped desks cover a lot of wall space. It is easy to accidentally place the desk over a heating vent or radiator.
Fix: If you must place it there, use a magnetic air deflector to push the air out into the room. Constant heat rising directly onto your equipment can shorten the lifespan of computers and dry out solid wood desktops.
Mistake: The “Dead Corner”
The square corner where the two wings meet is often too deep to reach comfortably while sitting. It becomes a graveyard for old coffee cups and dust.
Fix: Purposefully style this dead zone. Place a large statement lamp, a trailing plant (like a Pothos), or a printer there. Do not try to use it for active work items.
Mistake: Ignoring Leg Obstructions
Many L-desks come with storage drawers or file cabinets built into the return.
Fix: Check the “knee space width.” If the file cabinet is too close to the corner, you won’t be able to swivel freely. You need at least 24 to 30 inches of clear width for your legs to swivel without banging into drawers.
Final Checklist: What I’d Do in a Real Project
If I were designing a home office for a client today using an L-shaped layout, this is the checklist I would run through:
- Measure the Reach: Ensure the client can reach the windows to open them without climbing over the desk.
- Power Audit: Count the number of plugs needed. Buy a surge protector with two more outlets than the current count.
- Monitor Arm Check: Verify the desk lip is deep enough (usually 2+ inches) to clamp a monitor arm. Some desks have metal aprons that prevent this.
- Lighting Geometry: Ensure the task light is placed on the side opposite the dominant hand to prevent writing shadows (left side for right-handed people).
- Chair Height: Ensure the chair armrests fit under the desk. L-desks often have keyboard trays that lower the clearance.
- Cable Management: Purchase 50 velcro cable ties and a cable management spine for the desk leg before the furniture arrives.
FAQs
Can two people share an L-shaped desk?
Yes, but it depends on the size. A “partner desk” configuration usually requires a T-shape or a very large custom L-shape. If you use a standard L-desk, one person will likely be trapped in the corner. It is usually better to have two separate straight desks or one very long straight desk for two people.
How do I style an L-shaped desk in a bedroom?
In a bedroom, the desk should not dominate the space. Choose a design with open legs (parson style) rather than heavy file cabinets to keep it looking airy. Face the desk away from the bed if possible, so you don’t stare at your work while trying to sleep.
Is a curved corner better than a 90-degree corner?
A curved inside corner allows you to sit directly in the “vertex” and access both wings equally. However, it takes up more floor space behind you. A sharp 90-degree connection usually forces you to pick one side as your primary station, but it is more space-efficient in small rooms.
What is the ideal height for an L-shaped desk?
Standard desk height is 29 to 30 inches. However, for typing ergonomics, this is often too high for many people. Using a height-adjustable chair and a footrest is crucial. If you are buying a standing L-desk, ensure the motors are synchronized so both wings lift evenly.
Conclusion
The L-shaped desk is the workhorse of the modern home office. It offers the unique ability to compartmentalize your professional life, separating deep focus tasks from administrative duties simply by swiveling your chair.
By paying attention to the “command position,” managing the inevitable cable clutter, and layering your lighting, you can transform a simple piece of furniture into a high-performance cockpit. Remember to measure your return carefully, respect the traffic flow around the floating wing, and keep the corner styled but clear of clutter.
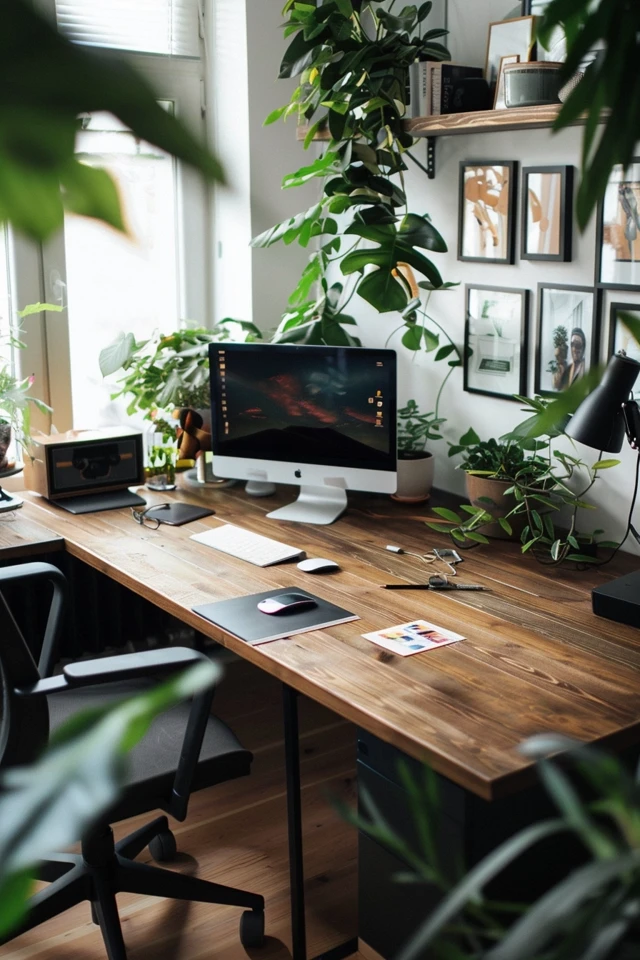
Picture Gallery


