
Las Vegas Small Backyard Landscaping Gems Unveiled
Designing a backyard in Las Vegas presents a unique set of challenges that most other climates simply do not have to contend with. You are dealing with intense UV exposure, extreme heat fluctuations, and often, very tight property lines typical of newer tract housing developments. The goal is to create an oasis that feels expansive despite the square footage, while ensuring every material can survive the desert environment.
I have walked into countless backyards in Summerlin and Henderson where the homeowners attempted a DIY renovation, only to find their plants scorched and their pavers too hot to walk on by June. The secret lies in balancing hardscaping with strategic softening elements. If you are just looking for inspiration, you can skip our guide and go straight to the Picture Gallery at the end of the blog post.
However, if you are ready to tackle a renovation, this guide breaks down the specific layouts, materials, and spacing rules required for a successful small yard in the Mojave Desert. We will look at how to trick the eye into seeing more space and how to select materials that won’t burn your feet (or your budget).
1. The Foundation: Hardscaping and Heat Management
In a small Las Vegas backyard, the hardscape usually covers about 60% to 70% of the footprint. Because water conservation is critical and grass is high-maintenance, you need a solid surface that functions as your floor. The biggest mistake I see is choosing dark concrete or slate.
Dark materials absorb heat and can radiate temperatures upwards of 140 degrees in the summer. This creates a “heat island” effect right outside your back door, increasing your air conditioning costs and making the space unusable until midnight. You must prioritize “cool deck” technology or natural stones with high thermal emittance.
My top recommendation for small Vegas lots is light-colored Travertine pavers. They stay significantly cooler than concrete pavers because they are porous and reflect sunlight. If you are on a tighter budget, look for sand-finished concrete in “French Gray” or “Cool White” rather than stamped concrete, which can be slippery and hot.
Designer’s Note: The Drainage Reality
One thing that often goes wrong in small walled-in backyards is drainage. When you replace dirt with stone, water has nowhere to go during our intense monsoon seasons.
The Fix: Always install a channel drain (deco drain) between the patio and the house.
The Slope: Ensure your hardscape slopes away from the foundation at a rate of 1/4 inch per foot.
Common Mistakes + Fixes
Mistake: Pouring concrete all the way to the block wall.
Fix: Leave a 12-to-18-inch planting strip along the perimeter. This softens the “concrete jungle” look and allows for vines to grow up the walls, which cools the ambient temperature.
2. Zoning: Creating Destinations in Limited Square Footage
When you have a small yard, your instinct might be to push everything to the edges to create a big open space in the middle. This actually makes the yard look smaller and less inviting. It highlights the boundaries of the property.
Instead, I prefer to zone the yard into distinct “rooms.” Even in a 400-square-foot backyard, you can usually fit a dining area, a lounging zone, and a cooking station. The trick is using rugs and slight elevation changes to define these areas without erecting walls that block sightlines.
For a dining zone, you need to calculate the table size plus chair clearance. A standard round table requires a footprint of about 9 feet by 9 feet to allow guests to slide chairs out comfortably. If you cram this into a corner, it feels claustrophobic.
What I’d Do in a Real Project
If I am designing a layout for a standard 25×40 foot backyard, here is my go-to approach:
1. Immediate Exit: A covered patio for dining (closest to the kitchen).
2. Transition: A walkway of stepping stones surrounded by river rock.
3. Destination: A focal point in the back corner, such as a fire pit or a “spool” (small pool).
4. Visual Anchor: A vertical feature on the back wall, like a water feature or trellis, to draw the eye outward.
Understanding Scale and Furniture
In small spaces, bulky, rolled-arm wicker furniture eats up too much visual space. Opt for furniture with open frames and exposed legs. Being able to see the ground beneath the sofa tricks the brain into thinking the area is larger.
Pro-Level Spacing Rules
Walkways: Main traffic paths need to be at least 36 inches wide. Ideally, 48 inches if two people need to walk side-by-side.
Fire Pits: You need 24 to 30 inches of legroom between the edge of the fire pit and the front of the seat.
BBQ Islands: Allow 48 inches of clearance in front of the grill so the cook isn’t backing into guests.
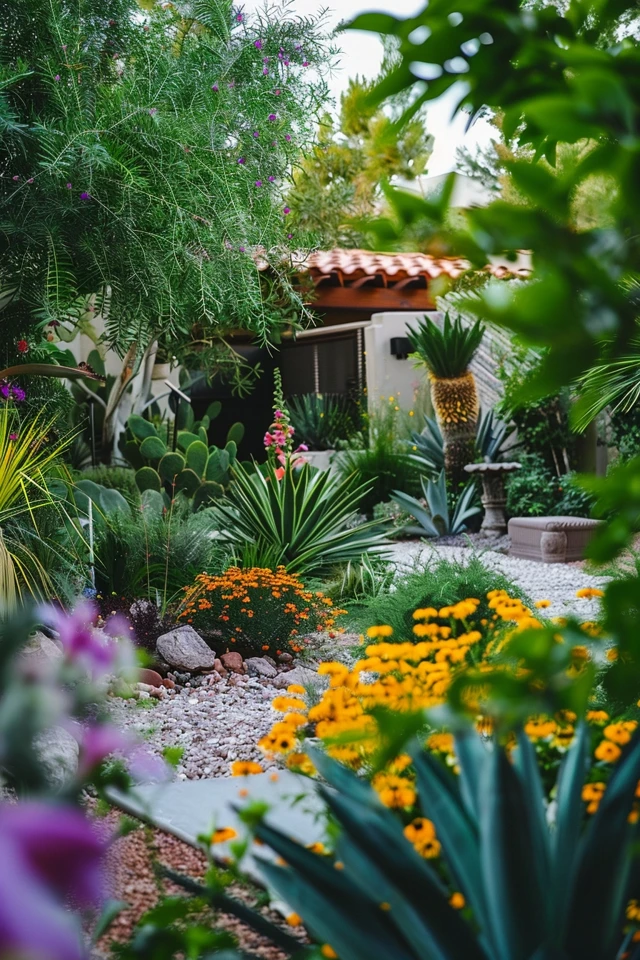
3. The Greenery: Verticality and Durability
Landscaping in Las Vegas is not about recreating an English garden; it is about architectural planting. Since we lack horizontal space in small yards, we must garden upwards. This provides privacy from neighbors who might be looking down from a second story.
Columnar trees are your best friends here. They grow tall and narrow, providing a green screen without encroaching on your usable patio space. The Japanese Blueberry is popular, but it struggles in full reflected heat.
Instead, consider the “Skyline” Honey Locust or the Spartan Juniper for tight corners. If you want that palm springs vibe, Pygmy Date Palms are excellent for small spaces because they stay relatively compact compared to massive Date Palms, though they do have thorns—keep them away from walkways.
Designer’s Note: The “Ficus” Dilemma
Everyone wants the Ficus Nitida columns for instant privacy walls. They look great and are evergreen. However, their root systems are incredibly invasive.
Alternative: For a safer privacy hedge, look at Hopseed Bush or Xylosma.
Strategic Layering for Depth
To make a wall disappear, use a three-tier planting strategy:
1. Back Layer: Tall trellis with vines (Star Jasmine for scent, Cat’s Claw for rapid coverage).
2. Middle Layer: Shrubs maintained at 3–4 feet (Little Ollie, Texas Sage).
3. Front Layer: Ground cover or succulents (Blue Elf Aloe, Lantana).
This layering creates depth, making the wall seem further away than it actually is.
4. Shade Structures: The Key to Usability
In Las Vegas, a backyard without shade is unusable for four months out of the year. In a small yard, you might not have room for a massive detached pergola. You need shade solutions that are sleek and integrated.
Alumawood patio covers are the standard here because they don’t rot or require painting like wood. However, solid covers can make the interior of your home dark. I often recommend a mix: a solid cover over the immediate door area, transitioning to a lattice or louvered system further out.
Cantilever umbrellas are also a fantastic “gem” for small yards. Because the pole is offset to the side, you don’t lose the center of your table or lounge area. Look for umbrellas with a heavy, flat base that can slide under furniture to save space.
The Retractable Awning Solution
For very tight spaces where posts would get in the way, a motorized retractable awning is the best investment. It provides shade when you need it but retracts completely at night to allow a view of the stars.
Orientation Matters
North Facing: Gets shade most of the day. You can get away with lattice covers.
West Facing: Gets the brutal afternoon sun. You need solid shade and potentially drop-down solar shades (outdoor roller blinds) to make the patio habitable at 5:00 PM.
5. Lighting and Ambiance: The Night Shift
Las Vegas homeowners use their yards primarily in the evenings. Once the sun goes down, the heat becomes manageable. Therefore, your lighting plan is just as important as your planting plan.
Avoid the “airport runway” look where you just place solar path lights in a straight line. It looks cheap and shrinks the yard visually. Instead, focus on uplighting vertical elements.
By placing a well light at the base of your trees or against the textured block walls, you reflect light off surfaces. This ambient glow makes the boundaries of the yard feel softer and more distant.
Lighting Temperature is Critical
Never mix color temperatures. For residential landscapes, stick to 2700K or 3000K (Warm White).
4000K-5000K (Daylight/Cool White): This looks like a commercial parking lot or a hospital. It is too harsh for relaxation.
2700K: Resembles incandescent candlelight. It is flattering to skin tones and creates a resort atmosphere.
Bistro Lights Done Right
String lights are a staple for small yards, but installation matters.
Height: They must be at least 8 feet off the ground at their lowest swag point. If they are too low, they feel oppressive.
Pattern: Do not just run them around the perimeter fence. Zig-zag them across the space to create a “ceiling” that defines the outdoor room.
Support: Use proper tension wire (aircraft cable) to support the lights so they don’t sag over time.
Final Checklist: From Concept to Reality
If you are ready to start your project, follow this logical order of operations to avoid costly rework.
1. Measure and Map:
Mark the location of gas lines, water lines, and hose bibs.
Note the sun path (where is the sun at 4 PM?).
2. Demolition and Prep:
Remove unwanted concrete or dead plant material.
Grade the soil away from the house.
Run utility sleeves under where your new patio will go (for future lighting or irrigation).
3. Hardscape Installation:
Install pavers or pour concrete first. This is the messy part.
Install footings for pergolas or shade structures.
4. Irrigation and Lighting Rough-in:
Run drip lines to planting areas.
Run low-voltage wire for lighting.
5. Planting:
Dig holes (twice the width of the root ball).
Amend the soil. Vegas soil is alkaline and clay-heavy; add gypsum and compost.
6. Top Dressing and Finish:
Install rock mulch (minimum 2 inches deep) to keep roots cool.
* Install light fixtures and test at night.
FAQs
Q: Is artificial grass a good idea for a small Vegas backyard?
A: It is excellent for aesthetics and water saving, but be aware of the heat. Artificial turf can get hotter than asphalt in direct sun. I recommend high-quality turf with “cool blade” technology and lighter colored infill. Even then, it will be too hot for dogs’ paws at midday. You must spray it down before use in summer.
Q: Can I fit a pool in a small yard?
A: Yes, but consider a “Spool” (Spa/Pool hybrid). These are typically 10×15 feet. They can be heated quickly like a spa but are large enough to lounge in like a pool. They leave room for a patio, whereas a full-sized pool might consume the entire yard.
Q: How do I hide my pool equipment or AC unit?
A: Do not box it in too tightly; these units need airflow to function. I recommend an L-shaped slat wall made of aluminum or composite wood. Leave at least 24 inches of clearance around the units for service access.
Q: How much does a small backyard remodel cost in Las Vegas?
A: Costs vary wildly, but for a high-quality renovation including demo, pavers, irrigation, plants, and lighting, expect to pay between $15 and $25 per square foot. Adding a spool or Alumawood cover will increase this significantly.
Conclusion
Transforming a small Las Vegas backyard is about fighting the elements while maximizing the square footage. It requires a shift in mindset from “filling space” to “curating views.” By selecting materials that stay cool, utilizing vertical gardening to blur boundaries, and zoning your layout for specific activities, you can turn a dusty tract lot into a private sanctuary.
Remember that landscaping is a living thing. It evolves. Start with a strong hardscape foundation, as that is difficult to change later. You can always add more plants or upgrade your furniture, but moving a patio is a major undertaking. Take your time planning the shade and drainage, and your backyard will pay you back in relaxation for years to come.
Picture Gallery


