
Making Tile Floor Shine: Restoration Techniques
There is a specific moment during a renovation consultation when a client looks at their floors and sighs. They assume the dull, lackluster tile in their hallway or kitchen needs to be ripped out entirely, costing them thousands of dollars and weeks of dust. Often, the tile itself—whether it is natural stone, porcelain, or ceramic—is structurally sound, but the finish has been buried under years of micro-scratches and improper cleaning residue.
Restoring that “showroom shine” is rarely about buying a new magic bottle of cleaner from the grocery store. It requires a systematic approach to stripping away old layers, mechanically smoothing the surface, and chemically sealing it to handle light reflection properly. I have saved countless vintage floors that just needed a professional intervention rather than a demolition crew.
If you are looking for visual inspiration on how restored floors can transform a room, be sure to scroll to the Picture Gallery at the end of the blog post. Before we get to the pretty pictures, we need to get our hands dirty and understand the chemistry and mechanics of your specific flooring material.
1. Identifying Your Material and Damage Level
You cannot treat all tile the same way. The restoration process for a natural stone like marble is radically different from glazed ceramic. If you use an acidic restorer on marble, you will etch the surface and destroy it instantly.
The Water Drop Test
To understand what you are working with, pour a tablespoon of water on the tile and let it sit for 5 minutes.
- If the water darkens the tile and soaks in: You have porous natural stone (travertine, slate, unsealed marble) or unglazed quarry tile.
- If the water beads up or sits on top without changing the color: You likely have glazed ceramic, porcelain, or a stone that has been previously sealed with a topical coating.
Analyzing the “Dullness”
Is the tile actually dull, or is it just dirty? Get down on your hands and knees with a flashlight. Shine the light parallel to the floor surface.
- Haze: If the light looks blurry, you likely have “grout haze” or soap scum buildup. This requires chemical stripping.
- Scratches: If you see thousands of tiny cobweb-like scratches, the finish has been physically worn down. This requires mechanical polishing.
Designer’s Note: The “Patina” vs. “Damage” Debate
In my design projects, I often have to convince clients that some wear is beautiful. On terracotta or slate, a high-gloss, mirror-like finish often looks cheap and plastic. A soft, satin sheen usually looks more expensive and authentic than a high-gloss finish.
2. The Strip and Prep: Removing Chemical Buildup
Before we can make anything shine, we have to remove what is currently on the floor. 90% of the time, the reason a floor looks dull is because of “cleaner buildup.” If you have been using oil soaps or “shine-enhancing” mops for years, you have essentially painted your floor with layers of wax that trap dirt.
The Stripping Solution
You need a heavy-duty alkaline cleaner or a specialized wax stripper. Do not use vinegar here; it is too weak for wax and too acidic for stone.
- Dilute your heavy-duty tile stripper according to the heavy-soil instructions on the bottle.
- Apply the solution liberally to a 4×4 foot section. Do not try to do the whole room at once.
- Crucial Step: Let it dwell. The chemical needs 10 to 15 minutes to break the molecular bond of the wax. Do not let it dry out; add more liquid if needed.
Agitation Mechanics
Once the chemical has dwelled, you must scrub.
- For Ceramic/Porcelain: You can use a stiff nylon bristle brush or a green scrubbing pad.
- For Natural Stone: Use a soft white scrubbing pad or a natural fiber brush to avoid scratching the stone further.
The Extraction
This is where most homeowners fail. You cannot just mop up the dirty stripper water, or you will simply redistribute the wax. You must use a wet/dry vacuum to suck the dirty liquid off the floor. Rinse with clean water and vacuum it up again. Repeat until the rinse water is perfectly clear.
3. Mechanical Polishing for Natural Stone
If you have marble, travertine, or limestone, chemical cleaning alone won’t restore a true deep shine. You need to physically smooth the stone, similar to how you sand wood. This removes the microscopic peaks and valleys that scatter light, creating a flat surface that reflects light evenly.
The Diamond Pad Progression
Professionals use floor buffers with diamond-encrusted pads. You can rent a floor maintainer (buffer) from a local hardware store. The logic follows sandpaper grits: lower numbers are coarser, higher numbers are finer.
Step-by-Step Polishing:
- Honing (400–800 Grit): This step removes deep scratches and etching. It leaves the floor with a matte, smooth finish. Use plenty of water to keep the pads cool and minimize dust.
- Polishing (1500–3000 Grit): This is where the magic happens. As you move to higher grits, the stone begins to close up and reflect light. A 3000-grit pad usually yields a high-gloss finish.
- Buffing Powder: For the ultimate “wet look,” professionals use a polishing powder (often containing mild acids that react with the calcium in the stone) alongside a hog-hair pad. This crystallizes the surface for maximum shine.
Common Mistakes + Fixes
- Mistake: Skipping grits. If you jump from 400 to 3000, you will leave visible scratch marks that ruin the reflection.
- Fix: Be patient. Do not rush the intermediary steps. Each grit removes the scratches from the previous grit.
4. Restoring Glazed Tile and Grout Lines
You cannot mechanically polish glazed ceramic or porcelain tile. The glaze is a thin layer of glass; if you sand it, you destroy the tile. “Shining” these tiles is actually about deep cleaning the grout and clarifying the glaze.
Grout Restoration
Nothing makes a floor look duller than dark, greasy grout lines. They absorb light and create a grid of dinginess.
- Use an oxygenated bleach cleaner or a dedicated grout cleaner.
- Use a thin grout brush to agitate the lines.
- If the grout is permanently stained, consider a “Grout Pen” or colorant. This is a thin epoxy paint that recolors the grout and seals it simultaneously. It makes old floors look brand new instantly.
Clarifying the Glaze
Once the wax is stripped (see Section 2), glazed tile should be shiny on its own. If it is still dull, the glaze is likely worn through. In this case, you have two options:
- Topical Sealer (High Gloss Finish): This is a liquid coating that sits on top of the tile. It mimics the look of a new glaze. However, be warned: these finishes require high maintenance and will eventually peel if not reapplied correctly.
- High-Sheen Impregnator: Some penetrating sealers are designed to enhance color and leave a slight sheen without creating a surface film. This is the safer route for longevity.
5. Sealing and Protecting the Shine
Once you have stripped, cleaned, and polished, you must lock in that look. Stone is porous and will soak up red wine or coffee in seconds if left unsealed.
Choosing the Right Sealer
- Penetrating (Impregnating) Sealer: Goes into the pores. It protects against stains but does not change the look or texture of the tile. This is best for a natural look.
- Enhancing Sealer: Soaks in but also darkens the stone slightly, bringing out the veins in marble or the rich reds in slate. It gives a “wet look” without being a surface coating.
- Topical Sealer (Wax/Acrylic): Sits on the surface. Creates a sacrificial layer. I usually avoid these in residential homes because they show scuff marks easily, but they are useful for restoring very worn, porous clay tiles like Saltillo.
Application Rules of Thumb
- Apply with a microfiber applicator or a lamb’s wool pad.
- Work in small sections (approx. 50 square feet).
- The Wipe Off: Most penetrating sealers must be wiped dry after 5-10 minutes. If you let them dry on the surface, they leave a sticky, hazy mess that is a nightmare to remove.
Real Project Constraints: Drying Time
When I schedule this for clients, I demand a 24-hour “no foot traffic” window. Even if the bottle says dry in 4 hours, the curing process takes longer. If you walk on it too soon, you risk imprinting dirt into the curing sealer.
6. Final Checklist: What I’d Do in a Real Project
If I were walking into your home today to restore your floors, this is the exact mental checklist I would follow to ensure success and safety.
The Assessment Phase
- Check for loose tiles. A floor buffer can rip a loose tile right out of the mortar. Secure these first.
- Tape off baseboards. Stripping chemicals and splashes can peel the paint off your trim. Use blue painter’s tape and plastic masking.
- Plan the exit route. Don’t paint yourself into a corner. Start furthest from the door.
The Execution Phase
- Ventilation is non-negotiable. Open windows. Some strippers and sealers have high VOCs.
- Change rinse water constantly. If the water in your bucket is gray, you are cleaning with dirt.
- Check lighting angles. Clean with the lights off and natural light on to see streaks, then switch to overhead lights to check for polish consistency.
Maintenance Handover
- Buy felt pads for all furniture immediately. A dining chair dragging on a freshly polished marble floor will leave a scratch the very first day.
- Switch to a pH-neutral cleaner. Throw away the bleach and the vinegar.
- Implement a “shoes off” policy, or at least place walk-off mats at every exterior door to catch grit.
FAQs
Q: Can I use a steam mop to maintain the shine?
A: I generally advise against steam mops for two reasons. First, on natural stone, the intense heat can actually drive dirt deeper into the pores if the sealer is worn. Second, steam can eventually weaken the grout integrity over time. A damp microfiber mop is much safer and more effective for shine retention.
Q: How do I remove a single deep scratch without polishing the whole floor?
A: For natural stone, you can buy a hand-polishing diamond pad kit. It requires some elbow grease, but you can locally hone and polish just the scratched tile. However, blending the finish with the surrounding tiles takes practice.
Q: How long will the restoration last?
A: In a high-traffic kitchen, a high-gloss polish on marble might dull down in 1 to 2 years. In a guest bathroom, it could last 5 to 7 years. Sealer typically needs to be reapplied every 1 to 3 years depending on the product quality.
Q: Why does my floor look streaky after mopping?
A: You are likely using too much soap. “More is better” is a fallacy in cleaning. Excess soap leaves a residue that dries into streaks. Try rinsing your floor with just hot water; if you see suds, there is already soap on the floor that needs to be rinsed off.
Conclusion
Restoring a tile floor is one of the highest-ROI projects you can undertake in your home. It changes the way light travels through the room, making the space feel larger, cleaner, and more expensive. While the process involves some physical labor and specific chemistry, it is entirely achievable for a patient homeowner.
Remember that shine is not just a product you apply; it is the result of a perfectly smooth, clean surface. Respect the material, skip the shortcuts, and protect your hard work with proper sealing. Your floors have likely been hiding a beautiful potential under years of life and traffic—it is time to bring it back to the surface.
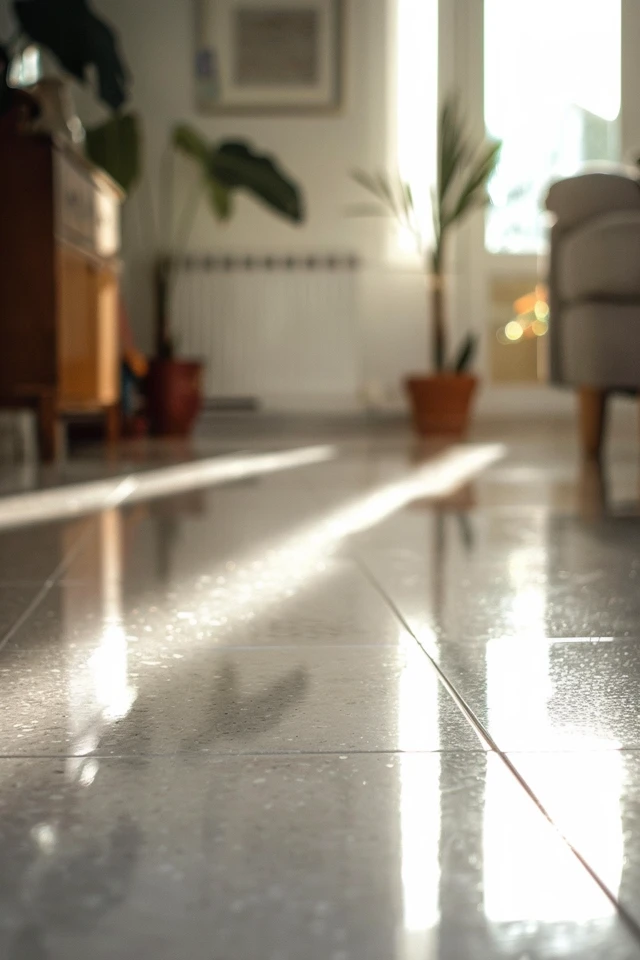
Picture Gallery


